- Lesson Details
- Transcript
- References
- Instructor
- Rey Bustos
- Subjects
- Art Theory
- Topics
- Anatomy
- Mediums
- Chalk
- Duration
- 1h 53m 31s
- Series
- Rey's Anatomy
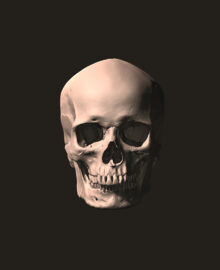
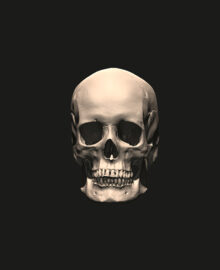
In this series, artistic anatomist Rey Bustos brings you a fun, unique introduction to anatomy of the human body. In this final lesson of the series, Rey shows you anatomy of the head and neck, and goes over some features of the face. Rey will begin by lecturing on the blackboard, breaking down each bone and muscle of the region.
Materials
- Blackboard
- Blackboard Chalk
- Digital Tablet
15953 views
69 likes
Discuss this video in the forums!
DiscussChoose one video.
AUTO SCROLL
This is Rey Bustos, and what we’re going to be doing in this session is the neck and
the head. You’re going to be surprised. I really edit this down quite a bit, but it’s
going to give you really good ideas as to what to do with this whole region up here.
A lot of times we have head drawing classes, but we don’t talk enough about the neck.
So, I put those two together because I think it’s essential that you put the head with
the neck together.
As usual, I’m going to hit the blackboard and really try to make this stuff easy for
you to understand. We’re going to show you some really nice pictures. I’m going to
be drawing over them so you get a really clear view as to what we’re talking about, but
using real people.
Okay, so now let’s just get into the head and neck muscles.
AUTO SCROLL
Okay, we’re going to be talking about the head—face, basically, and a little bit of
the neck. One of the things you’re going to notice is I’m not going to be talking
a lot about muscles. The reason is that with the rest of the body the muscles push up against
the skin. It makes all the difference in the world as to how you depict people, whether
it’s sculpting or sculpting on a computer, or drawing or painting. When it comes to the
face, you really have to know the skeletal system, the skull, the cranium. A few muscles,
fat, and that’s what makes up our beautiful faces.
The major things that we’re going to be talking about is the major structure of the
head, and that’s the skull and certain, of course, really important muscles like the
masseter, the chewing muscles that you’ll see right here. Temporalis muscle, the one
on your temple that fits right into the temporal fossa of your skull. Your skull itself has
a temporal ridge that separates my forehead from my temple. Zygomatic arch. Certain things
are going to be really important.
What’s interesting about the face and the head, especially the human head as opposed
to your lizard or something like that, is that we have the most sophisticated of all
the facial muscles of all the animals on this planet simply because we are very high on
the evolutionary scale, and we communicate a lot with our faces. They’re mainly there
to kind of activate the face, the skin over the face. That activation kind of creates
certain things where it’s somebody that you love come into a room, and you’ll say,
oh what’s wrong? Instantly we have a communication there. The communication skills that we have
are very subliminal many times. You can tell. All this stuff, I think, is really a lot of fun.
With that being said, I’m going to teach you something I think is fabulous. I’m going
to teach you how to draw good heads even just from your head, or pardon the pun, just right
out of your brain. Or, if you’re like sitting and having a cup of coffee like I like to
do out in a café, and I like to draw people. Now, there is a certain something that I’m
going to say that’s just going to make it so much easier for you. When you’re drawing
either like in a figure drawing class or you’re drawing people in life, don’t get too hung
up over the likeness because that keeps you from actually having fun. I did a lot of portraits
for a while, and I just never really enjoyed it because it really liked just drawing heads.
When I’m drawing a model I like to draw the person and their heads and this and that,
but not necessarily that person. You’ll find that in classic figure drawing from way
in the back, way back when, you’ll notice that it’s like nobody really cares that
these figures by Peter Paul Rubens look like a particular person. It doesn't matter.
But, you do see that they’re just really, really good drawings.
So, that being said, I’m going to start with the very first thing I’m going to teach
you, and that is a sphere. I could take a sphere, twirl it on my finger, and it’s
the same no matter what. That is going to be one of the most liberating things that
I can teach you right now. It’s kind of like the Mickey Mouse way of drawing. Early
on in animation it was just easier to make a figure out little spheres, little circles
because they’re easier to animate. That’s way Mickey Mouse is little circles. Even he
turns this way, his ears basically stay spherical or round.
So, the first thing I’m going to do is I’m going to do that. I’m going to draw a circle
like this or a sphere. It doesn’t matter. I’m doing it, you know, a little haphazardly.
It doesn’t matter because it’s just like a sketch. Now I’m going to take like a little
orbit line like this. It just kind of leave the orbit right there of the Earth and just
kind of goes into space like that. Now, this is an implied line. This is like basically
where I’m going to put the chin. This is a side view, by the way. It’s kind of like
me looking that way. Now, how far is it from here to there? Well, that can vary. It’s
also one of those things that once you start rotating that you can’t really use the system
of like where everything is at and how it relates, but what I’m going to do is I’m
going to just tell you that this is the height of the head. This is roughly around between
the bottom of the nose and the lip, generally speaking when I do these drawings.
I’m going to split this sphere in half like this, and this sphere in half like this. Now,
this one you might think is the eye line, but it’s not. It’s actually the brow.
Okay, so I’m going to brow line right there, and that’s halfway. It’s like the equator.
Right? So, that’s the equator. Now we’re getting somewhere. Because between the brow
and the chin you have a halfway point, and now you can see what I mean. This is going
to be the bottom of the nose. Bottom of nose.
So far, so good, eh? Now we’re going to have thirds.
The first third is the opening of the mouth. Now, I can find from here to
here the halfway point, and that’s going to be the bottom of the eye or the lower lid.
Instead of saying eye, I’m going to be very specific so you know exactly what I’m talking
about. Sometimes I’ve been asked is like where the pupil is or whatever. For me, I
use it as the bottom of the lid, so the lower lid.
As this happens to be male—I’m going to make it male—right in here at the brow it’s
more bumpy than it would be on a female. So, I’m going to put the brow ridge like this.
Then you have the nose kind of like this. Over here we also have the opening, the nasal
opening of the cranium and then the barrel of the mouth kind of like this, and then the chin.
So now we’re starting to put it all together. When you look at the outline you
can see what I’m trying to give to you, something like that. Got it?
Now, let’s finish this up and put a harder line for you on the chin. It’d be kind of
like this. If this is the lower lid then this is basically where the upper lid would be
like this. There is an angle to the lid like this and then the cheek, and then the eyeball
is inside there. This is the brow, so this is the eyebrow. There is the body part of
the eyebrow and the tail part of the eyebrow like so. So far, so good. Now, what I’m
going to do is see where the bottom of the nose is. I’m going to go back, back, back,
and that’s also the base of the skull there. I’m also going to put a jaw line like that.
The ear is basically from—now, this is going to vary quite a bit. There is the bottom of
the nose, and this is where I’m going to put the ear, all the way down to the earlobe
like this. Now, the ear itself is very interesting. It’s got a bulbous mass here, the tubercle.
See this? It almost looks like those Nat Geo shows where the show a snake eating a rodent.
It kind of gets a bulbous mass like this. This one just ends and kind of dissipates
into the earlobe. Then there is another little arm here that does this like this, like this,
and then it bounces here, creates a notch here, and over here creates a nice little
thing that you can use to push into your ear hole. It’s called the tragus. And voila!
Over here you have what appears to be a branching off these two little forms, and that’s the
basic design of your ear. So, over here you have the tubercle, the little mass like this.
Sometimes people have it higher, sometimes lower, but we all have, just about everybody
I’ve seen has a little mass right in here. You never want to draw an ear where the outside
line here, the helix is too uniform. It just doesn’t look natural. It starts looking
like you’re making a doll more than anything else. Sometimes you see little wrinkles right
in this area. So, that’s it.
Now, the other thing I’m going to put on the cranium is the temporal ridge. Conveniently,
it roughly follows this line, where the eyebrow turns from body to tail. Then there is a little
bulbous mass here, fatty tissue and lacrimal glands that kind of creates a puffiness there.
It’s highly variable. Faces are, as you know, very, very variable. The upper lid overlaps
the lower lid like so. It’s open and it’s thick. The eyelid is thick. If I were to put
a little shine on here you could see the eyeball is shiny. It’s actually a sphere, so from
this point of view you would actually see a little bulbous mass right in here, the cornea
and all that just bulging out a little bit more.
One of the things that is kind of disturbing for me to see with any kind of computer work
reminds me of when I was a student at Art Center College of Design when all of us had
airbrushes, and everybody started looking very plastic-y. All of our work looked like
plastic, and it’s starting to look like that again with computer generated work.
What I’m trying to do is I’m trying to get you to avoid that by knowing what the head is.
Your eyeballs are not these crystal balls, like these marbles. They’re not. They’re
shiny, but they’re not as crystal-like and glass-like as I’ve seen them. They don’t
look right to me. No matter how good you think the artist is, it just doesn’t look good.
It doesn’t look natural. Too much of that kind of work is starting to look plastic-y,
and what we’re trying to do with anatomy is try to get your work to look more naturalistic.
So, this line bounces around the eye like this. If you could kind of like see your x-ray
vision, there is an eye socket right in here. Then there is a cheekbone that kind of does
this so that it changes the direction or the plane from the front of the cheek to the side
plane. Over here what you end up with is the zygomatic arch. It does this. Roughly, this
is the way it looks. It changes direction from front to side. It’s a very simplified
kind of a drawing, but it really will help you. This is almost like, if you could picture
my glasses, my glasses have these little arms; one step down is my zygomatic arch, and it’s
kind of like the same thing. You have this nice strong form that catches light kind of
like this, and then there is one underneath that is—if I were to shine line from this
direction—you would see it kind of like this. This is getting a little bit of light,
so I’m going to just force the light issue and show you where the light is coming from.
It’s over here. It’s just kind of like natural studio lighting where you have a spotlight
doing that on the forehead. Then we have the forehead coming down like this. You bounce
around the brow ridge. Then the nose becomes cartilaginous, so all of a sudden this is
cartilage right in here. I’m going to just do that in a slightly different color like
this. Then the tip of the nose is cartilage as well.
And you have the lip area like this. I’ll talk about like features as well.
Then that’s the area all around, surrounding the skull, but you can always see the skull underneath
the nasal opening, the barrel of the mouth. All of that is very important.
AUTO SCROLL
Now, one of the muscles that I’m going to talk about first is going to be the masseter,
so I’m going to write that down over here and the temporalis.
Masseter and temporalis, like this.
Now, the temporalis is a neat muscle because it fits right in here and has thickness.
I’m going to actually draw it with a little bit of thickness. You’ll see that there
is a ridge right here, like a form that sticks out like this. It’s almost like a fan like this.
It’s underneath the ear, of course, so the ear is going to kind of cover up a little bit of this.
Now, let me draw this ear again because I want you to remember the tubercle, the lobe
right in here. The helix goes into the ear like this. The tragus, the antitragal notch,
antitragus, and then the two forked forms, that almost looks like an unmade bed going
into there like that. There is tendon right in here, and it goes through the zygomatic
arch, and it’s attached to the mandible right here. If I were to draw the mandible
it would look like this. It’s huge right over here by your ear like this, and then
there is a coronoid process or a little bone that this muscle goes through this and it’s
attached here. This tendon here would be attached here. Can you kind of see that now? So, when
it contracts it closes the mouth. It’s really pretty neat. This is your mandible. I’m
going to leave it a little bit nondescript because I need to put muscles on it, so I’m
just going to blend this out kind of like this. But, this is your mandible right in here.
It’s underneath here. So far, so good.
Then you have your vertebrae. These are your cervical vertebrae. One, two, three, four,
five, six, and the seventh one is the longest one like this. You have these little spinous
processes that do something like this. I know this is kind of simplistic, but you get the
idea. And this is C7. A lot of your teachers have already mentioned this, so that kind
of helps me out. Thanks, teachers all over the world. You have this kind of a thing going
on. You have transverse processes that look kind of like this. Like that. You also have
a hyoid bone which is, oh let me see. See, there is like the skull in here like this
to this to this to this. It hits right there.
Okay, so I’m going to put this little horseshoe-like—if I were to show you it, it would look like
this, like a little horseshoe. I’m going to draw the other end of it but kind of like
in the distance like that. It’s a hyoid bone. It’s what your tongue is attached
to. Tongue starts here, and it goes into your mouth. Your tongue is actually very large.
This is a facet change between the front and the side of your zygomatic arch right in here.
It’s kind of neat. It’s like a box edge, especially the way I draw it. I’m drawing
it very boxy. This kind of becomes the mouth area, the maxilla. And you can still see the
skull right in here. There is angle to all of this. I want to make sure that you guys
saw that. There is an angle to the eye, through this, and it basically hits the hyoid bone.
There is also the thyroid cartilage, and that is right underneath there. It creates what
we call the Adam’s apple. Adam’s apple, right in here like that.
So, what happens is that you have muscles that go from the chin to the hyoid bone to
the sternum, which is down here. It creates that very recognizable look of your profile
like this. I’m also going to mention this one little silly interesting muscle, the digastric.
Now, this one I want you to remember because it’s so helpful when it comes to like the
view of underneath the head. Because that digastric goes like this to the hyoid bone,
to the back of the hyoid bone, and to the mastoid process, which is the bump behind
your ear. Right here, everybody, you have this big bump in the back of your ear. It
does this. The neat thing about that, everybody, is that it creates this beautiful facet underneath.
It’s a really very interesting little area. Now, I’m blocking it out as if I was carving
into wood, but it really makes it a lot easier to understand the jaw. If you can picture
me drawing a line with a marker from here to here and then to here, it creates a nice
little facet. Same thing with the other side, so no matter what you can draw underneath
the jaw from now on. Okay, so all of a sudden it’s like you have the look of this beautiful,
beautiful head and neck.
The trapezius is attached here. There is a clavicle here, acromion process, spine of
the scapula, etc. This would be your clavicle, and your trapezius would cover this whole
area right in here like this. Sternocleidomastoideus would be like this and like that. Internal
muscles of the neck—you don’t need to know all of them, but there is like a levator
scapulae, scalenus muscle, the scalene group of muscles. But the sternocleidomastoideus
is a big one, and it’s this one. It’s the one that turns your head like that. Sterno
because it’s attached to the sternum…cleido because it’s attached to the clavicle.
That's what this refers to. And mastoid process. Sternocleidomastoideus.
We need more 22-letter words in our vocabulary.
This is the trapezius back there. You can see kind of how it rounds this whole area
up like this. There is splenius capitus. There are all sorts of muscles around here, but
all you really need to remember is sternocleidomastoideus and the trapezius.
The levator scapulae, all those muscles, if you really to know them you can look them up.
It’s one of those things that you don’t see them very often, but what I do is I let my students know that
they always go towards the face like this. You can see the groups of muscles underneath
here. There is usually like a little hollow here. The problem is, like when you look at
my own neck, is that we have this platysma muscle. This one, the one that pulls the corners
of your mouth. What happens is it’s almost like wearing a turtleneck sweater. You don’t
see a whole lot of detail here. Sometimes you see it older people or people with very
little subcutaneous fat around their necks, but basically this is it.
Okay, now, the masseter. Okay, so watch this. There. It’s attached to the zygomatic arch
like this, and the muscle fibers are really strong, and they’re attached underneath
this little edge of bone. This can drop down and then there is bone, and then the chin
is actually a nice ball of muscle. There is a bunch of muscles in here including at the
very tip there is a mentalis. Now, all you need to remember is this. Just remember that
this is a ball fitting into like a pancake, and the pancake kind of goes around it like
this, and then it surrounds the mouth like that. You get that kind of pouty look. This
is called the node right in here at the corner of the mouth. When I do the front view we
can kind of like look at all this again. Okay, so this was one-third, remember, from here
to here, the first third. You can see how all of sudden all of this really starts coming together.
Now, I’m going to take that same sphere—remember that one? Now, I’m going to draw it right
next door. I’m going to try to be as accurate as possible, but when we’re just kind of
sketching it’s kind of hard to do that. I’m going to try though. I’m going to
look and search for that little sphere in there. I think it kind of came down…now
I’m trying to find where the original sphere was. This is about right. I’m not going
to be too worried about this. You get the idea. Now, I’m going to get in front of
you for just a second because sometimes when I look at things from the side they tend to
get oblong. Okay, that’s good. The other thing I really need to get in front of you,
so excuse my back for just a second. I’m just going to put a line straight down like
this and try to find where I want to end that chin, so I’m going to just say that. I’m
not sure if it’s going to be exact, but it’s going to be close enough. You get the idea.
Okay, so you have a chin like this. This is front view, so I’m just going to arc this.
Now, because this is male, I’m going to square this off just a little bit more. If
it was female we’d just kind of do something like that. Now, that’s a little bit more
like kind of comic book art, but you still can see that on your female models and the
differences. Males tend to be a little bit more angular, the kind of stereotypical archetypal
male/female kind of a thing. I’m just going to put the jaw lines a little bit more angular,
and hopefully that will read as a little bit more masculine.
I’m going to put the center of the circle. Remember, that’s the eyebrow. Okay, down
to here, and then you find the halfway point between this and this, and it’s about like
that, right? That looks about right. That will take you to the bottom of the nose.
Okay, so far, so good. Remember about the thirds? About like that, so this is about where the
mouth is going to be. I’m going to put the little philtrum here, the little ridge in
between your lips, and the node. Okay, so nodes. They’re like little jelly beans at
the corner of your mouth, and this is like an M-shape. Everybody’s is a little different.
Then the lower lip doesn’t quite make it to the corners like this and like this. I’m
going to leave it kind of like that, a little nondescript. The chin group of muscles are
basically like this ball. The mentalis is actually like a smaller version of this big
group, but I’m going to just put this big group of muscles like this; the chin group.
You have an area of muscle that surrounds that surrounds your orbicularis oris. I should
write some of these down. Oris meaning mouth, like oral. Orbicularis oris. I call this the
mentalis group. This is a Rey thing, so you’re not going to find this in the anatomy books
except for mine. I like to just group the chin muscles.
AUTO SCROLL
More often than not, this is what you’re going to see. You’re just going to see this.
There is a mentolabial furrow, which is a little crease right there. Mento meaning the
chin, labial meaning lips. What I’m doing now is what I have here. It’s the area around
the mouth, so when I draw that—I’m going to color code these again. I want to make
it so that it correlates with the one next door. One of the things that you can’t really
tell is that these two little groups of muscles are actually two halves. You can see it on
people who have a little cleft or a little dimple. I’m going to put one on here just
to remind you. Then this is the mentolabial furrow. Some people have a little crease right
here. Regardless, there is an area there that separates both groups of muscles. Then the
softer group of muscles or the softer area of muscle around the mouth, because it is
softer, it kind of give way to the firmer. It’s almost like this is a rubber ball,
like a hard rubber ball, and this is like a balloon. You can push one into the other.
Knowing that, you can see the poutiness that is created by those two groups kind of pushing
against one another.
Then here is one of the nodes. Here is the other node. That’s also what creates that
little flop of skin at the corner of your mouth. Then the lips, various thicknesses,
etc. Then two bubbles inside the lower lip like that. And because your mouth opens like
this, this open lip gets more light oftentimes with regular lighting, which is from above,
whether you’re outside or inside. More often than not you’ll see that this is in shadow.
There is usually generally speaking just three little bubbles inside. So that’s it. That’s it.
Then this would get a little bit more light. Put a little bit of light right there.
Now, the eyes are at the halfway point of the whole entire head. That would be about
here. Remember, it’s the lower lid. That constitutes the lower lid. Your eye sockets
are actually kind of like this. They almost have a downward angle laterally like this,
like on the outside corners they tend to dip down just a little bit lower. They’re not
really square. They’re not really rectangle. They’re not really round like John Lennon
glasses. They’re a little bit of all of that. So, you kind of like can see this.
Then there is an opening here for your nose. It’s the nasal opening, the nasal bone. Depending
on your nose, or depending on the aperture of this opening, it will determine the width
of your nose. There is a little bone that separates both areas like this. Then the bottom
of the nose would be right in here. I’m going to raise this just a little bit. The
wings of the nostrils will be like this, and you end up with your nose. I’m going to
draw this a little bit brighter so you can really see your nose, how it surrounds these
openings that we call nostrils. Then at the very tip there is cartilage in two pieces.
Then there is medial cartilage right in here. Then, of course, there is the bone. I’m
going to raise the bone just a little bit because I think it’ll be better right in
here, a little bit more accurate for you. So, this is bone right in here. It goes from
bone to cartilage to cartilage again, and cartilage and fat for the wings of your nostrils,
so you end up with something like that. Then there is a little area here that we call the
glabella, that because it’s facing away from light like this. It’s coming towards
you. It would be, in this case, shadow. And because this is male—not that females don’t
have this—but males have this a little bit more pronounced. There are the brow ridges.
The brow ridges.
In this particular case, if I have the lighting over here then this would get a little bit
more light. They always look kind of like bird’s wings, meaning they go upward like
this. Okay, in this case the lighting would kind of hit this a little bit more like this.
He’s going to look like he’s kind of angry like that. Then, of course, the eyes are kind
of set in there. They’re shiny, so which side am I going to leave—I’m going to
leave this one a little bit more skeletal. This one is going to look kind of creepy.
Over here there is going to be lids and lid folds and eyebrows. I’ll do the eyebrows
in a different color like this. Where they change direction, remember, go above and you’ll
find the temporal ridge. I’m going to do it on this side as well like that. Oftentimes, there is like a peak
to the cranium right in here. I have a model who was in my class this last week, and he
shaves his head, and he could totally see that there is a peak up here. Draw the other
side. It would be kind of like this. This side would get light, and you could see that
it would be actually a little narrower than that circle like this. You could start seeing
the skull in here.
Now, this is really neat. This is a frontal prominence. That’s this
right in here. It’s this bulbous mass, like a melon coming through the front of your forehead
right in here. You’ll see this oftentimes. It’s really neat, like that. I’m even
going to put a little light on here because it’s just a, it’s going to catch a little
bit of light like that. Okay, so far, so good. Over here you have your lid, so let me kind
of finish that up like this. Then there is the palpebral furrow. There is shine on the
eye. And the color of your eye, if it’s blue then the light kind of goes through.
Then you’ll be able to see that.
There. Alright, we’re starting to really cook with gas here.
This is your zygomatic arch. It kind of goes around here. It’s like the
widest part of your face, so I’m going to just put that in that. Your ears, don’t
forget your ears are going to be in this little area as well, from the brow to the bottom
of the nose like that. Way too low like that, like that, like that. I’m just going to
put like a really simplistic little ear right there from the brow to the bottom of the nose.
That’ll be your ear.
Your zygomatic arch goes towards your ear like this, comes forward, and then changes.
It kind of creates a frontal plane of your face like this. Then you could actually take
this line like this, side like that, and it kind of surrounds your mouth like that. There
is a little philtrum right in here, and over here the light is hitting it like this. There
is nasolabial furrow that surrounds your mouth. If the light is going like this, this is going
away from the light, but this is facing the light. Your masseter is going to be very visible
from this point of view, and it will be kind of like this, like that. It creates that little
fullness of your cheek area. It’s underneath your zygomatic arch like that. There is an
area that’s not mouth muscles, and it’s not your masseter, but this is where you’re
going to get your dimples. Any kind of dimples are going to happen right in this little dimple
zone right in here.
Because this is a male, I can get away with giving him a pretty wide neck,
almost like coming down from the ears kind of like that.
Trapezius. This is the sternocleidomastoideus. It comes to the sternum
like this, and it splits off where the clavicle is. This is the clavicle. And here is the
clavicle on the other side. There. Like that. The end of the clavicle, and this is the acromion
process of the scapula. This is your trapezius doing this, and it’s coming from the back.
I’m going to put these little lines like this. Sternocleidomastoideus is like behind
your ear. I would do something like this and like this. These muscles go straight into
your sternum like in here, creating a little notch here, suprasternal notch.
Your hyoid bone is here, and your digastric muscles create that little area underneath that’s not head
and that’s not neck. Then your throat, your trachea is right in here. This is your Adam’s
apple right in here. It kind of comes out, sticks out like this. This muscle, the sternocleidomastoideus,
splits like that, and then there is the levator scapulae scalenus muscle.
I want to be really clear. Levator scapulae.
It elevates your scapula. This is your trapezius.
AUTO SCROLL
There we go. Now it’s all kind of coming together, isn’t it? How does this help you
if all of a sudden, you know, the model is not going to just do this and all of a sudden
do this. Well, let’s play around with that. Let’s just draw a sphere, or let’s draw
a few spheres. There’s one. There’s another. Here is another, still. So, there are all
these floating little planets. Well, you could one that does this, so that’s already telling
you something. This one is going like this. I’m going to throw one at you that’s kind
of interesting. It’s that one. So, what the heck does all this mean? Let’s see.
How about if I just do this? Now, does that tell you anything? Does this tell you anything?
Do you see what I’m doing now? This one is actually interesting because this is the
back view. Do you see what I just did? This is how I teach about drawing the head. Isn’t
that amazing it makes life so much easier to have something that will help.
You could have the highlight.
Okay, so now this one. Same thing. What you end up doing is basically putting—this is
where the eyes are going to be. This is where the nose is going to be because I’m still
finding and looking for all the same little landmarks. Basically, what you end up with
is something kind of like this, like this, like this, like this. The barrel of the mouth,
the chin, and the area around the eyes. The temple will always be at that turning point.
The ears will be here, and the cranium will be like this. Now, I’m going to tell you
why I know where the cranium would be. Then this is the jaw line like this. With this
one let’s say I’m going to do this like this. I’m going to do something like this.
Like this, like this, like this. And this one is kind of looking up a little. Again,
that’s where the temple would be, and the temple is not seen in this particular view.
Here is where the chin is, the barrel of the mouth or the bubble of the mouth. Kind of
like the poutiness of the mouth. Like this, like this, like this. The eyes are going to
be in this area and this area right in here. The eyebrow is going to be around here. I’m
going to go over here, and the ear is going to pop out here, and so on. Do you see how
that works? The cheek is here so you could kind of just drop that down, but this is the
masseter right in here. From here I’m just going to just jump forward like this, but
the masseter is here.
Let me just show you something that I think will be really value. I’m going to draw
a circle here, and I’m going to draw another one over here. I’m going to just change
these just ever so slightly. One is going to be like this, and one is going to be rotating
a little bit closer to us like this. How am I going to do this? Maybe I’m going to just
put this right in here, this right in here, this right in here. Okay, so what I end up
with is something that kind of looks like this. Okay, do you see what I just did? Then
this is going to be where I’m going to put the eye area here, and then this always determines
where I put the temple, you know, where this changes direction. Okay, so far, so good.
Alright, in this case watch what I’m going to do. I’m going to put an ear here, but
I’m going to put a cranium here, and then the jaw line like this. Alright. The beautiful
thing about what I’m going to teach you now is how fabulous this is. Watch. This is
the nose. If you can see the nose is popping out of the contour. So, when the nose pops
out, watch what I’m going to draw here. The ear is inside the contour. I’ll prove
it to you by putting yellow. This is the center line like this. Do you see that?
Now, over here, conversely what I’m going to do is I’m going to draw lines going like
this, and in this case you have a nose that is inside the contour. This one is not. However
I want to do it. So, now what happens is, in this case, the opposite happens. I call
it the ear/nose effect. In this case what pops out is the ear when the nose is inside.
Now it’s the ear that’s popping out. How about this? Let’s just name it right now,
together. Okay, so the Ear/Nose Rule states that only one thing will pop out at a time.
It doesn’t mean it’s always going to happen. It just means it’s a general rule. It’s
kind of like the i-before-e rule in spelling. Okay, so all of a sudden you end up with something
that kind of like makes sense to your brain.
The other thing I want to talk about is a little bit about features because this is
something I really enjoy teaching about. That is when you’re looking at different people,
and especially when you’re looking at like people from other lands, the stereotypical
eye that you all learn is like this. We just kind of, you know, for a lack of better term
we call it the European eye. It looks like this. The upper lid overlaps the lower lid.
Then there is actual thickness to the lid like this. Then there is this little thing
called—You know, this is parts of the eye, this little section over here. The plica semilunaris,
inner and outer canthi. Okay, so inner, outer canthus.
Just to remind you, it just means this.
The corners of the eye.
Then there is the iris, things that you probably already know. The iris is the colored part.
The pupil is the opening. We all know that we need an opening to let light in. It is
shiny. The eyeball is shiny, and light does go through it, so I’m going to kind of show
that light goes through. The color of your eye, if it’s blue, it does get darker as
it gets—I’m using the example blue because a light colored eye you can see the color
much more easily than if it’s a really, really dark eye. The plica semilunaris is
this little kind of like almost third eyelid that is right there. Then in here is your
tear duct. Okay, I’m going to do the tear duct just a little bit different because it
is kind of pinker. Of course, it’s got the little opening in it like this. Even your
lower lid tends to be a little bit redder.
Remember that your eyeball is in liquid. There is a lot of water. I’m going to put just
a little bit of that. Then your sclera is the white of your eye. It’s not really white. It’s off-white. Sometimes a little
yellower, sometimes a little bluer. And then you have your eyebrow. The area underneath
your eyebrow is kind of like this. We’re going to try to explain it to you like this.
It’s like a ribbon that all of a sudden changes direction, and it ends up looking
kind of like this. Do you see what I’m trying to teach you? This part comes out into the
light, and the other part is in. What that means is over here it kind of comes out into
the light, and over here it kind of is into the darkness like this. Got it? That’s what
this is right in here.
Then there is a little area right in here because there is a ligament, palpebral ligament
that kind of creates this little bulbous mass. You also have little wrinkles like this and,
of course, hair. But, it’s more sparse down here, and it’s fuller, more lashes up here.
They tend to kind of start falling towards the corners like that.
Then there is this thing called the palpebral furrow. Palpebral furrow, like that. That
is this area, folks. In the morning it can be kind of liquid-filled and make your eyes
look really puffy. Palpebral furrow, like that. The hair of your eyebrows grows in a
very distinct direction. It grows like this. It’s thicker and stiffer here, and it grows
in this direction. It starts falling almost like a wheat field in the wind. It starts
doing this kind of like that. But then at the tail it comes from above to the center,
and from below to the center. The hairs are much finger. Of course, as you know, the temple,
the temporal ridge is over here.
Then this is the forehead.
Right at that little juncture right in here. Where the eyelashes change.
Now, I’m going to teach you about a different kind of an eye that you might have. This is
something that I’ve noticed a lot on usually people of Irish descent or German descent
or Scottish. It’s an interesting thing for you to start kind of studying. That is little
differences in the way people’s eyes are seen. One of the things that you might have
seen is this: I’m going to name it. Remember, this is like the stereotypical eye that I
started with over there, and here is the eyebrow like this. What I want to show you is this:
It’s when the eye kind of looks like it’s collapsing. This is very Irish. My wife, Fiona,
who is very Irish and born in Ireland—Bantry. You go to Bantry, Ireland, you’ll see a
lot of people that have this. I don’t know if you’ve ever seen this. You see all the
Kennedys; they have that. It’s called the brow ptosis. It’s kind of neat. Various
degrees of it. Sometimes it’s a lot. Sometimes it’s a little, but you’ll see it just
the same. I’m going to open up that pupil just a little bit. You want to be able to
see at least a little bit of pupil like that and the pretty blue eyes like this, and there
you go. Of course, the palpebral furrow and all the things that make us beautiful and
unique. That is brow ptosis.
AUTO SCROLL
The other thing that you need to know as like maybe character developers or just as observers
of life, is when you can make somebody look a certain way. This is something all the Disney
animators know. For instance, you raise the eyelid fold and then raise the eyebrow itself.
It gives you that kind of rich lady look like that. The high lid fold, the high arched eyebrow,
all of that kind of creates a look.
The other one is that you should know is the epicanthic fold of the Asian eye.
I’m going to write that down because it’s a good one. Of course, saying Asian is like it’s a big
word. Most people on the planet are Asian, so it includes a lot of different people.
Native Americans included, people of the Americas, Filipinos. There are all sorts of—like,
not just the stereotypical or obvious ones like Korean and Japanese and Chinese.
All of the Asian groups have a variation on this epicanthic fold. It’s good for you guys
to know all these things. I have a lot of Asian students. A lot of times they really
like knowing that there is name for what they have that’s very characteristic.
There, epicanthic fold.
But when it comes to the head, I mean you know what, just practice it. See what happens.
See what happens if you just do something like this. Already you’re establishing something,
right? It’s almost like the perspective of drawing heads. Where the eyebrow is, that’s
where you dip in right in here. Then this is a center line, which means that, let’s
say, if this is where the brow is then this is where the bottom of the nose is. And that
third of the way down is where the mouth is going to be. So, the bottom of the nose would
be kind of like here, let’s say. It goes around like this, like this, and this is the
barreled mouth. Here is the chin. This is where, if this was like the center of the
mouth. Here is another kind of helpful hint. If you’re going around something like this,
then the lip goes this way, but then this goes like this. See that?
So, kind of like it’s easier for you to kind of understand when you have these little things
that will help you out. So, the lip will actually have this really neat kind of like meandering
form that changes right over here. Then the lower lip becomes a contour right there. Same
thing here. This one is long. This one arcs the other way. Here is the bottom of the lip,
and here is the chin like that. Then where you have like the eye area, this is the eyebrow.
This is the eye itself like this.
Get the eye in here. This is where the temple would be.
And like I’ve already taught you, if the nose pops out, then the ear is going to be
within the boundaries. So, I’m going to put the ear in here, and this is like the—if
you’re going around the equator kind of like this, this is where you would see the
ear like this. Then there is the jaw. This is the frontal prominence like this. The brow ridges.
The lid fold. I’m going to go into this with just a little bit of the block so
you can see this a little bit better.
Lid fold.
Palpebral furrow.
Nasolabial furrow.
The wing of the nostril, the tip of the nose. You can put a little bit of color on the eye
and a little shine. Same thing there. The masseter. The zygomatic arch: This is important
because it catches light like that, just a little bit.
The masseter is pretty important. As you age, what happens is the center section is what
starts collapsing. So, when you look at like an aging person, watch: You start like this,
and you’ll notice that on a young person the masseter is still really strong. Then
you go like this and you go the chin. Okay, so from this point of view what you end up
with is something pretty straightforward like this. Okay, so let me just draw a little bit
more. Okay, so this is straight, and then this goes like that, and it goes like that,
and this goes to here, and voila. But, over here what happens is a person ages—I’m
going to put the zygomatic arch, etc. Then what you end up with is you just get this.
A little bit cleaner like this. Alright, so over here what you have is you have the nose
grows a little bit. Your nose and ears grow throughout your life. Over here you also lose
hair. Men lose hair. So, over here you have like this nice head of hair. You’re looking
all cool and ready for the big dance or whatever it is that you kids do nowadays. And you have
that kind of a look and the big swooping hair and voila.
As you get older, you lose a little bit of hair. This is males. But what happens too
is this: The center section right in here—here’s the masseter, a nice strong masseter, nice
area over here, nice straight jaw line. This has really held up. What happens is this starts
to drop. Then when that drops so does the area right below. All of a sudden you end
up with something that’s a little bit more like that. So, it’s the same person. As
you age you start getting all the signs of age; the wrinkles, this area that starts to
drop right in there. How do you like that? The aging starts in this little section. Over
here you’ll see some of that—everything is still very kind of sharp, delineated, straight, etc.
Over here you’ll see I’m going to push this even further.
Like this. Loss of hair.
Basically, what we are as artists is we’re chroniclers of life and to chronicle life
you have to kind of like understand life and look around you, and here is the temporal
ridge. Here is the temporal ridge. Zygomatic arch is very apparent here. More wrinkles
and so on like so. Neat stuff isn’t it. Love teaching about all this.
Now, one of the things that you’re going to notice, and this is very kind of like animation
trick is this, the canthus, inner and outer canthus, on males they tend to be really straight
across. The eyebrow tends to be pushed closer like that. This is male. Females, the outer
canthus gets, and this is when you’re just doing a stereotypical archetypal like this.
The outer canthus tends to be pushed higher. The inner canthus is where the nose area would
be, and the eyebrow is pushed higher
Like this. This would be female.
I don’t know if I got that high enough. I want to make sure that you guys can see that it is.
There. More like cat-like. There.
How do you like that? I want you to practice this because this is really very valuable. This is one
of the best things I could teach you about heads. It’s being able to rotate that. I
will show you on models, and hopefully this will really, really resonate with you guys.
All of you will really, really get a huge benefit from all of this.
Okay, so hopefully this is something that you find useful, and I can’t but to think
that it is incredibly useful. What you’re going to be able to do now is be able to just
jot down really good heads really quickly and without too much sweat. The whole idea
about all this is try to keep from it being so hard that you just don’t like this anymore.
Do you know what I mean? Let me just jazz this up a little bit, give a little bit of
cast shadows and a little bit of roundness so that you can see that this really round,
round, round, round. Over here round, but then over here it’s flat. See those forms?
They change. This is the clavicle. This is the acromion process of the scapula. And you
can see how all of this starts making so much sense. This is the acromion process.
Acromion process, right there. Sternum is right here, so it creates this notch right here, the suprasternal
notch like that. You can all of a sudden see that everything starts
coming together and making sense.
I’m going to just get some of these a little bit clearer for you. There you go. Levator
scapulae and the scalenus muscles. Just looking around and just making sure I’ve got everything for you.
I think we’ve got it pretty good. Remember, just draw a bunch of circles and
start practicing this stuff. That’s the way you’re going to get better and better
and better. There we go. And having fun doing this. You can see that line that we started
with right up into the heavens like this. You can see that. It hits there.
It hits the masseter right here.
And voila. Alright, you guys, that’s it. The rest is up to you.
AUTO SCROLL
So, here is a man, and I purposely picked this particular individual because I wanted
it to just be an ordinary, everyday, kind-of-like-your-neighbor kind of a face. You know, not young, not old,
not this, not that, just a face. There are a few things I want you to look at when you
look at this. First of all, you can tell that he has the brow ptosis that I mentioned, and
that is that the lid fold area comes over the eye. This is very indicative of people
of German descent or Scottish or Irish. If you have this and you’re neither one of
those, it’s okay. It’s one of those things. It’s a name for something to identify a look.
One of the things that you could do, and right now because I’m working on a computer, I’m
doing it one way, if you wanted to you could just go through like magazine pictures or
drawings or anything that you find. Do this over tracing paper. You can see the circle.
Do you see the circle? I’m purposely drawing this lightly so you can see that you just
basically have to draw the circle in there. Once you do that you can start dividing this.
Now, there is where the brow is. This is where the bottom of that lid is. So now you’re
starting to establish certain things. The bottom of the chin will be roughly there.
The top of the head. I’m including the hair, but since his hair is thin it’s easy to
find all this. The eyes you can tell are at about the halfway point. From this point here,
the brow to the bottom of the chin, you find the halfway point. Sure enough, there is the
bottom of the nose. You can see on this particular individual the tip of his nose is kind of
rounder. You don’t see a lot of the cartilage change to bone, but you can see a little bit
of it. You can see a change right in here. The tip of the nose is a little bit less than
the cartilage is above it. Things like this are really kind of important.
He does have the brow ptosis. You can see also the eyebrow. What I’m going to do is
I’m just going to highlight like this because like I taught you, sure enough, look at where
the temple is. This area here signifies a change between forehead to temple. This is
called the hairline, whether your hair is there or not or even if you shaved your head.
You’re going to have a line right there where you cease to call anything above it a forehead.
This whole area is really great because it tells you and it reminds you of that change,
that plane change. Over here, forehead. Over here, forehead. Over here, temple. You can
see that sure enough, almost on the dot, it’s above where you change from body to tail of
the brow. In this particular instance, the brow line does go to the ears. His ear is
a good size. If this actually follows pretty much in suit, but it doesn’t mean that it
will on you. The ear, sure enough, is within those two parameters of the bottom of the
nose and the brow line. Then the bottom of the eye is where I’m putting that halfway point.
The one thing that you’re going to see on this individual very clearly is the masseter.
You can see the shading right in this area. Sure enough, it follows that line that I told
you about. That will take you to the hyoid bone, almost like a map. Then there is a thyroid
cartilage, the canopy or the area underneath the jaw line that is basically the bridge
between the jaw and the neck. It’s like this little neutral zone. This is something
I didn’t talk about in my lecture on the blackboard, but it’s called the parotid gland.
This one is interesting to note because it creates a little bit of the puffiness that
you see here. That’s his gland. On a cadaver it’s kind of a yucky looking thing because
it almost looks like old, shriveled grapes in this area underneath the ear lobe. It’s
about the same size as the ear. It’s almost like having another ear shape behind your
jaw line. Anyway, so those are the major things that you want to look for.
This is the nasolabial furrow. You can see on this particular individual the lower lip
is pushed back—the upper lip is pushed back and the lower lip is pushed forward. It’s
usually the other way around. That’s why it’s really good to know the norms and then
when people vary from that. Do you see that? Usually it’s like this. Usually it’s the
upper lip then the lower lip, and if you touch those two lines it hits the tip of the nose.
But obviously, this is just the ideal or the zero. Then the chin like that—do you see that?
Now, when I jump over to the front view, I’m going to draw again, it’s going to look
weird because it’ll look kind of like mascara, some kind of weird makeup. But this is the
body of the eyebrow, and the hair would grow a certain way. Then if we jump above it, that
would be the temporal line. He has a frontal prominence you can see popping through here,
and these are the brow ridges with the skin and the muscles pulling on those. It crinkles
everything up right in that area. Pretty neat, huh?
Watch what I’m going to do here. I’m going to jump down to the nose. This is the septum.
This is the nostril. This is the wing, and the wing is both fat and cartilage. This is
the tip of the nose or the apex. It looks likes what it is. It’s in two sections.
Then there is medial cartilage like this. Now, you won’t see this, but there is a
little split down the middle also. Then this is actually the bone right over here. Even
the bone has a little bit of a crack right down the center. Then, of course, you have
the side planes of the nose and then the nasal cartilage around here, the ala or wing. It
means the same thing in Latin; ala means wing.
Now, watch what I’m going to do because I’m going to take this little line from
the tip, from the center of the nose. It hits those two—like, what I’m doing in here
is watch: Do you see this little mouth I’m drawing on this body down here? This is that
little spot underneath his nose. If you take a line like this? Line like this? This is
where the bottom of the lip does that and it goes up. This is not exactly his mouth,
but this is just typically what I do. In this case, it kind of helps but it kind of doesn’t
because he has not the zero. This is the zero mouth, the made up mouth. He has a real mouth
because it’s his, and he’s got the lower lip which is narrower.
He’s got the brow ptosis, which makes the eye look like this…like that. You can see that.
It drops down like this, and because he’s a little older you can see some of
the wrinkles. Then this is the palpebral furrow right in here. This is what I call the cheek
pipe. It’s the area between the nasolabial furrow and over here, so it creates what I
call the cheek pipe right along here. Remember the side of the face over here? You have the
area around the mouth and then here is the chin. What you’re going to see is that this
area right in here is the dimple zone. That’s where you’re going to have—if you have
a dimple that’s where it’s going to be. If you have a character line, that’s where
it’s going to manifest itself. The other thing that you’re going to see over here
is also a little indication of the zygomatic arch and then the front plane of it. You can
usually tell because it’s a little bit more shaded underneath. See how that’s all looking?
Isn’t that fabulous?
Okay, so now when I look at this, the thing to remember is to draw that circle. See the
circle in here? And these lines—the lines that go around the head like this, and this
is the basic area right in here that I want you to take a look at. The nose is basically
like this shape so you can see underneath it. Basically, what I’m drawing is I’m
drawing something that looks kind of like this and then underneath the nose kind of
like this. Do you see that? Then just a little tiny bit over on this other side.
Do you see that? Fabulous.
Then you can see the masseter. The area around here that starts to collapse, and the area
underneath the canopy, the area that’s a bridge between the face and the neck. Then
you can see the throat coming through here. You can see a little bit of the sternocleidomastoideus,
and you can even see it here. It creates that little triangulation right here when they
split. Then you can see the trapezius coming from behind and doing that. Once again, that’s
how you find the ear is by going around, it’s almost like going around the equator and you
can see this. You can see this. You can see this. All of a sudden it gives you something
to go by. So, this is what you would see. Once again, you go over here, and then this
is where the ear would be.
AUTO SCROLL
Alright, so now, as you can see, we jumped over to a female. What’s really nice about
this is the zygomatic arch. I’m just going to put that right there. Remember that angle.
Always remember that angle. I thought I was the one who discovered this, and I looked
at a Leonardo da Vinci sketchbook, and I saw this in there. Once again, he took me idea.
It’s one of those things. Every time you think you come up with something, some of
these old clever cleavers have come up with it beforehand. I did the body and the tail
of her eyebrow, and if you could see there is a change in lighting there. That’s because
that is where her temporal ridge is.
Once again, there is the forehead. On one side it’s forehead. The other side it’s
temple. When I look at her, if I go straight across I totally miss her ears, unlike the
man. When I go across the nose I hit the middle of her earlobe, which means her ears are lower,
and they’re a little smaller than the male that we were looking at. That’s how we know
all this stuff. You can see the tubercle of her ear is up high, and then unmade portion
of her antihelix is like so, and then you can see the two little splits right there.
Okay, then the tragus, antitragus right over, and the antitragular notch is the little opening.
The helix comes into this little area and creates that little deely-bob, that little
point that goes into the concha. Her masseter is not as prominent right now. I bet if I
had her bite down you’d be able to see it a little bit more.
Nice young woman, and because of that, this is still very, very held up. Incredibly beautiful
posture. She’s a dancer. You can see that by just the erectus of her neck. Sternocleidomastoideus,
and for that we’re going to just jump over to the front. The front view reveals a few
things. One of them is that mentalis group shows the split so she has a nice, healthy
little cleft. If you looked at her mom or her dad, one of them probably has it pretty
pronounced, so she inherited that. There is a poutiness of the fact that this group of
muscles pushes into the mouth group of muscles, the obicularis oris. There is a point of her
nose right there, and if you just go across like this, you can see that there is an M
of the mouth. You can also tell that she’s just slightly asymmetrical. The corner of
this mouth is higher than the other when she is relaxes.
She’s got beautiful eyes that are basically very typical of what I just drew on the blackboard,
which is this part is convex, and this part here is concave. You have the eyebrow into
two parts; the body and the tail, and right above it you would see the temporal ridge.
The frontal prominence is sticking out here, and you can see light going in this area.
You can also see that she has very slight—because she is a woman—she has brow ridges, but
they are very delicate. Same thing with her nose. Her glabella is very delicate. If you
go over to the other side you’ll see what I mean. Her glabella is like this, and then
her nose goes like that as opposed to some people whose goes like that, so this would
be more shaded. But, she’s not like that.
Her masseter is very slight from this point-of-view. From here, what you do is you draw an ear,
but then you make this line going like this, and it creates this little arc that makes
her look more girly. In fact, with makeup artists they tend to put a little shading
right underneath the cheekbone. It makes women look more womanly. Her nasolabial furrow is
very, very slight. Anymore and she’ll look like she’s 45. Not that there is anything
wrong with that, but it’s just that she happens to not be 45.
The apex of her nose is very clear, and it’s also cleft just like her chin. One point where
it basically split like this. One thing that is really beautiful about this particular
photograph is how clear her sternocleidomastoideus is. You can see that there is one part that
is very spiky and one part that flares out like this. One part that’s attached to the
clavicle and the other part that’s attached to the sternum, creating the suprasternal
notch because it’s between this bone, this bone, the clavicles, and above the sternum,
creating this hollow right there. Her windpipe right in here is very evident. You can see
that little piping of her trachea. She has thyroid cartilage but it’s not going to
show because it’s very delicate. That’s what makes us very flat as opposed to the
males who have that Adam’s apple. This is very flat right in here. It’s just a tubular
form that you can see right here and right there.
Once again, you would draw the—and this is something that I want you to practice.
Just get tracing paper, draw the little sphere, the center line like this down to the chin.
Make a line where the chin is. Make sure there is perspective to it. Draw where the eyebrows
are right in here at the bottom of the eyelid. Really importantly, this; this little plane.
Don’t even see it as a nose. Just see it as kind of like this little area. Once again,
I’m going to draw it up here, but it’s going to be kind of like this. Like that.
Do you see that? And then the eyes would be kind of like this. That’s what I see here.
And because the nose is popping out, the ear would be within the confines of the cranium.
Remember that her eyebrow when you go across this way you miss her ear. Remember that?
Her ears are lower than zero. Then here is here earlobe. Sure enough, when you go across
like this her earlobe gets truncated like that. Isn’t that amazing how all this works out?
This is where her hyoid bone is. If you can’t see it, it’s over here. See that?
That’s what changes the direction from underneath the jaw to the neck. Here is the pit of the
neck and her sternocleidomastoideus like that and trapezius coming from the back like that.
Her mouth and this little area of her eye right there, you would just simplify it. And
her zygomatic arch. Then this is where it changes, and then this is where her masseter
would be. Once again, there is the temporal ridge right there. Her frontal prominence
and just little itty bitty brow ridges. Her mouth is going around like this. See that?
This is like the stereotypical kind of like the mouth is going around, and then the lip
is like this. She’s got a little tiny lower lip, but this is basically it. This is what
happens when the mouth kind of rotates around as it does this. It goes around to the other
side like that. Alright, let me draw some of the muscles now for you.
AUTO SCROLL
Alright, kids, this won’t take long because there aren’t that many muscles that I want
you to see. Just the diagram that I did for you is going to suffice for the most part,
but I do want you to see where the skull is. You have a lot of really good indicators.
That is going to be the temporal ridge, which is on the skull. It’s really amazing how
that just pops out on a person’s external forms. This lighted area is temporalis muscle.
You can’t see it, but it’s underneath the hair, and it goes underneath the zygomatic
arch. I can see a little shadow here, also a little light underneath this line that I
just drew. That tells you where the masseter is right below this line, right in here. Then
the skull, and I’m going to draw the skull because I think we need to, is in here.
Then this is front portion of the skull kind of like this and like that. Then you can see this going
like this. It goes around that area, and it goes towards the ear. It disappears in that
little area around where the ear is. Then the bone does this. I’m going to draw more
of the skeleton this time rather than muscles because it’s really important that you guys know that.
Remember this line? Remember this line right over here? It goes into the heavens. That
really tells you a lot because it takes you to the hyoid bone, roughly, and it also gives
you the masseter, and the masseter is right here. You can’t help but to see that. Even
the shading is rounded down here. See how beautiful that is? The muscle is attached
to the underneath side of the zygomatic arch right in here. Like this. There is like little zygomaticus muscles.
Sometimes you can actually see these on people. There are a couple little stringy muscles
that do this, and it kind of helps you smile, things like that. Then the LLSAN, which is
levator labii (levator just means lift, labii means lip) superioris alaeque nasi.
Okay, the LLSAN muscles are really neat because they basically do this. One is over here,
and then the other one comes down to the corner of the mouth.
Why do you need to know these? You can forget the name and all that, but just remember what
they do. They creates these little lines, creases on your nose that you can see on this
person just a little bit right over here almost like you were snarling like that. Okay, so
they pull. You have this big pancake-like muscle that surrounds you mouth and includes
basically the membrane that is your lip like this. But your chin group of muscles pushes
into that. Because these are sphincter muscles, meaning they go around like on a track, when
they compress when you whistle or whatever, you’ll see that the wrinkles above them
go like this, like the direction of the mustache. I don’t know if you can tell, but I’m
over here on the other side where the front view or the mustache is.
You have frontalis muscles right over here which raise your eyebrows. Now, the reason
you need to know this is because you’re not going to see them is that they create
perpendicular wrinkles, which you can see over on this other side, the front view. You
can see his frontal prominence like this, and all the wrinkles that happen through just
years and years of being alive and reacting to things, smiling, laughing, talking. Everything
kind of creates all of this that you see on this particular person. That’s why I wanted
to use him. He’s so interesting. He’s not a kid. You can see all the things that
happened, but you can still see the zygomatic arch.
You have to always make sure that you can see and you can feel and you can sense that
there is a skull in there. Here is his masseter. It creates that roundness before you can see
the collapse of the neck area right in here. The two muscles are this one right here. That’s
a digastric going right to—you can see that right in here as well underneath. It creates
two kind of cable-like muscles. Then the canopy right in here. The notch that’s created
by both spikes of the sternocleidomastoideus. Because he’s an older man, he’s got the
very deep crease of the nasolabial furrow. His nose, you can see that it’s in two sections
right in here. Then there is a center section, and then as I said before, there is bone.
The only muscles I really need to draw are the masseter, the temporalis I kind of just
indicate a little bit right in here. You can see the thickness of it right in here. This
is more important than anything else. This stair step right there. You can really see
that here. Okay, so the masseter muscle would be like this, and it’s attached to this
bone right in here. Sternocleidomastoideus splits off like that, and the trapezius right
in here. There is not a whole lot different than what I just showed you and diagrammed
you, but I wanted you to see a little bit more of the direction of the muscles. There
is like a buccinator muscle inside the cheek, but we have so much tissue and thick skin
and everything that makes up your cheek, I wouldn’t worry about this area at all, just
the forms of them. As you get older, this starts to collapse, this area right in here.
Alright, so let’s draw the muscles on this particular young lady. The first one I want
to start with is actually the center one because the sternocleidomastoideus muscles are so
clear on her. Remember, the sternocleidomastoideus is one muscle that splits, and one of the
forks is flat and the other one is relatively round and spiky going into this area. That’s
what creates this little area here. You see, when it comes to the face there aren’t a
lot of muscles that I feel comfortable drawing.
Here is the palpebral furrow. You see just a very slight indication, just the same as
this right in here. Her LLSAN muscles really aren’t working right now. She’s very relaxed.
But, if they were she would get creases right in here. What that would do is it would raise
the lip and the nose as well, making you snarl. That’s one thing that I’m going to say
about that. There are these two little muscles here. They’re actually like—the ends of
them are attached to the skin. That’s why sometimes if you bite into a lemon or something
you’ll see little tiny dimples on your chin. It’s because the ends of these little muscles
are attached, coming forward just like these dots are. They pull in on the skin. It creates
little dimples.
On this one I’m going to draw the masseter because I want you to really know this muscle.
This is one of those muscles you just have to know. You can see the shadow of her beautiful
little cheek right in here, and that is the bottom of the zygomatic arch. Underneath her
skull would be kind of like this, and then this is the front plane of her zygomatic arch.
You can tell where the temple would be and it would bounce around there. Then it would
go like this toward her ear like that. Then the muscles are attached here like this.
On some people you can really see this. You can see this from bone to muscle. You can
see a really definite line all the way across. She is very soft, very womanly, and very lovely
skinned, so you’re not going to see a whole bunch of the muscles or anything like that.
Even her temple, it’s almost just temple. The muscle is very slight.
Let’s see if there is another—then this is a very large sternocleidomastoideus. You
can see how big it is. You can also see how it splits down low like this. It’s foreshortened
so you’re not going to see a lot of this right in here. Then the trapezius. This is
where the temporalis would be right in here. You’re not going to see much at all in this
individual. Even all of this is very, very light. You have to be delicate about it. You
can see her node underneath her skin.
One of the things that I always look for is on this person, her head, her forehead is
pushed back. Her mouth area is pushed forward. She has this kind of a design like this, like
this, and like this. I look at those three points. This is her. This is the way I see
her, like this. Some people are a little bit more like this. Maybe the nose is more extreme.
Maybe the mouth barrel is almost like on par with the forehead. If you ever watch Seinfeld,
Kramer is kind of like this. Like this, like this. Trying to draw this, let’s see. Like
this, like this, like this, and like that. His forehead slopes, his nose slopes, and
his mouth barrel goes way back like this. All of a sudden you have the look of like
a Kramer, like that.
What you want to do is always look at those three lines of a person and see how they are
on that particular person. It’s always the slant of the forehead, the slant of the nose,
and the slant of the barrel of the mouth.
That’s all I want to do with these images. I just want you to remember to put tracing
paper and really look for the circle, the sphere, the center line, which takes you down
to the chin, and just keep practicing with either photographic imagery or artistic paintings,
drawings, sculptures. You’re going to be surprised how much better you get. Because
her nose is popping out, even though she has hair you would know that cranium is further
out that her ear.
Alright, so just like anything else, the journey just began. As I said before, now you just
keep learning and keep learning and keep learning. I hope you come back and learn from us some
more. I know I have a lot more to teach you. I want you to come back and I hope you come
back, and I would love to spend more time with you. Let’s keep learning and remember
to just keep practicing, keep drawing, and never stop. That’s one thing that we always
have in us. There is always better. There is always more. That’s what I want for you,
and that’s what I expect from me. Thank you so much, and I’ll see you next time.
Free to try
-
1. Lesson Overview
1m 5sNow playing...
Watch the whole lesson with a subscription
-
2. Side View of the Head: The Brow, Temporal Ride, Zygomatic Arch
14m 29s -
3. The Masseter, Temporalis, Diagastric, and Sternocleidomastoid Muscles
15m 15s -
4. Front View of the Head and Neck Area
13m 39s -
5. The "Ear/Nose Rule," and Variations of Eyes
16m 37s -
6. Effects of Aging, Male/Female Eyes, and Final Thoughts
17m 55s -
7. Diagramming Key Areas over Male Photo Reference (Model: Len)
11m 13s -
8. Diagramming Key Areas over Female Photo Reference (Model: Bridget)
8m 48s -
9. Ecorche Drawover Over Male and Female Photo References
14m 30s
CONNECT
New Masters Academy
16182 Gothard St
Huntington Beach, CA 92647
Contact US