- Lesson Details
- Transcript
- References
- Instructor
- Iliya Mirochnik
- Subjects
- Drawing
- Topics
- Anatomy, Drawing Exercises, Head & Portrait
- Mediums
- Charcoal, Pencil
- Duration
- 5h 15m 24s
- Series
- Russian Drawing Course 2: The Head and Neck
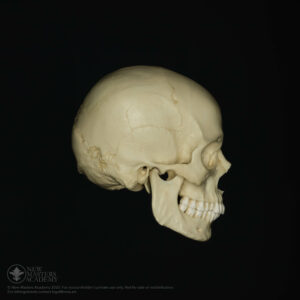
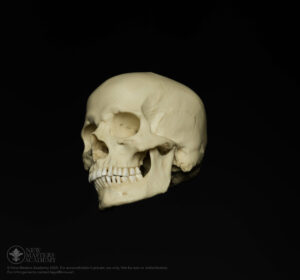
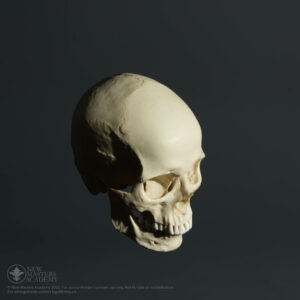
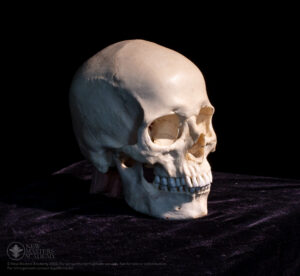
The skull was a critical part of the learning process at the Repin academy. In this lesson, Iliya will break down the construction and anatomical features of the skull.
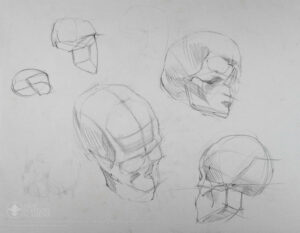
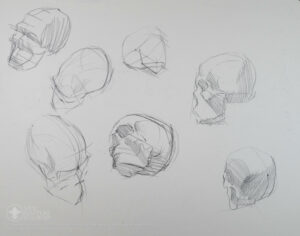
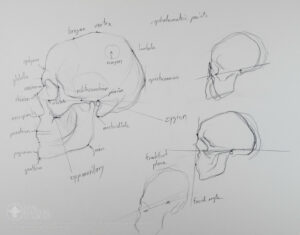
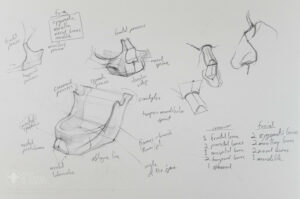
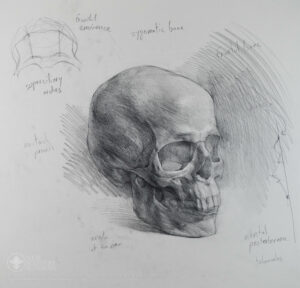
You will start with a long pose drawing of the skull. Next, you will learn the anatomical points of the skull to aid in your construction. Finally, you will draw tumbling skulls from multiple directions.
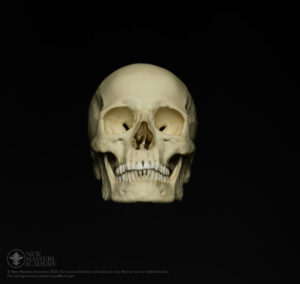
Students are encouraged to work from the NMA reference images and 3D viewer included on this page*.
Join Ukrainian-born artist Iliya Mirochnik as he passes on a 250-year-old academic method preserved at the Repin Academy in Saint Petersburg, Russia and seldom taught outside of the Academy and never before on camera.
The Russian Academic drawing and painting approaches were uninterrupted by the modern art movements that transformed representational art in the West, and as a result, they provide a unique and clear lineage to the greater art traditions of the past. As a powerful approach that is both constructive and depictive, it combines the two methods that prevail in contemporary representational art.
In these three drawing Courses, we have set out to condense the entire program, spanning over eight years into a logical, step-by-step procedure. We have made improvements and added resources and exercises to explicitly drive home the concepts that are required to work in this approach.
We have also structured the course so that it is not only useful for professional and experienced artists but also artists with no drawing experience whatsoever.
In the first part of our Russian Academic Drawing Course, Iliya taught you how to hone your fundamental drawing skills. In this next part, Head & Neck, you will undertake a new challenge: the portrait.
In order to draw the complexity of nature we need to study all the anatomy that makes up the surface form of the head and neck.
Head & Neck covers topics such as the structure of the skull, individual bones of the skull, deep muscles of the face, skeleton of the neck & shoulder girdle, muscles of the shoulder girdle, and the portrait drawing process.
The New Masters Academy Coaching Program directly supports this Course. If you enroll in the coaching program, you can request an artist trained in the Russian Academic Method including Iliya Mirochnik himself. Click here to enroll in the Coaching Program.
Materials
- Sanguine pencil
- Piece of sanguine colored chalk
- Vine charcoal
- Charcoal pencil
- Notebook
- Graphite pencils
- Kneaded and Hard Erasers
- Sanding Block
- Utility Knife
- Roll of Paper, Smooth Sketchbook paper
- Staples
- Staple gun
- Artist panel
- Easel
- Light source
Discuss this video in the forums!
Discussthat makes up the surface form that we see in the head and neck.
So far, we've spent quite a lot of time
honing our fundamental drawing skills.
Now we undertake a new challenge, the portrait.
At the Repin
Academy, the skull was treated with the utmost importance. We
studied each of the bones that make up the skull and had to
draw them from imagination. Luckily, we have
fantastic resources to make this task easier than ever before.
We will be working from photographs and 3D models scanned from the real
human skeleton. For the first time at New Masters Academy, we will also be using
castings of real human cadavers prepared by renowned artistic anatomist Eliot
Goldfinger. These 13 castings are a remarkable
one of a kind early resource and we will be making full use of them.
I will be demonstrating the planes
and structure of the anatomy, as well as giving you some instruction on the anatomical
terms and forms. You will follow along with assignments, working
from the references we provide.
After our
intense exploration of anatomy, we will tackle the final
assignment in this course, the portrait from life.
With that, let's begin.
lesson focuses on the skull without much of a
lecture. My intention here is to ease you into an understanding
of organic structures, utilizing all that we covered in The
Fundamentals segment of my program. It will also familiarize you
with the skull and bones in general. Now before we
begin, for these assignments you're going to need to add a couple of things to your
supply list. So you're going to need a
sanguine pencil. The ones I use
are by Conté a Paris or
Conté of Paris. A
piece of chalk that is
about the same color as the sanguine
pencils. And there are a lot of different options
in your local art store where those are.
A piece of vine
charcoal and a charcoal pencil.
The one that I have here is also by Conté of
Paris but it comes in black. Now
I would also like you to have a notebook
where you're going to write down all of the anatomical
information and terminology that we cover and
finally you're going to need two more boards, onto which
we are going to stretch more paper.
The sizes of which are a 20 by 24 inch board,
24 by 48 inches.
So now that we
have had some experience with inorganic
geometric structures
including a head,
the step that comes after this is to switch
and begin to analyze
forms that are a lot more organic. So
it's equally important
for the purposes of our course to
switch
gears a bit and begin to introduce aspects of anatomy
and we're starting with the head.
So the important thing is
is to get accustomed, to get kind of acquainted with,
the forms of the head .
The place to start this is, of course, with the skull.
So just approach this
as you did all of the assignments
in the previous course.
Your outlines, your angles.
We'll
be getting into the more specific anatomical properties
of the skull soon but what's important
right now is to simply spend some time with it,
get used to it, get used to its proportions,
observe it, and also
begin to sort of start analyzing it
as a structure.
Now of course there are
certain ways that you can start analyzing it as a structure.
It primarily focuses on
figuring out what anatomical landmarks,
what points to accent
but at the moment just
kind of go with what's in front of you.
And keep in mind that
the whole time
you're making corrections. And I will
be pointing out some of these points, even here,
but I don't want you to get caught up in them. I'll
go over them soon.
(drawing)
So the important thing to establish
first and foremost is
the relationship of the cranial portion
up here to the facial
portions. And the point
that separates them in front is right
here. What is commonly referred to as the bridge of the nose.
(drawing)
And then continues
(drawing)
around and ends
here and then continues up.
Now the important thing
in this whole concept of construction
is that when
you see a
symmetrical object as the skull
undoubtedly is, off of a line right here,
everything on this side of the skull
is found
on the other side as well. The importance here
is to establish those axis
alignments. And we're gonna be talking about alignments
a lot. So expect to hear that.
So for example, the form right here of the
upper part
of the eye socket you'll find on the other side as well.
So just continue it, find that same point, and
almost - and establish an axis.
A line - and you can
use your pencil
or needles that we used in the previous course
or just do the same thing
with a pencil and another pencil,
some other object, to get that axis.
And the important thing is
that you then have to - once you've locked that in
and I always recommend
both in a portrait - well especially in a portrait
and a skull - is to
find those same axis absolutely
everywhere you can. So where
the teeth are, where the bottom of the jaw
is, where
it meets our table, in this case,
and every important, sort of, important
change of plane. And the thing that's
important here is to kind of go back to the
drawings that you made of the
planar head and just
use some of the planes
in understanding where the planes are here.
It's obvious that here
they're not as obvious
but they're still there. And if you remember this whole idea
of highlight, if you really just even - even at this early
point, just pay attention to where the highlights are. Most of the time
they're giving you the major changes in plane. So the
very fact that there's a highlight here on this whole part
which is known as the frontal eminence, you'll see that there's
a change in
tonality and
of course that implies
a change in the form.
So now I'm going to continue - but see it continue down with the
lower part of the -
of the orbit
of the eye socket and the same way that I took that
axis across, I'm going to do it here to find the bottom
of it there.
(drawing)
Then I'm going to do the same with this point right here. This whole area
is a bone of its own. And we'll talk about the bones that make
up the skull. There are
22 of them. You don't actually have to know all of them
but you have to know almost all of them so.
But the bone right here,
the zygomatic or
essentially what makes up
the cheekbone, is one of the more important bones in the head.
And so
that also has a pair
across.
(drawing)
So
something to think about
in the skull. And you can think about this even before
you start on any
skull and a portrait. And you'll see how this applies to a portrait.
There's this concept of the facial angle
which
came about a while ago in an effort
to find some sort of standard classifications of
the different types of
skulls. And the
actual facial angle is taken from
this point right here, sort of the
outer most point over there, known as
the - I'll write it here because it's super important.
Known as the glabella.
To the outermost point
of the
upper jaw. So right above where the teeth are.
And that's a line that you can just put your
pencil up to, just actually take that angle
and move it.
Okay. And remember what we
spoke about that a lot of times
I recommend that you simply just put this
on the page by eye and
then go back in
and take the angle.
That's the only way to sort of build up -
(drawing)
build up that intuition
for angles and proportions and so on.
So, as you see, so we're getting these
sort of more precise outlines. And if you saw I just removed a whole
part of what I put in early on. It was wrong and
that's the way we approach this.
If there's something wrong you just - you go ahead and you don't hesitate to make the
correction.
Now this
bone, the zygomatic,
you can see it almost in its entirety and it's an important
element in constituting
this element here known as the zygomatic arch.
And it
is a combination of this part that comes up and
meets with the zygomatic bone. It is a small
sort of extension of the
bone right here known as the temporal bone. And if you follow
it all the way down to here you have what you
can see right here and also an important element known as the
mastoid process.
(drawing)
So
(drawing)
and I will - so the bone here is also - I'll write it up here - is known
as the
zygomatic bone.
So if there are any parts of the skull that are -
that you absolutely have to be aware of when you're starting out
it's the ones I've written here. The glabella up
here, the zygomatic bone on one side and the other, and
the mastoid
process right behind this
whole part of the jaw.
(drawing)
Okay. So
we're getting a little closer now.
(drawing)
Now I'm going to sort of explore what's happening here.
Now the one thing to kind of imagine
and think about at least for a while, is
the particular changes in plane
of this opening
right here. There's a
common tendency to just kind of put it in there
as just sort of
an opening. But if you look closely - and especially look
in profile,
the particular changes in plane
go along
(drawing)
those few changes. Now this is in profile.
So what happens when it's not?
Well, it's actually quite helpful to
have these points because they also align according to
your axis.
So for example, you find
that point right here, you find it across, then you
push this whole part in,
once again you find that point, you find it across
and then you extend it out
and there you have it.
Now it's important to already begin to see
that the end here,
what essentially constitutes the base of
the nose comes down to pretty much the
same point as the end,
the bottom most part of the
zygomatic or
the cheek bone. And this is
extremely important when you're working on
a portrait
and it's hard to pick that out in
a human head that's covered
in, you know, in muscles and all different kinds of
of elements that go on top. But
it's important to always like
even when looking at a head, at a person
to pick out all of the
structures that belong to the skull inside.
Yeah, it's important to pick out all of those structures that
are a part of the skull inside. They are the most important ones. And of course
the skull is in the head and a lot of times
you can't actually pick them out but it's
for our purposes you almost want to exaggerate. You want to pull
the skull closer to the surface of
the surface of the skin.
And
we'll obviously talk about that when we get to the portrait.
(drawing)
But that's the importance of starting with
a skull and spending time on it.
Because it's extremely important to kind of have it - almost
like to be able to picture any part of it
without an actual skull
in front of you because that's what you're going to be -
that's what you're going to be trying to
pull out of every human head
that you might be working on
and trying to depict.
Okay so we're getting a little closer.
Putting in -
now I think
it's time to go over some of these, just overall outlines.
The other thing that's extremely important
and what is - it's -
what isn't a problem when working on a skull but most definitely is when
working on a
portrait is this tendency to make
the head just completely round.
And now I don't think that tendency
appears when working on
a skull mainly
because it's much easier to see that it isn't. You can see
individual sort of changes in the
outline areas that are - have a certain angle
and also are
longer than
others. It's not simply a line that
you can take across and make into a
even curve. And the thing is that that
also has to be
picked out of a human head, even if
there's hair. Like you're still
focusing much more on the
skull inside then you are
on
particular sort of interesting qualities of
the head
regardless of how interesting they actually are. They always
go on top of
a structure that you're building inside
and then building on top of.
Okay so right here,
this is something on this whole
area is an important one. It is the -
it belongs to the bone here, known as the
frontal bone.
All of this. And this part right here
is called the zygomatic process because it leads into
the zygomatic bone.
You see that
this is quite common. And essentially it
signifies a part of a bone that's
sticking out and sort of - and coming out towards
something else. And so it's
called usually after the thing that it's attaching
to. So for example, this part of the
bone that is the zygomatic bone
is called the frontal
process because it's moving upwards and
attaching to the bone up here, known as the frontal bone.
So there's a lot of that that's going
to be happening in the terminology. So
a lot of the sort of
the harder parts about the
anatomy - and it seems like what people are -
what a number of people who I've
taught have
a problem with is
the fact that all of the names are in Latin
and it's harder to
memorize them. And a lot of people
that point say, but I guess it's not that important that I know what everything's called
and I tend to think that it is. It is important
to know what it's called because if it has - if you know what it's called, you know
that it - you have sort of
a better understanding of that fact that it's an element that has
to exist on paper.
So I do recommend
learning what all of these parts and all of the bones and then all of
the muscles are called. And there are a lot
of books where all this is covered and so on.
And so the - but the way to
make it easier is to understand why everything is called what it is.
And they are
in Latin but usually if you
kind of just
explore where that word is coming from, you see that it's much easier
to remember.
In the case - well in the case
of what we already have here, the frontal,
it's easy simply because it's in front.
These other ones
are a bit harder but if you look up what
the translations are
you'll see that it's actually become
sort of easier to remember. And, you know,
it might make you embark on
you know, essentially
learning another language.
Both of anatomy and Latin.
Okay.
So now I'm going to
signify some of
these like
internal edges of changes in plane
right there on
the parietal bone up here.
There's something called the parietal eminence
and it is the widest point of the cranium.
And so that would be an important
element to put on the page even if it's not
as obvious from your angle or
in conditions of light that you happen to be working.
in.
(drawing)
Now here is the actual, sort of the end
of the front
bone as it moves up here.
And you can see the bone behind it is
the parietal. It's that one and
it's on one side and the other.
(drawing)
Here there's this sort of -
there's this kind of a dip in the frontal bone before
it moves up to the highest point in the skull.
(drawing)
Okay.
Now I want to signify some of
these areas, some of the ones right here to give this - pull
this whole area out a bit before
it moves up
into the zygomatic.
And to kind of continue that into
(drawing)
the sort of the changes of plane on
the mandible. On the jaw.
And if you simply sort of follow the contours
a bit, they can give you some indication of
where those changes in plane are for the most part.
Here continuing down to there,
here again. That might appear
as sort of simply a line,
the fact that it keeps
changing direction
should help you see that it's actually also a change in
form. Because there isn't ever a change in contour
without there being an explanation for that change in contour.
(drawing)
Which is the change in form.
Okay so, a little bit
as well. You always sort of
want to be thinking of this whole area, for the most part, is divided into
(drawing)
the part right here that's in front and
the parts that begin to sort of - to
curve off - okay, so you want to be thinking of
where the front of the skull is and where
the side is. And this
line right here, this sort of protuberance
is a good indication on
the skull of where it is.
And then you kinda can continue it
down here, that would be - and
in our case you can actually see a little bit of -
you can see that our light is hitting the front of the
skull and then right here you begin to get that terminator which, in this case,
indicates kinda the beginning of the side plane. And the same here
like some of the shadows here are indicating
the sort of - the change from front plane into side plane.
Now in a head, of course, this whole
area is filled in. But from here to here -
but the beginning here is essentially
is that sort of turning
point between the front plane and the side plane.
So you might as well
put it on the skull. If you can see them
on a skull, you'll be able to see them on
a head. It's the importance
of really, really having
an understanding of where the bones are and what they are
and what their shapes are and what they're called.
(drawing)
Okay so, here we are. We kinda have
this also, of course,
I'll just write - this right here, that point where
the bottom of the jaw begins to turn up is simply known as the
angle of the jaw.
And is also
an extremely important point and one which is, of course, easier to see
on the skull, but harder on
a head. So
we'll slowly, like, add
these points into
our vocabulary
in order
for you to start thinking about all of
them and then I assure you it'll be considerably easier
to pick them out of a human head, exaggerate them,
accentuate them. And honestly, even like, a lot of the
times if you don't know where they are, they might not even stand out on a human
head.
But if you know that they're in there
you'll see that they kind of just begin to
appear. Okay so now
with some of these lines
it'd be good to go over and make some
corrections. But as we
kind of began
to understand in the previous
course, a lot of the times you can't even
pick out where you're off
until you move on. And by that
I mean moving on into our
shadows.
(drawing)
So I
think for the most part
I like where things are right now.
The one thing I do wanna
add is that if you've noticed I'm ignoring
(drawing)
the teeth. And I advise you to
do that as well because I think
it's easy to get caught up in teeth and start
counting them and start outlining each one, not thinking
of the teeth in relation to the areas around them, as well
as in relation to the whole head. So you'll be able to
put them in as you go. Right now
it's not as
important.
It's more important to just establish
the, sort of, the - establish
where they originate
as a line and then
kind of just think of them as a mass, a solid mass.
(drawing)
And then begin to indicate
where the top row overlaps the bottom row.
(drawing)
But always keep going back to your alignments. Like
these points, establish them on
that side, go back over these. And the important thing about the teeth actually
is also that they have to be aligned. And it's not even
so much that you're just sort of observing
and taking in everything that you can, even though that is important, especially if you don't. have experience
It is important to simply just
observe and spend some time
with the objects in front of you, regardless of what they are.
(drawing)
But you also are kind of interpreting these things
and beginning to interpret them based on an understanding
of them based on
a structure. And it's okay
if that isn't something that happens right away because
chances are it won't.
But that's the goal.
Okay, so now that -
I'll draw an arrow.
So now that
some of these things are in place, I think it's time to move on into
figuring out where some of our shadows are to begin to further
explain the structure and
while we're doing that, we're also correcting our
outlines, correcting our proportions, and so on.
time to put in some of our shadows.
And we could of course begin with the
shadows that sort of
give a general idea of the form of the skull. And if you
remember, kind of begin to place these terminators with almost
a hatch so you begin to
apply the half tones coming off of it -
(drawing)
begin to imply them
but the key is not to
sort of over accentuate some of
these shadows that give you the form
overall, even though of course you need them.
But the more important shadows are going to be concentrated on
the areas here
because that's what's closest to you and the thing that we're going to accentuate the most.
So always be thinking of what's the elements that's closest
and that's where your contrasts are.
So for example here
(drawing)
remember to differentiate between your
core shadows and cast shadows. Kind of already be
a little more organic
and as you go, kind of begin to
correct. Here you have a cast
(drawing)
shadow
into that hole over there.
The other thing that's important is to not to
over, sort of, accentuate the cast shadows inside
the orbits, inside the cavity here,
it's important to not - like, you should still put them
in but the key is that the structures that are
casting all of those shadows
are more important than the cast shadows
themselves inside. Because otherwise you'll
just have a hole that will take too much, sort of,
attention onto itself
and that's not what we need.
So now we can kinda get
I think a little more specific, sometimes come in with an outline,
the end right here, just the end
of the frontal bone,
a very important element.
See like even just getting a curve in there
gives you an end to a structure here and pushes
that structure out.
Then when we're here
you see that little bit of that terminator
and then the - this is still the frontal
bone, so that's more important to accentuate. It's more important
to get the end of it. Then we're
here.
Just begin to place these things. See like,
that's possibly not what's actually up there. Probably
this area of the frontal bone that's curving in
is probably going to be catching some
reflected light into it and because of that be a lighter value than
the cast shadows inside. But that's not what we want
right now. You might want it
in some parts but we'll get to that.
Not right away.
(drawing)
And then just get some of these outlines,
but more specific. Here, on that
nasal bones, these two small ones that are
making up
this area, you will see
of course the terminator and then the shadow itself.
(drawing)
And, like, in some cases here
the form is, like, that much more important
that even if - even if there's a
gentler curve out, in a way that it's harder
to tell where, like, a cast shadow ends
and a half tone begins from a
form overlapping it, that you
might as well just continue with
a tone in that area without really differentiating.
It's more important to establish a curve
with whatever tone you have than it is to
really
spend time in those small areas thinking
about the exact -
like what kind of a shadow it is and if it's a half tone or if it's not.
And you'll see that once you put it in it's actually then easier to
go back into it and
make that distinction.
So what are we doing here? Here, we have a ridge
the same ridge that we have over here.
Use your eraser to get these things
out and clean.
(drawing)
And then from here,
all of this
is already sort of beginning to turn into the side plane, so we might as well -
there are, of course, distinctions inside. All of these areas
that are hole here, here, the
same sort of thing applies
as did to the orbits
and the cavity over there.
You don't want to - you wanna have them in there but they cannot stand out
as something that's overpowering
the forms of the skull.
(drawing)
And then maybe a little bit of work inside those
areas of
shadows to show the forms within the shadows. And I know
that there's sort of a common understanding that you don't
need to overemphasize the form in the
shadows much as you do in light, or on the edge of light
and shadow but considering our main concern here
is structure,
it's sort of unavoidable.
Let's see so I'm just gonna place all of this
into the side plane. Even though there's of course a lot going on
in there. And then right here you can
begin to see, of course,
that's clear half tone but it's turning away
and we need that in place.
(drawing)
Now to get - now keep in mind you're going to see
some of these shadows in the orbit on the
sort of on the other side of the head. But even
in that case, even if you see them as a darker
value than the orbit that's closer to you, you don't want to do that.
You want to always keep coming
back to those elements that are the most important and making sure that they stand out, that they are the
contrasts.
(drawing)
Now
if you happen to have
one of these sort of pencil,
kind of
mechanical pencil erasers or whatever they're called
you can use them to get into some of the smaller
areas and sort of carve out
in there and
I've always seen people in my classes have them and I haven't ever
used them, I would just always cut my eraser into sort of
a shape that I needed. And even though I haven't ever -
I always see people in my classes have them and use them and I'm always
rather envious. I, for some reason, I never went out
and got any but I've decided to use them
here and give them a shot.
Because there are a lot of these sort of small
areas and small sort of
tiny changes on the
on the -
in the half tones that it's just sometimes
quite helpful to have a small eraser.
But it's not the end of the world if you don't have one. As I said, I didn't have one until
just a few days ago. So here I'm gonna
place that half tone along that plane that we were talking about.
Here - along that plane that's
beginning to turn off before it hits that edge,
that really like pushes the form into the side plane from the front
and so even though that's totally half tone, but I feel like it needs
to be in there. And see - and a lot of it is still kinda -
it's not really
precise. I'm just sort of beginning to
add things into it that become
more and more specific as we go.
And so the question is what - then after
you get to a certain point here
what do you really spend your time on?
And the answer is, these parts that are closest. So
like that's where you really want
to focus all your attention and begin to introduce
detail and
more accurate analysis of
what's actually going on there.
You wanna
begin in those
places.
Of course, the hard part here is how to spend time
in one area but then not
get so caught up in it that
the other parts are just
totally incomplete. And
I think you'll see that the answer is
that you spend a little bit of time here, you always keep coming
back to those areas but then you sort of
spend some time working a few other
parts but then you're always sort of coming back into these areas
that are of primary importance.
I'm not at that point yet. But as you see I am just sort of moving around the head,
adding sort of slightly more accurate outlines,
adding -
(drawing)
putting some of those important shadows in.
(drawing)
And when you do begin to put in some of the teeth,
the important thing is you're working off of this line
that, as you see, I keep having in there
my sort of - like the line
that divides the head into
two symmetrical segments. One on the left, one on the right.
And you want to have them - you wanna have
that line and keep bringing that line in, that line that you
kind of began to put in with this concept of
facial angle.
The one from the outermost point.
Up here to the outermost point there.
And so
that line's always coming in and out.
And becoming more and more precise. You need that
line.
(drawing)
So here - and so when you're putting in
the teeth, you're working off of that line. Even if that's not exactly
what you see in front of you, you know, you put the
two teeth in front on
opposite sides of it and then
you work on one side and then you work on the other and so on.
Because you want to keep the skill symmetrical and even more
symmetrical than it actually is. Because in reality of course it's not
perfectly symmetrical.
(drawing)
Okay so here we are.
Now I'm going to - and I think right now it's time to focus
on the zygomatic process
of the frontal bone,
these areas right here, these sort of
protrusions above each of the
eye sockets.
(drawing)
So
(drawing)
see I made that a
straight line but it isn't. I'm gonna go and correct it.
(drawing)
And here is
the time to really begin to push that terminator
and make sure it reads.
(drawing)
And here you might even like, in some cases, introduce
like kind of internal contours of the end. I mean
the internal, with respect to the skull
in its entirety, but of course they're external with respect to
an element of a bone or the
entirety of the bone.
(drawing)
Now and there's probably a lot that you're going to be picking up that's
rather sort of small.
and I must say at this point rather inconsequential. Of like these tiny
like these tiny changes,
tiny dents and protuberances and so on. So you
want to not really focus too much on them and get -
squint and get sort of larger elements
of the planes and the forms.
(drawing)
So this right here is clearly half tone
and it's important to have it as a
half tone because it's already begun to turn from the front.
So you're always sort of
thinking about what is
the front plane
and then at what point it really becomes the
side plane. And that is an important
area. And you can see that
in our case and in almost
all the cases, that edge is a
actually the element that is the closest to us.
It's this right here. And so
that's the interesting part.
By working here you're kind of killing
two birds with one stone a little bit. You're pulling out the thing that's
the closest, emphasizing it, but you're also
emphasizing a major
movement in the structure of the skull, a major movement in its -
in the form. So here
I'm - this part,
the coronoid process, it's this right here, this sort of
area that comes out. And see
the areas that I have
like I am bringing a light into these areas that's stronger than
the light that I see. By erasing out,
it's as light as some of the highlights
and lights that I have up there. I will
remove that. I mean I just want them in there and that's why
I'm erasing them
but I haven't yet
compared any of that to the
overall situation of light in the skull. Here there is a light,
a bright light, that's
being caught on
this part coming out, the
part that has the actual temporal - like the
bottom part of the joint. The
temporomandibular joint. The one right here.
(drawing)
Okay, so
now I'm gonna go back here.
and do some work there.
(drawing)
Now I'm gonna be placing a little bit of a cast
shadow underneath the zygomatic only
in an effort to pull out the zygomatic a little more.
Now of course the problem right now that I'm beginning to see is that
the cast shadow inside
the orbit isn't as dark as it needs to be to
really pull this out. So see so I'm not so much thinking of
what it is on its own. It's like oh so the
tonality of that in relation
to
the tonality of things around it I'm more
thinking of as a contrast. Thinking how dark does that need to be
to make this whole area look as prominent
as I want it to?
(drawing)
See so that kinda begins to help with that.
Now to get into some of these.
These sort of smaller changes
along the form.
(drawing)
Smaller changes.
Hatch. I'm not talking as much about some of the things
that we discussed in the
(drawing)
earlier course
because I
think that you probably already have a grasp on it enough
to focus not so much on the individual hatch marks
or like actual technique of the application
of the pencil or what not and it's
now more about what's really happening in front of you.
And see and I'm -
this is your -
this is your core shadow, that's your terminator
and that's your cast shadow. And it can be quite small
but all it happens to do is your cast shadow's falling on a form
that's just slightly up
but remember for a shadow to read like a shadow
it needs to have all those components.
(drawing)
Now here
the tooth that you want to of course focus on
in this case, going by
what we've already spoken about, is
the canine right here
because that's the one that's falling on the change of plane here
between the front and the side and
that's the one that's gonna have the most obvious terminator
and that signifies your change in plane
from that you can just pulling them all away.
(drawing)
As you see I haven't done a lot of work
on the other
zygomatic bone.
(drawing)
I'm going to tone down,
push this area of the orbit
and a little bit here to show the
end of the nasal
bone as they move up. Wanna have them there
(drawing)
and here too right? They're major
change in plane between the front and the side.
(drawing)
A little bit of a light on the edge there.
Okay so it's beginning to sort of
beginning to appear a little bit.
But in a way that's not as
clear cut as some of
the stuff we did previously.
It's not so obviously
starting
with all of our shadows and then moving on to the half tones,
it's more about
the individual changes
in the structure because of that
the half tones sort of begin to play a larger role.
Especially because this is
organic.
Though, if you look at the things I'm doing right now
I'm just sort of establishing a larger area
of shadow. Because we still need
that distinction between
our half tones and shadows. Now here
(drawing)
the - there's a tone
that's very important and you wanna take that all across.
Also kinda want to find a little bit of a half tone on the
area of the glabella itself. It's a
major -
an important area,
it's one that demands
attention. But then here
(drawing)
I want to
push this into this - the
part of the head and, of course,
the skull, that's kind of the -
is essentially the easiest to establish - in which it's the easiest
to establish a structure is up here.
And it's
very important to really get accustomed to
where these changes in plane are
in the front bone.
Because they're easier to see on a skull than they are
on a head. But they're not actually
that hard to see on a head either. And it's a
place that I often see if kind of
overlooked.
Which seems kind of, slightly,
it seems to me slightly
counterintuitive because if you do have this area that it
has - like you have the ability to
structure as much as possible
and it's as obvious as it is
and that needs to be
something to think about when working on a head
(drawing)
You need the structure of the
frontal bone. And a lot of times
the advantage of having sort of
a skull
sort of memorized is that
even if something isn't that
obvious on - in a human head if you're working on
a portrait then you can just sort of revert back
to your experience of
the skull and the particular
sort of aspect of it and then you don't really - you don't actually
need to observe these things happening in a human
head, you can just sort of put them in as if you were working on
a skull based
on your - what essentially amounts to is
imagination. But
imagination that is based, of course,
on your experience.
(drawing)
And I'm just gonna tone that away a
bit because i need to show
these areas
as having the larger sort of areas
of light. They're more
frontal but then of course because I tone this down
I'm gonna have to go back and get
a tone in there.
(drawing)
Remember that parietal
eminence.
(drawing)
Even if there's a tone there, you still - it needs to -
this sort of parietal eminence,
it's an important point because it sort of - it's
signifying the beginning of where the
side plane begins to turn into
the plane of the back.
Just gonna
clean up my page a little bit.
(drawing)
And clean up some of these
contours.
Here too, you need this half tone to show the front plane
of these areas of the chin
as they turn it
into the side. At the same time of course, this is half tone
and then there's a cast shadow from everything up here onto it.
So they're kind of slight distinctions but they have to be made.
(drawing)
Now the areas up here,
the ones that we need to
focus on right, if I draw a
very sort of simplified -
(drawing)
Simplified frontal bone.
(drawing)
So this right here right and I'm
on the other side as well, these
protuberances are known as the
superciliary arches.
(drawing)
Now
hold on a second.
these protrusions
above each of the orbits are
some of the important elements in the frontal bone.
Up here is another
protrusion, known as
the frontal eminence. So up here
it's the frontal
eminence.
And the important thing is that -
I mean I've also seen that
it's, at times, it is a singular
protrusion known as the frontal eminence, but sometimes
it is sort of a combination of
two frontal eminences.
So that will
essentially simply,
it will depend on observation.
But at the like the high points - so this sort of
rectangular area signifying the front plane
of the frontal bone, you can
see where it is based on a line that
moves up from the highest point of the
superciliary arch and goes to
sort of the point of the frontal eminence or
the entire frontal eminence or each one
where it - the form of the
bone begins to turn away, off
of these lines. And so
regardless of whether
they're very obvious or not,
spending some time on them
is important because they are
important landmarks. And of course they aren't as obvious
in a head because these areas
are covered by
muscles. But they're -
usually they're not,
they aren't sort of
large enough to really remove the indication
of the superciliary arches or the frontal eminence.
(drawing)
And
obviously if you're working on one, then you're also working on the other.
Because all pairs of elements
should essentially be worked at the same time.
You can see a little bit of a tone there.
And then here you can begin to
get some tone on
the front plane. Even though of course it is the front place and it can't be a
tone that's too heavy, you need it so you can
show the change in plane between
this area and then sort of the
change in plane up -
of the superciliary arch.
And then
what's up here is you also want to
begin to tone away the top
portions, the portions where
it begins to turn away
into the top plane. And, at least for the moment, just
establish that highlight simply - almost as a
change in plane. And it is on the frontal eminence.
In the case of the skull,
it's somewhere in between two distinct frontal eminences
and a singular.
frontal eminence. So
you're gonna have to kind of think of it
as a form that's slightly divided into two.
(drawing)
I'm beginning to
round everything off but of course as you spend time rounding things off
and getting them more organic, there's a chance that you lose that
planar structure. So you don't want to do that
and you might wanna go back and reinforce that planar
structure.
Now it's important to really
establish here that sort of, that whole -
this sort of empty cavity.
It has a name but I think we've had enough
names for now. But you want that cavity
and you see how there's a
muscle that goes
into this cavity.
That sort of makes
all of these areas not as obvious
on a head. But it's not
but we're gonna be going over that
soon.
I've switched to a pencil that's a tiny bit
harder and you
could, in order to get some of these half tones that are a little
bit lighter.
(drawing)
Now here you have
a bone
inside, it's one of the bones of the skull, it's not particularly important -
I mean it is, it can be -
known as the
lacrimal bone and there's one
on each side and
it's important enough because it creates that
sort of the inner part of
the orbit there. So I'm just gonna hint at it slightly.
It's catching a little bit of light also.
So if it's catching light you might as well use it.
(drawing)
And then the hard part is
really making this cast shadow
ready like the one inside the orbit.
read like it's clearly a shadow but at the same time, as I said, you don't
want to take away from these forms. So any time you spend too much time
on it, always step away
and reassess.
(drawing)
There's a little bit of -
there's a light right there that
a notch
up there, a notch,
it kind of - it's a good
point to use because it sort of separates the superciliary
arches, you can follow them
upwards and around and kind of separating them
from this edge, from the upper edge
of the -
on the eye socket.
And also a harder pencil, you know, can give you
a little more control for when you want like a wider
half tone over
in an area,
like a little more control of what the shape of that
half tone is and so on.
(drawing)
So I'm really
getting into this one area.
That's the area I want to focus on.
(drawing)
Really getting into it - and you see I kind of -
I've almost like pushed that too much. Like it's too dark
and at the same time it needs
to be in there. So I'm just gonna go
and tone down some of these other areas around it.
(drawing)
Just to get it - I mean it's okay
if you push all your, if you push
the tone a little bit more than maybe you need
in an effort to
show as much form
as possible. Kind of okay with that and I mean honestly
you can go
back into some of these areas and bring them up if you really need to.
(drawing)
I would
rather have an excess of
structure than not enough of it.
(drawing)
So now I can keep going into this.
And what you really want here is a lighter
half tone
right around
the part that is sort of catching the largest amount of light
along this edge, along the
frontal process of the zygomatic.
And I hope by now you're
beginning to sort of catch
onto all of those
all of those
terms and hopefully
not be so afraid of them, if you were.
(drawing)
So now
to go into some of these
half tones on this plane
of the
(drawing)
zygomatic. It's important also - so like
of course there are some elements of construction
that we're going to talk about. Some
elements
that you -
that kind of, that you can see
repeated in
every
skull and every head, kinda like the stuff I was talking about
over there. But at the same time I'm hesitant to offer sort of
a general
structure overall that applies - kind of
applies
to every skull that you might run into or every head.
The whole point, and the whole point of this approach, is that
you kind of, you keep these things in mind
but you're still working off what's in front of you. You're still analyzing
what's in front of you. You're still observing.
(drawing)
It's always kind of a
game. You know like there's a certain
part that you sort of are able to
do out of your experience.
And out of your understanding that you
don't want to
not be observing. You don't want to get caught up
in things that you - like you don't
wanna get over confident. You still
want to
remain impressionable.
Hmm now see I pushed that
a little bit. And I feel like
it's kinda overpowering. It's flattening out the zygomatic
and if you look at the zygomatic on its
own, it is sort of flat but there is that
important change of plane there and you don't want to
like even that out. You want to
exaggerate it.
Now from here, let's just complete
this part of the
bone here, despite the fact that from
here it's in shadow, you still want to
have it. You still want to have it end.
And, you know, the interesting part if you've noticed
is you still don't have any of the teeth.
And honestly I don't know if I'll have them. I don't think they're that important.
I mean
they obviously are,
if you're eating, but in terms of our sort of
analysis and the
time we're spending getting accustomed to
the forms of the skull
we're - simply getting accustomed to
just almost any object, there are certain things
you could omit. And honestly you almost
omit them for the purposes of your
education.
They're certain things that are, kind of
take your attention away
from what's most important. And only after you
have like a real, solid understanding of what's
important, then you'll see it's not that hard to add them in later.
(drawing)
See so
I'm still, I'm focusing on these areas, these important ones,
I might just go in and
kind of push some of those
small
structures that are, for the most part, observed,
and remember to take time
to step away from
your drawings and
view the whole thing.
Well I think
I'm going to just
push this all away again.
(drawing)
And even here though, this is
the next part, this upper,
(drawing)
upper ridge, right
above the teeth
needs some work.
(drawing)
You need
some specifics. And
I'm also going to get into here
(drawing)
I'm still here.
I'm going to get into
(drawing)
the bones of the nose.
(drawing)
And remember that every change in contour,
and the skull offers a lot of internal contours, is
a change in form.
(drawing)
Push this a little bit. And then
here, yeah. So the hard part here is to
begin to treat the
cavity in a similar
way that we treated the orbits.
Here though inside you can begin to pick out the change of
planes inside but you can't overemphasize them.
They have to exist but not too much.
(drawing)
Remember to go back over the shape of the nasal cavity.
(drawing)
Some places you might
want to introduce a line to really
clearly place it. And then here - and
obviously like if you're already here, you might as well spend
a little bit of time working on the -
(drawing)
working on the other socket.
But keep it light.
Keep it light.
(drawing)
If I step back I see that there are some parts
that are still feeling a little bit confused.
And that's because there's not enough of a sort of a distinction, a contrast
up here, up close.
Even in here but you want to
emphasize where the front
plane is and then, you know, I think
it's worth spending a little bit of time on a side plane, even though it is
kind of in a half tone
there's a little bit of light.
Oh, this eraser is fun.
This eraser smudges a bit, I'll switch to a different one.
You don't want the eraser to smudge.
(drawing)
And then to kind of just
continue with some of these things right here.
That terminator, that actual, like that -
the full terminator. But it's not a very large area, there's a lot of reflected light.
(drawing)
Cast
shadow's down there. You want that
shadow on the mastoid process
And here I'm just going to kind of
move a tone into there, very
lightly. Just kind of off the
page
a bit. You don't want to overemphasize. But see, by
working inside the form I'm losing a little bit of, sort of, the outside.
I'm losing that edge. So
we're gonna have to put that back. And
even here, there's a little bit of a cast shadow. This doesn't
belong to the skull, but I don't think...
It's just on the
pedestal that it's propped up on but
like introducing a little bit of
a background in those areas
can help because it gives you a tone but
it also, it keeps
these areas of the skull, which
from our angle are not that important,
it keeps them from overtaking.
Because you don't really want
the contour to overpower, sort of,
overpower
the form. You do sometimes. And we'll
get to that. But it's -
but at that point it's kind of,
it's more about the - just sort of a stylistic
quality than it is about an analysis
and depiction of the structures of the head.
(drawing)
At the same time you don't want to lose the contours entirely, as I
almost have.
(drawing)
So I'm gonna go back over them
(drawing)
as a line. I think it helps a little bit, kinda just
locks these things in place.
I'm gonna clean it up a little.
And I kind of urge to not to keep, sort of
cleaning up the contours and the
page and all of that.
And as you're, like
at all points in the process,
I don't think that's something to keep
until the very end.
(drawing)
It's kinda part of that whole thing that I was talking about,
where you want to
you want
kind of jump
ahead in order to then
pull back a bit.
(drawing)
So I'm just kind of working
all around. Rounding things off
in the back here. Kind of
thinking a bit more of the skull as a whole, as opposed
to individual parts.
(drawing)
Here there's an interesting thing you can
see the end,
the sort of the top part that's sticking out of the
temporal bone. The one that's here.
This top part, known as the
squama. You wanna -
and I'm just gonna - and it -
I'm not actually entirely sure if that's a detail that's
very important. But I'm going to add it.
(drawing)
Gives it a little bit more character.
(drawing)
And then of course it's not as light as that so then you can tone it
all away. And this right here is still a little bit
light, I feel like we need to tone down that reflected light. It still needs
to read like reflected light but can't be
overpowering. But then here you have
the bone in the back, known as the
occipital
bone with its own protuberances.
And those
protuberances are going to give you
(drawing)
sort of the elements
like the correct sort of placement of the,
of your reflected lights there. Now
from this angle we obviously don't need to focus
that much on the occipital bone.
(drawing)
And I feel like
still like I can push that terminator more now.
(drawing)
this part that I put in here,
this small detail, that
is the
inferior temporal line of the parietal. And
right here
is the end of the temporal bone
and the end of the top part that's known
as the squama.
And now these details aren't
that important
in our current
depiction of the skull but, you know, it won't
hurt to be aware.
Now actually though in this
I'm not actually entirely sure. This might be the
superior temporal
line as opposed to the inferior. It seems like I can see the inferior
here continuing from this
area, which is the temporal,
this is the temporal
line.
And you can see it continuing into here. Now I'm
not entirely sure but
it's not
that important.
This part is of course. It's
sticking out and casting a
shadow and is also that sort of important point
at which our
skull sort of moves from the front
plane to the side plane. What's happening on the side here
is not so much a
description of any
structural elements as much as it is
simply an interesting
detail to add to kind of
make this just that much
more interesting.
Here we can be rather
clear about the
end of the frontal bone.
(drawing)
And then what do we have -
go back into the mastoid process.
(drawing)
I think maybe it could be
some time to put in some of
the teeth.
So in this case - see
once there, for the most part, in place
then it's so much
easier to kind of just
establish their outlines.
(drawing)
Because you already have a place for them.
(drawing)
And then on the bottom
row is important but even here
the canines on the bottom
are the ones that are going to give you that turn
as well as the forms
that continue underneath that are inside where the roots are.
More importantly is
the edge.
That tiny bit of light there before
the tone
and then
here we're coming back out on this sort of
triangular
area that sticks out, known as the -
known as the - I'll write that one down, it's important - known as the
mental protuberance.
(drawing)
Protuberance.
And these tiny parts on the side are called
mental
tubercles.
And so kind of just feeling this
the entirety of the shape. Because
it's going, that also signifies a change in plane.
(drawing)
Even out that
tone there on the side. And you know what? I think though, after
all the stuff that I just put in
you put them in and you begin to see that you're
actually a little bit off. I feel like I don't have enough
in a distance. You know I like to point out that
everything is in constant flux here.
Raise that ridge.
Alveolar ridge where the teeth -
where you can see the teeth
at their origins and
I'm gonna cut them a little bit
and move up the lower row
and just to take the
angle from the outermost part
of the teeth to the mental protuberance
and I actually think the chin
comes in more.
(drawing)
Now of course
that changes some of the other things here because it makes the front plane way too small.
But that's fine, then you move it from there, you change
your central line immediately because that's one of the more important things.
And see that would be a thing to
try to get right straight away. It seems important
enough. But at the same time if you don't, as you see it's not the end of the world.
(drawing)
This whole process is the process of
correcting your mistakes.
(drawing)
Alright so
(drawing)
that's what the issue - that was the
issue and see so that's a
reason, that's proof of my point
that don't start putting in the teeth until you get
the place for them.
Proved that on my own
example. So
it's important to try to see
this line coming
(drawing)
out of it more because it
affects the form of this area.
(drawing)
I think we're closer now. Okay, yeah.
I like - it's always
interesting when you're
when you find
that something went wrong and you
correct it and things just really begin to click into
place. It's a good
feeling. It's almost
more enjoyable then if you got it right from the start.
(drawing)
It's kind of a hunt.
(drawing)
Just putting a little bit of cast show from the upper row onto the lower.
And at the same time,
getting that ridge
even as it moves into
those areas of shadow, remember you can
always tone it down later.
(drawing)
Alright so, one thing that I did omit
and you're kind of not going to need it in a real head as much
or in the same way, but I'm just gonna place a little bit of that
cast shadow from the skull onto the table
because you still want it to have
weight. You still wanna see where
that line is, where that occlusion
shadow, if you remember, is going to be.
(drawing)
Now I'm gonna get up here a little bit more,
begin to get some of these
more
gradual changes
of the frontal bone as it moves up
upwards,
continuing this. You still wanna -
you still wanna keep in mind that
eggshape in a sense of the whole head.
(drawing)
Accent that
edge. And now that things have
come a way,
a relatively long way, it's time
to spend even more time
stepping back and analyzing
(drawing)
Now
have to kind of get into the specifics of the
superciliary arches. And even if you don't see
a very clear edge,
for example like the one I made right here,
it's okay if you put it there because the point is to isolate a form
to get it on paper.
(drawing)
At this point I'd rather be
overstated than understated.
(drawing)
And I feel like introducing a little bit of a tone
for the background won't hurt either.
Especially up here. And see and
here is a great example of the thing that I was talking about. I kind of
overpowering of the contour up there. Don't think
we need it.
Can soften it and simplify it.
(drawing)
We can always put it back if we feel like
it's lacking
in just a
clarity of outline.
(drawing)
It's still a little
heavy but I'm gonna keep it for now and I'm gonna
continue with this
(drawing)
And then here too I will bring this tone
all the way
to the zygomatic on this side but I don't
want it to be too strong.
(drawing)
And see so it's already kind of, much
closer to where I want it
to end up but there's still plenty to do.
And essentially all it is
is taking everything that's already here and unifying
it, refining it, and then adding
important details,
which is all kind of going to be happening at the same time.
But that process
of unification is, of course,
something that has to be thought about regardless of
the object in front of you or if you're outside or anywhere.
I kinda
want to push this
background down there to give a little more
clarity of contour to kind of, to take that
zygomatic across
from one - like take that access across from one zygomatic
to the other.
(drawing)
This is currently in the way. It needs
to stand out as something that's catching a little more light of course but
not as much as that.
And instead to
tone it away -
to tone it away.
(drawing)
And then
to really - to get into some
more specific analysis of these
tiny changes in form.
But now I've lost
this part, the zygomatic process
of the temporal bone.
If you remember it's that part that's sticking
out of the temporal bone and is
aiming to connect with the zygomatic bone.
(drawing)
it's time to kind of,
to take a look at the whole thing and work to
get some of the gaps filled in, so to speak.
All at the same time
while bringing
more and more completion into individual
parts and details.
This is a good
area
to kind of think of the cranium
at large.
Connect these things. This feeling.
Obviously now that I see it as sort of a
whole this is feeling a lot lighter than it needs to be. We can kind of -
it's falling into our front plane a little bit.
Even this edge right here, as important as it is,
perhaps needs more in terms of the -
in terms of its, like the precise
outlines of it in part
(drawing)
but at the same time maybe doesn't need to be as bright as this.
It can use a little bit of tone
that you can just place very evenly.
Kind of a bit more of a painterly
approach, kinda just put a glaze on it. Almost -
or, if you prefer, thinking of it like just putting a wash
over it in watercolor.
I like to - I think it's important to kind of
to take elements that apply to
a medium, say like a wash in watercolor
and see how they might translate
into a medium like graphite.
Because a lot of times it's just a matter
of the proper vocabulary
to define the proper action.
That's
kind of what I was talking about when I said it's helpful to know the names
of all the anatomical parts
because if you have the vocabulary,
you have the concept. Or at least you're
that much closer to it.
And I kind of recommend that, especially
if you don't have too much experience with a skull.
Mainly because the more time you
spend with it,
the
more you'll
observe and
be able to explore.
And almost more importantly, the more you'll remember.
(drawing)
It's all a lot softer
back here. I'm still taking
care of that problem a little bit.
(drawing)
I like to
on this part of the occipital
there's a little bit more intricacy there
won't hurt. And see I'm just carving back into it even though
I placed a tone
on to the background there but I'm just gonna
put it back. So I've been spending a lot of time
working on all those parts that initially I said were not as important.
But there does come a time when you do have to
sort of pull things together. And
that's essentially a unification of all the parts. And that has to be
some sort of even amount of
completion over the whole, while at the same time
preserving a hierarchy of completed elements of
accented elements and so on.
I've made a bunch of
marks there on the page but easily
remove them.
You'll see that once we switch from
graphite to
sanguine
the process becomes
messier, a lot messier.
But also more fun.
So now I think it'd be nice to spend
some time in this area. You can see
that what was the center line is actually almost a ridge
and so at this point I'd rather
show that ridge with highlight
as it would give a greater
explanation of this form
(drawing)
And then here in general we can
tone down this whole side a bit because even though it is catching
light and if you remember
a lot of these areas that are actually in light
but are surrounded by shadows
like this group of shadows here, shadows inside the orbit,
(drawing)
they're surrounded by these
shadows and because of that strong contrast they look like they're much lighter
than they are. But then just a quick glance from here to here,
a comparison, will show you that all of this
can be toned back. Can be tones down.
(drawing)
Now
that we're -
I feel like it'd be nice to get a nice
contrast right in there once again with the same
idea as what I was trying to do here. To
pull out these elements in front
of it. Accent them.
(drawing)
Make sure they read as close
and then especially to get
the tiny edges
which you don't need right away, which at the
beginning you show sort of more as line anyway.
Now remove those lines and make sure there's
it's an edge with its own particular
width.
(drawing)
And you know - and there
are still some areas that
don't have any half tones at all up here
that we're gonna have to
arrive at eventually and we will soon enough.
Just to tone that down just enough.
But then all of this too. We can kinda just, without
getting too into it, just
to push it away. A lot of the time you
see that to get to somewhere
in those areas
the ones that are sort of
are far away and if you think you need to be a little more specific
get more happening there. A lot of
the time just a general, like a general
tonality in those areas.
and proper contours, some proper
outlines, will kinda be enough.
(drawing)
Then to reinforce
these outlines,
get a little more specific
there. And even here
where I'm seeing it, I'm seeing it,
it would make some sense for us to push the half tones inside
this orbit. They're not shadows, the shadows are here and right now I've evened out the shadows
and half tones. But just to get it
in there, just to have the
bones
up here a little clearer.
A little bit...
Keep in mind you're
always thinking in contrast.
You're never thinking of an individual value.
You're thinking of the values of an area
(drawing)
in relation to the values of another area. But always in groups.
(drawing)
And then down here
to kinda push that cast shadow
in there.
(drawing)
A little heavy but I'll keep it for now.
It might be alright. I'm gonna go back and just -
into some of these teeth, some of these half tones. A lot of the time you might
just kind of tone them away
and give them a little more structure
and form.
Give them a little more structure and form
with your eraser and with shadow
but you wanna try to get them into a half tone.
(drawing)
See and just putting in some of these details, the harder teeth
are the ones on the side, so...
(drawing)
I just at this point feel
free to almost outline them.
especially the top row. The bottom row
you can't see as well. It's more about the edge and then occasional
accents down there but...
(drawing)
And then the alveolar ridge
on top. Make sure it reads.
(drawing)
And then some highlights.
So see they kinda begin to appear and yet they're not
in the forefront of this whole thing. Which is interesting because
I think if you kind of just imagine
a skull or kind of
stereotypical
skull, like a simplified one on a
pirate flag or something like this
the teeth are sort of
extremely - like it's -
you can easily put in the teeth and it'll immediately begin to look like
a skull. It's sort of the core of
the imagery. And yet
here I am kind of telling you to ignore them.
That could be also
why people who -
why students with not a very large amount of experience
working from a skull kind of gravitate
towards the teeth,
the element that is
to them the most characteristic. And I agree, it is.
(drawing)
So here too I'm gonna kind of
just get it into a general
tone and bring out the light
(drawing)
on the
mental protuberance
(drawing)
with the eraser
and honestly a similar thing can be done up here
in all these half tones. You could, of course,
build them up slowly with your pencil without
smudging. I'm totally alright with that.
And that might even
in some ways be an approach that's
you know sort of
strictly academic.
Though I don't think think that
that's what
defines an academic approach.
I rarely think
that it's some kind of a
technique ever actually defines an academic
approach. I think it's more of a
type of analysis.
(drawing)
Okay so where are we here? Here there's -
this element is rather important, it shows a sort of
major change in plane at
the point right here and
as I said, the angle of -
as I said the angle of
the jaw is a very important landmark and so it needs to be
accented.
Coming back here a little bit to get
more
information underneath. Maybe a little more of that cast shadow.
One that might eat up some of the information underneath it.
Simply to have
(drawing)
these thing emphasized.
(drawing)
Kind of almost ignoring the bottom row,
teeth, except for the contour of them. The contour that overlaps
will give you a lot.
(drawing)
No that seems
a little heavy but once
again
what's the most that we can push to pull out the bones in front?
And if that is
a darker element inside, at least
the point is not to, sort of, just
tone it very evenly. It's more about, like, you can make it an accent but it can't be
the entirety of a whole
like here, right. So here if I just
emphasize a little bit more down
here then this continues
over a little bit.
(drawing)
Now I'm gonna go back up here.
and make sure
it really reads
In the skull we have in front of us, these elements that I spoke about
over the frontal bone are not as prominent as
I've seen them on some other skulls
but we can
almost exaggerate them.
(drawing)
It makes some sense to tone that down
(drawing)
and this
part the
frontal,
(drawing)
the zygomatic process
of the frontal bone on this side has to be a little more intricate.
A little - not a thick line.
And with
an extend out of that, you follow these changes
along the outline to get you where
you need to go.
You might even keep it as a -
(drawing)
you might even keep it as a
contour if you have the contour
correct and it is describing the forms
without too much internal overlap.
(drawing)
And then toning it back just a little bit.
(drawing)
And see at the same time I'm trying to get it to be a characteristic skull
like I'm using what's
in front of me.
And the whole point of course of this is that you're also,
like you're also just
committing parts of the skull to memory.
(drawing)
I'm going to just extend this out to make
it a little more even, a little more solid.
I kind of even allowed the tone to penetrate
and enter that side of the skull
even though it might be catching some light. And if you need like
an accent of light in there you can always put it in.
But at the same time,
maybe you just don't need it there.
It's kind of an exaggerated
atmospheric
perspective. Which of course is not actually happening in this room.
(drawing)
We're not outside and these aren't hills or mountains but
at the same time,
it's still something to
play around with, to really sort of -
so you can see the advantages of
the advantages of and
plays in which you can
draw the viewer's attention to
parts of the piece.
(drawing)
This whole thing is kinda about control.
(drawing)
And it's
sort of about you figuring
out as much as you can what really
interests you in the objects that you're observing.
And you might be aware
of that. But then the step
that comes after that is how do you make others interested in those things.
(drawing)
That is the point of
composition.
(drawing)
Okay so I think that in
the skull here, it's of course possible to
take this
to work on this for longer and complete certain parts
even more and even certain other
parts out and exaggerate
and accentuate
important anatomical elements and points of interest.
I think it's a pretty good
place right now to kind of think about
what we need to do to complete this so
I am just going to kind of
scan the head for small and interesting
highlights, intricate ones, that will -
and scan
the whole thing for elements
that are repeating and
kind of remove those repetitions.
Remove those repetitions. And that goes -
and that's a tonal
aspect of
this as well.
And push and pull even more.
(drawing)
This right here is feeling a little bit too light
because I want this edge,
the inferior edge,
of the eye socket to be more prominent
so it can show that highlight on it.
(drawing)
So right now I'm kind of, I'm going over the whole thing.
Placing accents where I can,
(drawing)
where I think they'd be the most useful.
(drawing)
In the process of working on this skull you've
kind of done a few things.
You've gotten acquainted with this
extremely important and extremely complex element
of the human body
and you've moved
onto organic objects
while
still thinking of them as
structures in space.
So a lot has happened.
(drawing)
I'm gonna clean this up a little bit.
(drawing)
And I still feel like
I can have
more accents
(drawing)
to continue with that
tone that'll
kind of move our attention
away this contrast of the back of the head to the white
of the paper. You don't
want that to be the first place
you look.
(drawing)
Also cleaning up some of
the edges,
(drawing)
reinforcing important areas. And remember
you can kind of reinforce an area with a sort of an obvious hatch for
example
That helps. It's not always
about the accurate
tone and sometimes not about the tone at all. Sometimes it's about the handling of the
media. You have to use everything that you have.
So here for example
a few, sort of, important
hatch marks are going to
play a role in how
completed this area might look.
And see - and
now with this side of the head kind of
disintegrating a little bit into the paper, this side of the
head disintegrating a bit but coming back into a contrast
up here and these contrasts finally beginning to
sort of to play their most important role, I think
now I can
say that
there's a feeling of completeness here
that was absent before.
(drawing)
Always a good thing. And you find yourself, like the closer you are
to completion, the more time you spend sort of away
and at simply analyzing,
thinking. In order to complete
(drawing)
a drawing
or a painting, you find that
a lot of the times you need
to spend
more time simply just thinking,
figuring out what needs to happen
and then the actual execution of this is
easy. It's usually a hatch mark or
a slight change
(drawing)
but it's not a lot to
complete something. But it has to be deliberate
and calculated.
Now I say that but often
there are times
when if you just think about it enough
you realize it's already done.
But the whole point is to really
begin to realize this
you need to spend more time away from the work
than you might think.
(drawing)
I apologize I'm not
explaining what I'm doing right now but it's kinda just
more of the same.
It's just a matter of
placing those important accents, those
elements that are really going to add to
the completion and completion is all about
a hierarchy of elements.
Now I have to go back and clean again.
Always the issue.
(drawing)
And now I just feel maybe a little bit more
down here to emphasize that frontal eminence.
After all the other
tone that I was putting here
felt like maybe it wasn't enough.
(drawing)
All those same things we've been
talking about, just reinforcing them.
Alright. I think
we're good. I think we have
a relatively completed
sort of, I would say,
I would say
a highly developed
drawing of a skull with certain important
established hierarchies of elements.
draw the skull. Using the provided photographs,
or a skull that you happen to own, do a completed
drawing of the skull from at least two angles, noting the
questions that arise during the process. I also want you to
prepare the notebook that I asked you to purchase and write down
those questions that arise, as well as some of the terminology
that we already covered. This notebook will serve as a good foundation for
your future studies of anatomy as well as for general
review.
study, let's cover some important
terminology. These terms will be repeated throughout the entirety of this course
and it will be very helpful, you'll see, if you familiarize
yourself with them in advance.
what I wanna talk about right now is some very
important anatomical terminology. It's not so much that
I want to immediately talk about, you know, the parts of a bone
or muscular attachments or any of that stuff. I just wanna begin with
just terms that will help us in
decoding some of the
anatomy that you've probably already encountered and that you are
going to encounter in this course.
So to keep it as simply as possible, I'm just going to make an outline
of a person.
(drawing)
It doesn't really matter what kind of person this is
but we just
need an outline and
a center line. We just need an outline and a
center line and so yeah, that's just a very simply -
I'm not trying to make anything of quality
at the moment, I just want an outline for you to see
what I'm talking about. But I also want
one in profile.
So it's just a kind of
sort of simplified outline of a person from the front
and a person in profile.
(drawing)
And I'm just going to
take it all the way.
Our profile person doesn't need arms.
We already have arms on the ones on the front.
On the one in the front. And so
the main thing that I want to talk about now is orientation.
So it'd be easier to find
where things are based on their names.
And the first thing that we need to understand is the word
anterior, which simply means it's in front.
So anterior means
in front. That's why
I put it in front of our profile
person.
And so -
couldn't
help myself. Had to correct the form of that skull.
Okay, so. Anterior is front.
Now if anterior is front, then
the next thing to think about of course is the back.
And the next - and everything that it's in the back is now
the posterior. Is the posterior.
Everything in the back is the posterior.
Which means the back.
So
you'll encounter these a lot because they'll tell you
where something is.
It's either in front of the
body or in the back of the body.
So if it's above, it is superior.
So that means
above. You're gonna encounter that one a lot as well. Now
if it's underneath something then
it is inferior. It is below
or underneath.
So that already kinda establishes overall
orientations. Except
can I just add just a couple of
important anatomical landmarks here
on this schematic man.
I imagine. So
that center line's very important.
We can call it
the middle line as well.
The basic idea is that everything that's closer to that line is
medial.
you're going to write down the anatomical terminology that we covered in this
lesson and memorize it.
apart, quite literally, and see what it's made of. There's
a lot to cover here but this should give you an idea of how we're going to proceed
in our analysis of the skeleton. I'm also going to introduce a
tool here that you will have at your disposal: the New Masters Academy 3D
viewer that comes with premium membership on New Masters Academy.
If you do not have access to it, that's okay, but
it's essential that you use these and work towards internalizing
all of this information to develop an understanding of the human
body. So here we go, hold on tight.
acquainted with the skull, simply observing it, why don't we use
some of the resources that we have here to really explore it.
So what we have here is a cast of a skull
that we're going to be looking at. We have
a scan of the skull on the iPad
that you see here and you will be able to have something of the kind at home
if you don't happen to have a cast of
a skull like I do, or perhaps even an actual skull.
A real human skull, I think the scan
will provide an excellent opportunity for you to really understand it.
What we also have and what we're going to be using a lot of is
the disarticulated skull. And what that means is is that
each of the component bones of the skull, except
you'll be able to see them on their own. And we'll be able to take a look at them
analyze them, and pick out those important points
that we have to cover. So all in all the skull consists of 22 bones.
That does sounds like a lot, however,
let's make this a little
easier. So the first thing
to know is that eight of those bones are pairs.
So there are - so if you know one of the bones
in the pair, you know the other.
So now, instead of 22
we have 14.
That already sounds a lot easier, you don't have to have a name
for each of the 22. So there are
14 individual bones in the head,
eight of which are pairs, however, there are a few more
that you don't really need to understand in full.
Mainly because they're inside the head and
they're not going to contribute to the same extent as the other ones
to the overall structure, especially the structure that we're trying to
put on paper. And there are five of them.
And so, that already will cut down
the number that we have by a lot more. So say
it's not the 22, so we have nine.
Nine bones essentially that we need to concern ourselves
with. However, I'm gonna make
one more adjustment and I'm gonna say it's eight and a half.
And I'm gonna say that mainly because one of the
bones that we're going to be talking about is
primarily inside the head, with just a small amount on the outside,
contributing to the overall structure. And that
is why it's only half a bone. So
I'm gonna begin here to kinda just explain
just what are the major parts. We'll start to take down
the whole skull and, you know, divide it up
sort of piece by piece. And we'll start by
just simply dividing it into two parts.
And the parts that we have here
are found if you take that point from the
bridge of the nose and take it all the way down to the
opening in that back of the head. The part above it is the cranium
and the part below it is the face.
And we're going to begin
with the cranium. So those particular points
I'm going to talk about a bit more
in detail as we get to the particular areas
on the individual bones where those points are located so you can
easily understand them.
And so why - and the thing with the cranium is that
it's large and so the cranium is a bone that
is a part, that takes up a large amount of space in the head.
And the common error often is that not enough
attention is given to the cranium to really figuring out what the forms are
mainly because it's covered by hair,
it's not as interesting as eyes and all of this. But I have to tell you that
the cranium is of primary concern.
So why don't we begin with the first part. The first part that
actually on the cranium that you can perceive easily. And that
is - let's just put them in groups.
That is the frontal bone probably because it's the most obvious, it's
the one that we can all perceive on almost
in any portrait is the frontal bone.
And so let's
sketch this out in order to -
in order to get a better understanding of it. And so
what's important here is
that you need to understand the
structural aspects of it. Which means that you need all of your axis
you need to spend as much time with them as possible and work across the axis,
make sure everything is aligned, because
the kind of
work we need to do here is not simply observing
but it's a structural analysis. And so here
do keep in mind the contours are very important
but they need to be placed in accordance with
the structure. And so what will help of course is to begin with a little bit of tone
where you see it in order to allow that tone
to hint at where the planes are. And so here
I'm just trying to isolate where the front
plane of the bone is and where the top plane is and as you see
there's a structural aspect here that is actually quite
constant. And it's that rectangular
plane in front and
the sort of triangular
planes on top. Now off of that
rectangular plane in front, I'm immediately trying to pull
the tone to get an intermediary plane on the sides of the bone.
And then once the planes are in place, you can add a bit more
tone confidently mainly because you will have an area
that locks that tone in. And see so
even at this point, without getting into too much of the details
we already have something that resembles
the bone that I'm holding.
And
now we can just add some of the tone that's perhaps
in some ways more observed. I happen to understand what the structure is but we will be
we will be talking about it in more detail
and just go ahead and get those contours
a bit more accurate, establish where you have your terminator, where you have your
main core shadow and then push
the values just a bit more. Keep in mind we're not looking for anything too
completed here, we're just trying to get a better understanding of what the bone is.
And so
I think we could kind of begin
(drawing)
with what some of these parts are called just after I
get a certain amount.
Yeah I feel like - just kind of add as much tone
as you need in order to have, like, the clearest understanding of
the forms that you're observing.
And
so
I also want to talk about this but just in a moment
because it requires a knowledge of what these parts are
but there is - I would like to go into some distinction
between the female frontal bone, the one I'm
holding, and the male frontal bone, the one that's
actually on the viewer. So I'll just
sketch it out in profile
because that's where most of the
distinction between the two of them are more obvious. And so now I'm going to use
the skull that I have on the - I'll just add a tiny amount
to kind of get a little sort of,
not simply an outline to make it a bit more of a form as we go on.
And yeah, adding a little bit of tone where I can.
But at the same time I want to put right underneath it
the skull that we have on the view which is the
male bone. And because you need to see them sort of side by side so
just going to sketch that out using the screen and
using the iPad a lot like
you guys are going to be able to do at home. So the bottom
edge, as we see from this angle, called
the super orbital margin. And
it's called this because it's
the orbit of the eye and the orbit simply means it's the eye socket.
And so we have the upper
margin, the superorbital, upper margin, of the eye socket.
And you can see that as we find out what
are, like, what the bones are that comprise the
orbits of the eyes, you'll see how like individual parts
of the bones around it create either the upper
margin or the margin on the side or the one underneath. So
the part that we need to talk about next and is of primary importance
is this protrusion right about the brow.
And you can see there's sort of a triangular indentation
there but it sticks out. It sticks out
quite heavily in the bones that we have
here. And these arches are called
the superciliary arches.
Are called the superciliary arches. And a very important point.
If you happen to speak French
the root of the word -cil means eyelid
in French and that will be perhaps helpful, it will at least put you in the area
that we're talking about. Right so this is above the eyelid.
Okay.
So
I'm just going to make an arrow to distinguish,
point out where some of these things are
in a moment so that you know the superciliary
arches are above the margin.
So we have this also a triangular part that you see sticking out
on either side of the
superciliary arches and that is called the zygomatic process
and we're gonna be encountering that a lot so remember the word zygomatic.
Now you can see that there's a large curvature
to the major part of the bone. You can see it right here in profile, it's sort of
popping out if you will and that is known as
the frontal eminence.
And it's a curvature that you have to kind of,
you might have to exaggerate so and because
curvature thinking in planes might not help in this case.
You have to think in a shape that's a little more organic. In some cases
on some people you can see that the frontal eminence kind of
is divided into two separate eminences
across the line there. So I'm just going to
make sure we know that the upper upper bone is the female frontal bone
while the one underneath is the male frontal bone. And now that we know some
of these parts, it's very clear that we can use this vocabulary
to show what the distinctions are. So you can see
in the female frontal bone, the frontal eminence
protrudes a lot more where in the male frontal bone
it's the superciliary
arches that are more prominent. And so this of course
is going to change the angle of the bone. And you can see the female
bone, the angle between the frontal eminence and
the superciliary arches is just kinda goes straight up, it's much
more of a vertical line, while in
the male frontal bone it's at much more of a diagonal.
And this of course will also alter the
shape of the eye socket. You could see
in the female it's much more shallow.
Okay so now we're
approaching one of the more important parts. This point
I'm writing it down is called the glabella.
It's the outermost point of the brow, essentially
it's the outermost point of the superciliary arches. Kind of
along the line of the super orbital margins. And
underneath it is essentially this upside down trapezoid
kind of a plane reaching in at the end of which
you of course have the bridge of the nose. And this point
is one of the most important points in the head. Because from this point you
can construct across and along the head.
Okay. So
that kind of gets us a little more acquainted with
a very particular, very important bone and a few of the parts
of this bone. So
what we need to do now is continue along our exploration of the
skull. So the bone that
comes afterwards is called the parietal and I'm going to
put all this on paper so don't
worry about it. And the - I'm going to just
try to show you, if I can make it work, try to show you
how, like what that articulation, by articulation I mean
the connected of the frontal bone is with
the parietal bone, the one that we're going to be talking about next.
Now the main
problem with the parietal is that on its own it's a little too abstract.
And to really understand what the structure of the skull is we need to think a little more
architecturally. And so that's why I'd like to
show you how both of the parietals.
Now the parietals are one of those bones that comes with
a pair element, so
in this case I think to really get the most
out of it - to really understand
what the parietal looks like, you can see it but it's a little
abstract and
the basic idea is that we need to think a little more
architecturally. And so here, to show you, I'm holding up
the parietal bone with its pair
because this allows you to see the overall curvature
of this sort of architectural
roundness
of that part of the skull, that part of the cranium.
And you can see it right here on the monitor, on the iPad on the
scan of the skull, you can see the amount of
space that it takes up and how it really creates
that overall curvature at the top
of the head, the top and sides actually.
And so when sketching it out I think it's
very important not to draw a single
parietal bone. So as you see, I'm trying to
work by placing that
large arch at the front of it that consists of
both parietal bones at the same time.
And so here you have to think really
like, at least at the beginning, as structurally as possible.
(drawing)
And so you can just kind of see where
your outlines are but think in terms of
the basic structure of a,
just a simplified, geometric form.
And since we've practiced those
I think this shouldn't be that difficult.
So, as always, right away this
is of course organic and not thinking of it as organic can lead to problems
later down the line. And so, right away, begin with a little bit
of tonality to give yourself an idea of where major plane changes are
strictly from observation. This shouldn't be
a problem now that you've established those main arches
and you're taking them across. And so
keep in mind, right, that you kind of have to use as much tone
as you need, don't overstate
it but remember that your highlight is always
on the change of plane. So your main
area of light is going to be along that edge
in between the top plane of the skull and the side
plane of the skull.
And then just, you know, there's not, on the contrary to the frontal bone,
to the frontal bone or some of the other bones that we are going to be
looking at, there's not a lot to kind of -
there's not a lot to emphasize here, right, there's just kind of a
roundness. And make sure, even after
you've sketched it out
to still kind of see as much as possible,
the inside of the bone, the part that you don't actually - that you
can't perceive, right. So you try to find that arch in front, which you can see,
but also try to find the arch in the back, which may be obscured.
So you're kind of observing and constructing all at the same time
here. And then go back
and add just a little bit more tonality,
establish those alignments at all points,
at all times, and
you'll see something that looks like
the bones that I'm holding, the parietal.
(drawing)
So
this part that I'm currently kinda like slightly emphasizing
is one of the few parts of this bone that
are really important.
It's right here. It's this protrusion
towards the back of the head.
And that's the main landmark that
you have to understand
and always emphasize
in the parietal, it's right there. And you could
see it when I tilt the head, you can
see it from above. You can see it, it's at the widest point of the parietal.
And often that is, in most cases, I've seen
some in which it wasn't, but in most cases that is the widest part of the cranium and
of the whole skull.
And so
the idea is that you already - the whole idea behind the
anatomical terms is that once you start to accrue a certain
vocabulary, it'll get easier because a lot of
the words are repeated. So let's just make sure we know
that this is the parietal. We'll add it to our bones of the cranium
and that point, that larger
protrusion you could see it,
and you'll be seeing this on a lot of the bones that we're talking about, especially the larger -
the larger bones, we had it in the frontal bone with the frontal
eminence, so by proxy,
this part of the parietal bone is called the parietal eminence.
Now I'm just gonna turn the head a little bit
so you can see it a little more in profile and
you can see on the scan, you can see that there
are these kind of a lines that runs across it.
Of course it's just a slight -
you can see a couple of them and
this is an interesting connection between the -
between the frontal bone and you can see I'm
kind of extending that line upwards over there and then continuing it
on the parietal. Now the thing is in the parietal
you have a line above and a line underneath.
While on the frontal bone you only have
a single line. To our advantage
they're all called the same thing. So the
two lines on the parietal
are called the temporal lines.
And
it's not so much that they're really a landmark, but they kind of really help
to define the edge of the
side plane of the skull, of the cranium
more specifically. And you
can see that that line on the frontal bone
also helps do that and it's also called the temporal line.
And it kind of - it starts from the upper and
outer margins of the zygomatic processes and pulls back
and continues all the way into the
parietal. Alright, in terms of
the vocabulary that we need, that's kind of it. So let's
move on to the bone at the back of the head.
This one's the hardest because if you have some idea,
like we can all see where the frontal bone is
the parietal we can, even if there's hair, we can sort of see
the underlying structure, but the occipital,
which is the bone I'm holding up now, is obscured.
Often by hair but also by muscular attachments and things like that
that are not making it obvious.
But we still have to see how this overall structure completes itself.
And so we
can move it on the monitor to get
a better - to get a better idea
of what it looks like. You can see how a large portion of it
is actually underneath the head with that large
opening at the bottom, into which the
spinal column inserts and all of that. So
here I can kind of see how
the back end of the parietal
just kind of connects
with the occipital. And there are important points on it
but it's also one of the harder ones to draw because
there's some aspects of it that are rather abstract
and
in order to show the form as much as possible we're going to actually have to
draw it a little bit from underneath
which is not a way that you'll be able to actually see it on a head.
So - but this will at least
allow us to get a little bit of clarity at where the major changes in
are. So
here you kinda have to undertake a combined, once again, undertake
a combined approach of kind of an overall
structural outline showing where your main
angles are, your main changes in plane are, but
also try to get the contours and try
and so, you know, it's all
kind of the same approach.
All kinda the same
approach.
And always
establish where your
center line is
as well as
take some lines across and right away get in with some of that
tonality to help you see
overall curvatures beginning but then quickly make them into
planes.
And as you know that's kind of the approach overall.
Start off with just a tone in an area
that can help you see a general curvature, allow it to influence the way
that you establish where the planes are, and then use those planes to add more
tone on top but at the point you already have
a strict, locked in area
for that tone.
And of course, one of the main things is we need to find where, sort of the upper
plane is, front if you will,
plane of the occipital and then where it begins to curve
inwards.
Kind of wrap around the head.
And so there are a few
parts underneath,
some important anatomical elements, it's not so much
structural but I'm gonna talk about them
a bit, kind of add a little bit of context and information to some of these
things that we're putting on paper. And so
you want to
get as much of it as you can without losing the overall structure but also
without getting caught up in some of these really organic
aspects of the topography of the form. And so
yeah, always then you can kind of go back
and reinforce the contours but I'm just putting in
a little bit, just basic outlines of
kind of what this bone would look like in the context of the skull as a whole.
And even that will look abstract because this is not an angle that we ever see a head
in and very rarely
see a skull in even.
So if we kind of
extend the logic that we already have sort of experienced
there is, of course, a large protrusion on the main
upper part of the bone. In this case though it's called the occipital
protuberance. Why it's not an eminence I don't know,
possibly because it's smaller and like
a larger
elevation would be called an eminence, a smaller one
would be a protuberance. So there are a few more things here.
I'm just gonna mention what they are. You can see them kinda going
across the occipital. You can definitely see them on the
3D model. They're called nuchal
lines. And we don't really need to spend too much time with them but you just have
to know and if you do get in depth with a lot of this anatomy,
they are the sort of attachments of a lot of the
muscles in the back and even some of the
muscles on the side and the front of the
neck. And so
you know I keep going over the -
I keep going over the bone, kinda making sure we get
a little bit more clarity in the -
in terms of the major changes of plane
and you can keep doing that. I mean honestly
you can think of each one of these not just a structural one but also
as one to just practice hatching,
practice your half tones, light and shadow, all the stuff
that we covered in the earlier parts. And so
here, yeah, just kinda - but at the same time from a structural standpoint
don't be afraid to make these lines run across to give you a better idea
of what the changes in the form are.
And
so there is that opening
underneath that I mentioned before was
for the insertion of the spinal column. And there are these two
we can't really see it on the
3D model
but we do see the -
we do see nuchal lines running across though and you can see them as
I turn the head. But so right underneath it, these little two parts sticking out
they are known as condials.
And we're gonna encounter that word a lot as well.
Now really
much more in the head but we're definitely going to encounter it in the bones of the arm,
the bones of the leg, and so on. So it's
these particular condials that
are instrumental in allowing the head to move
and so I'm just going to draw
a quick diagram of
how the two upper vertebrae of the
spinal column allow the
head to move. And they're called the atlas and the axis. The atlas is on top because it's
like atlas, it's holding up the head. And the axis
is underneath it. And so
the basic idea
is that the atlas
revolves around the axis, allowing the
head to turn
left and right while those condials
are connected, are sort of
attaching in a way to the atlas and allowing
the head to move front to back. So
the axis
has that part sticking up, it's kind of a horn, and the axis
revolves around it. So all that movement happens below the
occipital. While the actual movement
of moving the head up and down happens
between the occipital and the
atlas with the use of those condials.
And so, you know, you kind of - I'm just adding
a little bit of a tone inside
that opening for the spinal column that we spoke about before
and its name, just so you know, is the foramen
magnum. And it's an important
anatomical element but not one that really helps
you describe the structure on paper.
And so, yeah, so that kind of pretty much -
we can't really see it that well
because we can't put the light underneath but on the other hand
you don't really need it that much you just need to know where it is and it's that
part, it's the front part of the foramen magnum
that if you take a line from that front part to
the bridge of the nose
that's that line, which divides the skull into
cranium and face. So
I think we kinda have
a good understanding of what the occipital looks like.
And I'm just gonna go back in, add
a little bit more to it, kind of get it to look
a bit more completed, if you will.
You know, as I said
every assignment kind of encompasses
all of the assignments. So it's not
only in order to understand what the structure is
it's also
to practice. Also simply to practice drawing
and organic form. And so yeah, you know
I'm kind of going back in, making sure some of these alignments
are okay, you know, and keep in mind if you're
off and you've spent a lot of time on a thing
you just have to go in, erase it, and change it.
And we're gonna be seeing a lot of that because that's just how I work and
it's a way that I think is actually quite helpful because it translates very well
into painting and all different kinds of
media as well.
Okay. So now that we've covered that, why don't we -
why don't we move on. And so
what you can see here is if I hold up the parietal
and the occipital, there's a gap in between them at the bottom.
And that gap is what we're gonna be talking about,
or rather the bone that goes into that gap is what we're going to be talking about next.
And so, here it is.
That's how it articulates with the other
bones. And
its name - there it is.
The temporal bone. And I will of course
put that on the
page. And see here, I'm just holding it up for you to see how it articulates
with the occipital, without the parietal.
(adjusting)
And so what we have
is a bone that
here it is, I'm gonna write it down
for you. The temporal bone. And so
the - we have to approach this bone a little bit differently.
And mainly because it is not
something that you could really approach too well from the
same structural perspective that we started
out all the other bones. But you can see where it is on the monitor
in the context of the whole. And of course it does help make up the overall structure of the
cranium but to begin it, I highly recommend using
a more observational approach. Just figure out what the contours are and figure out what the
proportions are within those contours and then
afterwards begin an analysis of
the -
and afterwards begin the analysis of the changes
in the topography. There's not really going to be
too much of a change in plane from the side to the top to the
front, it'll all be more or less flat. We're gonna talk about how
flat it actually is in just a moment. So
yeah and kind of as you go and figure out those contours, try to get them
pretty specific.
Try to get them as specific as you can.
(drawing)
And so after that though you can
see I'm following some of these lines into
the structures to get those
changes in the topography. And there are of course curvatures and some parts are
sticking out a bit more than others and of course it'll be much easier to know what those parts
are once you have the vocabulary to describe them.
And let me tell you, you already have the vocabulary to describe some of those parts.
But before we do that let's take a look at how flat this bone really is.
And if you take a look at it from above you can see the major upper part.
It is in fact flat, but this tiny
kind of elongated part that sticks out is actually
curving outwards quite a bit. And this is very
important because, in a sense, that part that's sticking out
is one of the more important parts of this bone.
You could also make the case that every part of this bone's important, however
you know we gotta isolate some things
above others, right? And so that part is called
the zygomatic process.
Of the temporal bone, because you remember
we have the zygomatic process in the frontal bone.
So we're gonna encounter a few more of these zygomatic processes.
So the part on top, that flat part
that sticks up, is called the squama. And
actually the
upper part of the frontal bone is also known as a squama.
So I'm just gonna move the -
I'm gonna move
the model of the skull, the 3D model of the skull to have you better see
the amount that that zygomatic process sticks out
from the squama. And
you see this is gonna be rather important.
Because a process is named after the bone to which it
connects. So the bone that I'm showing you here, that's
the zygomatic bone. That is a bone
called that. So the processes are connecting there. So
this part on the temporal bone underneath the zygomatic process
and closer to the back of the bone is called the
mastoid process. And
that's going to be an important point as well when we discuss the muscles of the neck.
And then, right in front of it, is the opening of the ear canal
and the actual name of that is the
external auditory meatus.
So the structural aspects here and the one that I do
want to talk about is that you can see how the zygomatic process
doesn't just come off of the squama. You can see it, you can kind of take the
line, the upper line of the zygomatic process and you can see that it sort of
stands up from the squama even before it becomes its own element.
And that's - and you can see it here
on the screen as I would like to
show you on the screen, it's curving outwards.
And it's a continuation of that upper margin,
if you will, of the zygomatic process. And that
line, that change of plane, is called
the temporal line. So, in this case though,
it's at least a little clearer because it's the temporal
line on the temporal bone.
Alright, so now let's move on
to that half a bone that I was talking about earlier.
And here it is. See
it looks kinda cool but the only part you're gonna really
need is this outer part that you see right now.
And this bone is called
the sphenoid. And
I'll just make sure it's spelled correctly.
So the bone that we have here
there's a lot of parts
that you're not gonna see. So we're only concerned with what you can see right in there,
right behind, right underneath and behind
the kind of more inwards
from the zygomatic process of the temporal bone.
And so that's, that part
that you can see on the outside is the
only one that we're concerned with. And that's what will essentially
finally complete the form of the cranium, will lock that whole thing in.
So
I'm just going to sketch this out in a moment
but I'd like to kind of show you how
it fits in with everything else. So here I'm holding up the frontal bone
and my hand
is on that part of the sphenoid that we need. And here I'm
showing the articulation of now the temporal
bone to the sphenoid and the other side from the frontal.
So the hard part is that I can't hold this up without actually covering
that part with my hand because
that's essentially how small it is.
And so in sketching it out what you need to do is also
take a slightly different approach, just kind of outline
what's in front of you make sure the proportions are alright and
this part
I do keep talking about this part of the sphenoid that we see is called the greater wing.
And so
it's not to say that there's any sort of topographical
variation along the bone. It's not really that flat and you can see that
there's this indentation. The part in the back is a little bit longer and moves inwards
and the part in front of it is not as long but they kind of, they meet at a crease.
It's that crease that's going to give you enough of a
structural understanding. So here I just want to kind of
like put all of this information that we've covered about the cranium, put it all into -
kind of think about the cranium as a whole again.
And you can see how that just overall
structure of the cranium
kind of locks in at that crease on the greater wing of the sphenoid.
And so I could simplify it and say it's
kind of like a balloon that's a little elongated
or something of the sort, but that is usually a problem
that I see. Everything is kind of made a lot -
kind of a lot more organic than it actually is and I think that
causes more problems in the long run. Of course it's nice to simplify a form but
here the whole point of explaining all of these on their own
is to show you that they each have changes in plane
that are going to affect the overall structure. And so it's that crease
right that crease allows you to complete that larger mass
and then the only part that's coming off of that mass is the zygomatic process of the
frontal bone as well as the zygomatic process
of the temporal. So here I'm going to demonstrate
it again and kind of - see here
I'm working off of the cranium without
the frontal bone attached to begin with. I
started with the parietal and now add a little bit of the occipital and then you kind of
cap it off in the front with the frontal bone.
And then,
you know, then you can add the temporal line
to signify that major change in plane onto the side
and then
it's important to see that
all that as just a larger mass and then
extend off of it the zygomatic process of the frontal bone
as well as the zygomatic process of the temporal bone.
So, I think if you think of it in that way
it'll be quite helpful. And see
that's the idea, right, kind of extend that
part off from there. And that part,
that extension of all of these zygomatic processes as well as the
zygomatic bone itself, which we'll talk about in a moment, is called the
zygomatic arch. So I think
that that about completes our exploration
of the cranium. I think there's a lot that we covered here
and now let's move on to
the bones of the face.
sort of gotten acquainted with the cranium and it's the part that I believe
to be the most important, let's move on to
the bones that you're probably more aware of
anyway. Right, the bones that are making up the orbits, making up the
nasal cavity, all of the teeth, and things like that.
And so, the facial bones
are what we're going to talk about next. We're going to start
with the one that you
already know. I wrote it down,
it's the zygomatic. I'm gonna hold it up for you.
And so the problem with the
zygomatic is that even though it's probably one of the more important
structural elements in the skull, on its own it's not
very exciting. It's kinda flat and so on. But see if I
turn the head, the flatness of it is
actually what's really going to push that edge of the zygomatic,
you can see it when I change the -
when you can see the front of the face in shadow you can see
how that zygomatic, that plane of the zygomatic, immediately pushes the skull back
towards its side plane. It's not completely on the side, it's turned outward a bit,
it's kind of an intermediary plane, it can go front and side, but it's that
change, which is the important one. So I did mention
that the zygomatic processes attach
to the zygomatic bone. And here is the particular articulation
of the zygomatic process of the temporal bone attaching
to the zygomatic bone itself.
And I like to show you the same exact thing
of how the zygomatic now
attaches and the connection between the zygomatic process of the frontal bone now.
So I think you're getting the
idea. So, once again, as with all
of the bones that, kind of on their own aren't -
don't have too many changes in plane, just begin
by establishing proper outlines. Proper outlines, find those proportions,
and then add a bit of tonality to kind of
establish some of the topography. There is a change in plane though, it's not very strong
but there is a change in plane.
So - and we will of course talk about it but you can kind of hint at
it with some of the
shadows that you see. And just don't forget to make that upper
margin, right, that's creating the side of the orbit now,
just make it a little bit wider. It's not flat.
And so you can see that slight change in plane. It's not totally flat
right at the edge it curves.
So because everything is organic keep that in mind
it would be impossible to really see
an immediate change in plane, though you probably - that's kind of as close
as you come in the skull. Okay
so I'm going to extend out some of the processes that we've already covered.
How it connects to the bones of the cranium
and - so that's the
zygomatic process of the temporal
and, of course, that part that connecting the zygomatic process is called the
temporal process of the zygomatic bone. See, because it's connecting
to the temporal bone and by the same logic,
the same process on top, connecting to the frontal process,
is called the frontal
process of the zygomatic bone.
And
that edge
that's now connecting inwards
is called the maxillary process
because, as you find out,
it connects to the
maxillary bone,
the next bone of the face
that we're going to be talking about. So I'm gonna change the light here a little bit
and we can see how
that large portion,
the next bone we're gonna cover, is called the
maxilla or the maxillary bone.
I've heard that it depends
on the book you're using. So here it is. Once again, as
with a lot of these, there's so many bones and they're small and so on their own
they might be confusing, you might not know exactly what to do with them.
But here, let's just begin by
putting it down on paper. Right, the only way we can internalize them is by
transferring what we see to a piece of paper
and analyzing it. So here
you could say it's sort of abstract as well but there are some larger changes in plane.
There are some larger changes in plane, they are a bit more obvious
and they're a bit more important. And so you kinda have to feel
some of those structural aspects right at the beginning.
And
you could see that change in plane in the front, off to the side
and that part that's coming off of it, that one that's connecting
to the zygomatic bone. And also the
underside of it, make sure to really
take a look at it and see it from all angles, right, to get those proper contours. Because here
the contours are really important because they have to be
put in with the structure in mind.
And so it's sort of - it's kind of -
there's a very strong organic sort of quality, kind of abstract quality to this
bone on its own but there's also, you can see all these changes in plane,
it's not flat like a lot of the other ones that we've
covered up to this point. It's got a lot of
moving parts if you will. And so
here I just want to show you the articulation of the zygomatic
with the
maxilla. And that's already a lot - like
as soon as you put that in you can see almost the
entirety of the orbit of the eyes underneath. So that's already beginning to look a little more
like a skull, even if you just add that one small bone.
So I'm gonna add it onto the drawing as well, it's simply for clarity.
See so you just want to
see how the turn
of the form. You wanna see the plane
in front, you want to see that little bit of an intermediary plane, and then the final
push into the side plane.
And of course underneath that part that sticks out and connects to the
zygomatic, underneath it you're probably gonna have a shadow of some sort.
But use your half tones here and use them in
a structural manner. Try to show
all these changes in plane. Now, a lot like with the parietal,
I think it makes a certain amount of sense to think of the two bones,
the maxilla is a bone that has a pair, and is connected
to its pair.
You know I haven't - if a bone - I'm only talking about the ones that are
pairs that connect to each other because I think that's where it's important
to really understand them. I think some of the other pairings
are self explanatory if they're not
connecting. So obviously the zygomatic has a pair but it's not that
important to think of them as pairs at the same time in the
context of what we're doing right now. It will be in a head actually
but here, right just kinda sketch both of them out
so you can see these angles and you can take them across, so you can
align all these parts, you can align the changes in
plane. So if there's a change in plane on one of the
bones, there has to be the change in plane on the other one as well.
(drawing)
Also, keep in mind that you do want to
take a closer look at the opening of the nasal cavity. We're gonna get a little more in depth in a
moment but you just want to take a look and see that it's not just a hole.
There are changes in plane along that outline.
Okay so that part that
I haven't named yet that connects to the zygomatic
is, of course, called the
zygomatic process.
Now there are some other processes that we need to talk
about. So I'll show you on
the parts of the skull. So
this thing that moves up, this area, this part of the bone that moves upwards
we can already call it a process. This process that connects to
the frontal bone and kinda creates that
almost like completes the inner outline
of the orbits of the eyes is called the frontal process.
Obviously right. Connects to the
frontal bone, that's the frontal process.
Alright. So
what else do we need here? We need that edge at the bottom.
That edge underneath. And it's where the teeth
originate and it's called the alveolar
ridge.
So I think that about kind of
explains a fair amount of what's going on there.
Keep in mind that we had to sketch all of these out at the Academy
and the during the final exam we were asked to
draw each of these bones from imagination. So
that's how important they thought these bones were.
So I'd like to show you two bones
that attach onto
the maxilla.
And see, if you look you can see it's this tiny part
that comes up kind of off of
the frontal process. And you think they might - it wouldn't be
that important but they play a
very large structural role. And so
that's why we're gonna cover them. Obviously you don't need to like sketch them out
on their own and see what changes in plane there are, they're two small bones, they're
relatively flat with a minor curvature but
I think it'll be helpful to just understand
because you'll see how they affect everything.
How they affect the profile and all of that. And
so here I've kind of exaggerated that curvature. That curvature
happens because - like that major, sort of arch - happens because
of it's a pair. And so when you put them together
you can really see that curvature. But I'm gonna put them right on top
of the maxilla and
I'm going to sketch them out at the same time as
as I place the nasal cavity. You can see that they
kind of create a part of the
upper part of the nasal cavity, especially its profile.
And they're called
nasal bones. And
see I'm going to just add like the general
profile of what a nose might look like
on top, right, just sort of a structural thing. And, you know, in some cases
that, you know, after these bones the nose is made up
of cartilage. And in some cases there is that change
in plane, in other cases there isn't, however
it's still an accent and you should take a look at it.
So let's just take a look at the nasal cavity again. And in profile
that's kind of a generalized schematic of where those major changes in plane
are. And the -
I'm just going to add just the general contours of
the part of the nose that is made up of cartilage. A nose, as we tend
to experience it in life, but you can see - and of course
I'm kind of elongating the
nasal bones a bit. But it's also
I want you to see how the nasal bones connect to
that upside down trapezoid of the frontal bone.
Right, you just have to see that
arch. It's almost like
it fits in there perfectly.
See so it's that
kind of the arch, that upside down trapezoid. Of course the
bottom of the trapezoid is curved to accommodate for the nasal bones
and then there's just this perfect - they intersect perfectly.
And they kind of
create that interlocking structure. The thing that I do want
to remind you is that I did mention how that part
is one of the most important parts of the head because you can construct out of it
into the superorbital margins and also
construct along that point into the structures -
of the structures of the face. So to kind of
conclude this area, with its component parts - and see I couldn't
just take the bone on its own, I had to do it together. I'd like to show you that
tiny part that sticks out, right at the base of the
nasal cavity. It's called the nasal spine.
And that about
covers the bones here. I wasn't able
to stick to it, I needed to kind of combine a few
bones in order to get a larger
understanding of it. To see it in context right away.
And so why don't we move on to one
that's really important, it's right here,
the mandible.
And so here you really
have to see this out, closer to the way that we did some of the,
like some of the large bones of the cranium. You really have to see
the structure, you have to see that kind of, that
curvature, think of it as sort of, kind of an arch,
that's a horizontal arch in space.
This can get relatively complicated. If you want, think of it as a horseshoe
and then see how all these other parts extend
off of it, both in front, on the side,
and of course in the more obvious parts, these parts that move upwards, closer to the back.
And so you can definitely see them on the screen
as well. So right,
keep in mind, I'll write it down
but keep in mind of course that that
horseshoe, the alveolar
ridge is wide, it's got - it's not just a line.
And then as you're extending some of these
parts, keep in mind that this bone is perfectly symmetrical and take these parts straight
across. It's on its own, it's not -
you don't need to think of it along with its pair - it doesn't have a pair, but it allows you
to structure it based on its own
symmetrical nature. Alright, so every time you make a curve
or an indentation on one side of the form
you find it right across and see where it is on the other side.
And see where it is on the other side,.
Use some of these constructions,
right like as you place all these alignments
they also kind of - they almost
make this into a block, a solid block. So
you can kind of think about it without the empty space inside of it and
think of it as if you're just taking a block
and carving it into the generalized form
of the mandible. And, once again, as always, begin
with a little bit of tonality, kind of get things in place,
take these lines in, see where the tone helps you
establish where this form is, and then
structure some of these if you can or
you can either follow along as I put them in but
or come up with them on your own as you're looking at the form, but just
find those curvatures on the topography.
Include those over those - I don't even know
what to call them - those
cross lines. I guess they're creating to some degree a cross section.
Yeah let's call them that. So, yeah. And even
parts that you can't really, like you might not even see from your angle,
like I can't really see it, even if you have it on one side make sure
to find it on the other as well. And I know I was just talking about
thinking of this as a block but
it's strange, you must think of it sort of as a block, as a solid form on the one hand, but
also as transparent on the other.
And then let's add some tone
to make this a bit more of a
sort of a completed drawing exercise, right. The purpose of this
is practical anatomy, so the skills
are all intertwined, they're things that you are
practicing here that aren't
only about figuring out what the structures are.
They're just about putting something on paper and making it look convincing.
And so yeah, I think that about
covers
everything we need to put on paper before we begin
to talk about
what some of these parts are called.
And so here
let's put down that this is one more bone
that we now know, the mandible. And that
honestly that covers all the bones of the face.
It's a slightly smaller number than the ones in the cranium, plus the bones themselves are smaller
and
why don't we just move the
our scan of the skull to get a better understanding of what the forms
on the mandible are.
So why don't we begin with the forms protruding at the front.
They of course are the
chin. So this point
right before that protrusion is called
the mental synthesis.
And that part right below it, right, that part
on the very highest point of that protrusion
is called the mental protuberance.
Now we've encountered the protuberance on the occipital. See, it's a little bit smaller
than an eminence. It's just this one part that sticks out and in a sense
a bit more obviously because it's smaller. And so
that is the mental protuberance. And then if you go
outwards, you go outwards
to kind of the corners on the
bottom edge of the mandible and those parts
are called the mental tuberosities.
So that kind of completes this vaguely triangular
protrusion or protuberance, but I don't wanna
use the same word to describe multiple things
so of course what you're looking at here is the word
mental, which means that you're talking about the chin.
So moving on to the far end,
the back end of the mandible, we have
these parts that are coming up off of it.
These branches, if you will. And
I'm just - I just wanna show you
how the mandible connects to the
temporal bone and allows it to move.
And that area is called the temporomandibular joint.
Temporal because it's part of the temporal bone
and mandibular because it's part of the mandible.
And that part right there also
known as a condyle, just like in the occipital,
is the part that connects
with the temporal bone.
And of course there's one on each side.
Now those
branches that I was talking about are known as the,
each one is known as the ramus, in plural
it's rami and it directly translates to a
branch. So it wasn't an accident that I used that analogy.
The people that gave them these names in Latin also thought
that, or at least I think that
now because of them, but it resembled a branch and
once you start thinking of it that way it makes sense. So it's called a ramus.
And then on the front end of the ramus, sort of in front of the condyle,
you have this part that sticks up and
is called the coronoid process.
Now it's not called that because
it attaches to a bone that's called the coronoid,
but that's just the name we have to use. And
so it's particularly important
it lies with - you can see it on the viewer here, I'll turn the head -
it lies with a muscle that's all
along the side plane. It's called the temporalis. It's on
the parietal bone, it's on
the temporal bone, and its attachment is the
coronoid process. And what it does is it pulls the mandible upwards.
Okay, so if we
get to some of the other parts,
you can see, a lot like we saw with the zygomatic process of the temporal,
you can see how when a part of a bone sticks out
from a different part of it, there's
usually a hint of that happening way before it actually happens.
So in this case you can see that edge
will eventually become a part of the ramus, that front edge of the
ramus. And that edge is called the oblique line.
It's important because it gives you an idea
of the form of the mandible specifically
but also allows you to see that there's certain patterns
that, as we move into more and more
of the anatomy, you begin to -
it'll be easier for you to recognize these patterns. And the
final thing that I want to point out
is this point
on the far end, underneath the mandible,
that point where the body becomes
the ramus. And that point is called the
angle of the jaw, or angle of the mandible. It's a
very important structural point in the head. And
with that point
I think that about covers everything. You can always go back, change your alignments.
I can't - or correct your alignments, make sure they're right - I can't help myself, I keep going
back over them even when the thing is nearly complete. But what I wanna do now
is do a little recap. So
why don't we go back to the cranium. We have the frontal
bone, we covered it, that was the first one we did.
There's only one
frontal bone, remember it doesn't have a pair.
Then we have, right behind it, are the two parietal bones
followed by the occipital at the back of the
head that kind of completes it.
That larger mass of the cranium. Then at the side, underneath the parietal,
and slightly in front of the occipital, are the two temporals,
and then completing it with that tiny piece in
between the frontal bone and the temporal, right inside
of the zygomatic arch is the sphenoid, there's only a single one of those.
But you can count that as half if you want considering
you're only looking at the outermost part of it, the greater wings.
Now let's move on
to the bones of the face.
Alright so these we
covered more recently, so why don't we count them up in the
same way that we did with the cranium. Let's start
with the two zygomatics,
and that's, as you know, and you're probably already tired of hearing
zygomatic, you might not ever forget it. Then we have the two
maxillary bones, the two nasal bones,
and one mandible.
So, now you know
what all the major bones of the skull are called and you also know
all the different parts of them as well
as have a pretty good idea of their
structure. So that about covers
the bones of the skull.
right now I want to
take a brief moment to describe
some important points
on the head. And
keep in mind you've already seen them, we've already covered them a little bit.
They, in this case, will have slightly different names
but I assure you this will be helpful
because it'll allow you to structure the skull
based on these points.
So in order to show this
I'm gonna have to sketch out just
in basic outlines the skull
in profile. And
I'll include a lot of these
things that we have covered.
So there's the mandible
and the angle of the jaw,
the mental
protuberance, along with all these changes in plane,
the -
and you know, I don't ever
think anything is correct starting off so you can just go back,
make corrections, and put in more information. That was the mastoid
process and here we have the
zygomatic process of the frontal bone,
the superciliary arches
the frontal eminence, and all that stuff that we covered.
And we're just going to actually go over right now even though
and I'm almost sorry to say this, they're gonna have a different
name. Except now these names are more about a particular
point on the skull as opposed to
an entire anatomical element. So we do want
to get sort of a general idea of where
the bones connect, right, the overall
sort of the edges of each of the bones that we covered.
Make sure they're in the right place.
Make sure to have your
orbits. And really be accurate here because you're gonna need
a lot of these intricate changes along the contour.
We've already covered them, as I said, so
it shouldn't be that
hard but you're gonna need them because
the points that we're gonna cover are
based on very particular parts
of the skull.
So, in this case,
yes, it should be a basic outline but do take your time. Here we have the
coronoid process and the edge of the ramus
continuing into the oblique line, and then out of it you can extend the
alveolar ridge of the mandible as well,
as make sure the have the alveolar ridge of the maxilla.
Make corrections as you need to.
Just keep in mind you don't need to have all of
the teeth. They're not that important here.
You just, I think, the bones that
we covered kind of can give you an idea of what the form of these
things are without including each individual tooth.
So
here we have
our mastoid process, all of this
right where we need it.
(drawing)
Okay, okay. So what these points are called,
what these are going to be
are the cephalometric points of the head. The
cephalometric points of the head. And
And the
idea is that they were originally,
and currently even today, used more by anthropologists and archaeologists
to categorize skull
proportions, particular types of skulls, and so on. But what we're gonna use them
for is to find, essentially,
where our major changes are. Where major changes
in planes are and where we have important indentations
protrusions and so on.
(drawing)
So I keep going back
to the skull, I'm gonna add a little bit of tone, I can't really
justify why I need it but
why don't we begin with one that we already know. And that point,
that outermost part of the superciliary arches, as we know, is called
the glabella. And that
was a cephalometric point.
And you didn't even know it. Now if we take it, if we move that line
down a bit, along that
trapezoidal plane that we
discussed earlier and that really has
and what creates that intersection between the frontal bone
and the nasal bones and it's that arch.
That arch that I said was one of the most important structural
elements in the head. And that point
is called the nasion.
Okay so
why don't we continue and move down
the nasal bones, along the center line of the head
until we get to that very end, right, the
point that sticks out
the most at the nasal cavity. And that point is called
rhinion.
So
this part
I don't really know. So I'm gonna -
I can't help but make a few corrections,
a little bit more tone
to clarify some lines in the head. It's not that important
but every time I feel like
even something like what I'm doing here,
the corrections have to be constant. So
what is important here is that
these points and you understanding
where they are and what they're called is just another
way of becoming more and more acquainted with all these parts of the skull.
So it's kind of pulling it away from this abstract and complex element.
You know this thing that seems way too complex by breaking down into
parts makes it easier. So the next point is called the
nasospinale.
And we've already encountered it because that part
is the nasal spine. In this case most of the points are Greek
but in certain cases they are -
their names are Latin. I don't know why but
that's just it. Okay so the next point that we're gonna talk about
is that the outer most part
the most protruding part along the alveolar
ridge of the maxilla
and so it's
right above the upper teeth
and it's called the prosthion.
So
that already establishes
some very important points and
connection between points that we're gonna talk about soon. The next
point right at the height
right at the tip of the
mental protuberance.
The outermost point of the mental
protuberance. As you see, a lot of these points are giving you
sort of the outer and inner most points along the contours, so
that point
is called
(drawing)
pogonion
and that'll be quite - and see it's quite helpful, you can already
see where these points are so you could almost structure
the contour based on these points. So the next point
is right at the bottom edge of the
mandible in front. It's called gnathion
and it is right where the front plane
of the face turns under and becomes the
bottom plane. The plane underneath the mandible, the bottom
plane of the mandible if you will. Okay so
now it's time to move our way around and the next
point on the mandible we already know. And it
is the angle of the jaw
but it's - the name of the point is
gonian. So you have pogonion
in front and gonian in the back.
Then
as we move up -
as we move up, the next point is,
as we know, it's the sort of the outermost point of the
mastoid process. And that point is in Latin and it's name is
mastoidiale. Mastoidiale.
So, see you
already know where these things are but just honing
in, not so much in just a larger anatomical area, but to a
specific point I think can be really helpful.
And afterwards, I recommend you just connect
just as an exercise, all you have to do is try and connect them and see
and you can see it gives you all the
major parts of the skull. So now
continuing our way around the head, we have
the outermost point at the back of the head on the occipital protuberance.
And that point is
called opisthocranion.
It's the outermost point
at the back of the head. And it corresponds to
the occipital protuberance. Now
I'd like to show you the next point
on the 3D viewer because
it's not so much an inner or outer point, it's kind of an indentation
but it's essentially that point of intersection
between the two parietal bones and the occipital. And it's called
lambda.
And it's an important point because it establishes the
far end, the end of the two parietal bones along the center line and the
beginning of the occipital. Now if we follow along
we move up to the highest point of the head, which is called the zenith.
And just the most important thing
to remember here and the mistake I often see
is that the zenith is behind the halfway point.
If you take the width of the head
and you cut that in half it is closer to the back.
Now the next point
is called bregma.
And it, in the same logic
as the lambda in the back, the bregma is a
long, it's the connection, that intersection, from the two parietal bones, that
point, two parietal bones, and the frontal bone along
the sutures.
And so
that point is also somewhat of an indentation.
So the next point
that I want to talk to you about along the contours
in profile is that very top point
of the superciliary arches.
And you remember there's that slightly triangular indentation. So essentially
it's that point which is going to separate the eminence
and the arches. It's called ophryon or
ophryon in a slightly more traditional
Greek pronunciation. So that
in a sense completes it. So
if we move down and in a little bit
we get to a point along
the orbit, right, so it's no longer on the contour
but we're still gonna be able to see it on the contour. And it is the
lowest possible point on the orbit.
And it's pretty much right at the
intersection along the orbit of the zygomatic
and the maxilla. And it's called orbitale.
(drawing)
It's also in Latin so
here it's also easy to remember what that's called
and you should remember what that's called and I will explain that very shortly why.
And so now
the inner most point, so the outer and inner most point of the orbit
is the next point. And it will allow you to
kind of just, even with these few points, see
that the orbits, as a whole, are at an angle
kind of pushing out and
inwards, away, towards the back from the center line.
And that point is called the
ectoconchion. That one's a bit of a mouth full
but it plays an important role.
So now I'm moving up to our parietal eminence
which we already know. That too has a cephalometric
point name. And
it's important and you can remember why
because it's the widest point in the head.
At least in the cranium. And that point is called
euryon. And it's that
point of the parietal eminence
and now we need to continue
along this concept of the widest points now
we're going to go to the zygomatic arch
and all of its component parts, the processes and the
zygomatic bone itself and so on. And along
the zygomatic arch, the
zygomatic and specifically the zygomatic process of the temporal bone there's a point
called zygion. And it
represents the widest point
in the face. So much of the time euryon
is wider
but I have seen some skulls where the two zygion
points are out more than euryon.
So it's essentially the widest point of the zygomatic arch.
And then we go to
the zygomatic bone itself and it's
the bottom most point of
the zygomatic bone
where it sticks out. And it's called
the zygomaxillary
because it too happens to be
along that connection. Orbitale
was the connection on top between the maxilla and the zygomatic
and the zygomaxillary is the point at the bottom of
that connection, of that suture. And
that, in a sense, is kind of all the points
that I think that you will need along the contours
of the head. The
one other one that I do want to talk about is at the top upper margin
of the external auditory meatus, or the ear canal.
And it's called porion, the opening of the ear canal
and I'll let you know why that one's important
in a moment. So
there are actually a ton of other points
and you can find them online and in anatomy
books but I think let's start
with these. So let me just explain
a few key principles. And for this
I'm gonna need to sketch out another
profile of the skull. And I'm gonna have
the profile view on the screen as well.
This does not need to be too specific but there are
things that we need to be able to see.
And even the proportions
here, I think, could be a bit better
and the particular thing that I am
concerned about and you will see in a moment is where
some of these points are.
I'm not making it very clear where they are but
you'll see in a moment. Now I'm going to
draw yet another skull
where some of the alignments are going to be
rather drastically different from the skull above
it. And the - and you'll
see in just a moment where I plan to go with this.
And
I think you are already
seeing that I'm thinking of these points
as I'm working on these two skulls. Okay so
you remember that point porion,
that point on the upper margin
of the external auditory meatus.
It's right there
and it's also on the skull that we have
here with all the points.
So the other point that you need to remember is orbitale.
That point on the lowest
part of the orbit. And the basic idea is
that if you take a line, a plane actually, and
take it from one of those points to the other
you have what is called the Frankfurt plane. It's the
Frankfurt horizontal plane. And the basic idea is
that when a person is standing upright
that the line taking between
those two points is horizontal.
So that actually, knowing where those
two points are, finding them in a portrait
is going to help you figure out what the tilt
of the head is. And why don't we
see what that same Frankfurt plane -
it's not longer horizontal but you definitely feel it as a plane -
is on the upper skull.
Right so you go from that point, orbitale,
all the way to porion, the upper margin
of the external auditory meatus. That gives you that tilt.
The next two points that we are concerned
with are the glabella
and prosthion. So the outermost
point of the brow and the outermost point of the
maxilla. And if you connect those you have a line
and also you can think of it as a plane but in profile
it just appears as a line. It's called the facial angle.
And what it gives you is
the particular character of the head. it shows you the amount
that the facial part,
particularly the mandible and the
maxilla stands out against the cranium.
So is it at more of a diagonal as
I'm sketching out right now, but you could also
imagine it as
more of a
vertical line. And you can even experiment
with caricature in a way that you can really exaggerate those angles,
see what kind of
characteristic portraits, characteristic skulls you can
make. And then after that you
can actually take some of the other points that we spoke about
and see if you can play around with those as well.
And you can even
take an outline of a skull that's
observed, you can use a real skull or a viewer
with a scan of a skull like the one I have here and be very, very
accurate but then, on top of it, just move
those points around and see how it changes the character.
So all these points are important but
the ones that we just spoke about are particularly important.
because once you connect them, establish them
as planes that go into the head,
that can give you the tilt of the head as well as the character of the face.
use the scan of the skull
on the 3D viewer to really practice
some basic skull constructions. I think this is
extremely important. Now that you have spent some time
with the skull, you've done
a drawing that's relatively
completed, on top of that we've also spent time analyzing
the parts of the skull, we can use
the 3D scan of the skull
to do some quick
structural analysis of it. And the advantage of the viewer,
as you see I can turn it, I can change
where the - I can change the angle of the light. There's a lot here
that's much more convenient than actually having a skull
because that would require a larger amount of
organization. Here, it's all
in front of me, it's all easy to use. And so -
(checking)
so I'm interested in
finding an angle - and I wouldn't necessarily
start out with this exercise in
a way that, you know, from angles that are particularly complex.
So ones that include a lot of perspective.
and things like that. And so - but at the
same time I do think that you should work your way up to
these angles of the skull in which the skull looks pretty
much abstract. But at the same time, use your understanding
of the cranium, the bones that make up the cranium,
the bones of the face, and so on. And
so I'm just gonna move the
skull around to kind of get acquainted with this
program, to get acquainted sort of different
angles and really spend some time. Spend some time picking
the angles, thinking about the angles. Don't immediately
sort of put the skull up on the
screen and then, you know, and then
attempt to put it on paper. Spend some time thinking about it, just
imagine how you would approach it before
you begin. I think that'll be quite helpful.
Okay so I think I'm happy with this
angle that I have here. There's a good amount of a tilt
sort of a little more complex but still it's very clear that it's a skull.
And it's a bit more complex mainly because we're looking at the skull slightly from underneath.
So this will affect our axis more than
anything else.
And I am going to
begin this in a way
that's relatively structural. And we're going to try
a number of different approaches. The basic idea
here is to not use all of your paper and do multiple
skulls on one page.
And so kind of
just establish your general outlines, your
general proportions, but keep thinking about
the internal structure. And immediately find
those axis. Especially if you're working
from an angle like the one I have here where you're looking at the skull from underneath and you need
those axis in place. And so I am
really simplifying it into just the structures
of the cranium and the structures of the face.
And as I know often I'm
against a very specific way to construct the thing
but I think to begin here, this could be helpful.
And so the thing that I would like to
start with right away is that point that I kept talking about. Nasion,
that point of intersection between the
top of the nasal bones and the
bottom sort of trapezoidal part of the frontal bone
in order to construct out along the
superorbital margins. And then you can wrap it around
just a bit to get at least one of the edges,
at least a part of the zygomatic processes of the
frontal bone and then you can continue and take
them around and up, establishing your temporal line.
Really making sure you have, by doing this
making sure you have the front plane and the side plane of the head. Now
I want to move around the orbit
of the eyes and
mainly to find that point orbitale. That point
on the lower margin
of the orbit.
And then you connect orbitale
and you construct a plane
out of the two orbitale points and the one point,
porion, that you see on the skull.
Because you can only see one porion at a time.
One external auditory meatus. You can
imagine where the other porion is but you don't necessarily have to because
you only need three points to construct a plane. But if you want,
as an exercise you could find the fourth
and make it a trapezoidal plane.
And so once
that's in place, remember that means you have the tilt of the head.
And from this angle, as I said, this is particularly important.
So then you can continue and be
begin to, as you see,
I'm working to find that
nasal cavity and I'm structuring
it. And if you remember they're very particular changes
in plane in the nasal cavity. It's not simply an opening.
But I like to skip past it and find that other point.
prosthion. So that I can establish
the facial angle by taking a line from the
outermost point, along the superorbital margins in the middle of the head
the glabella, and
bring it down to prosthion, the outermost point on the maxilla.
See, so I'm using all these things that we were talking about.
And now I keep moving
across, keep moving around the head, and I'm finding how
all of this connects to the angle of the mandible.
Because you can move that line up, that line,
outer line of the ramus
up to right in front
of the mastoid process. And then
you can continue, you can move
up
from the mastoid process to euryon, to our parietal eminence,
and then essentially from there
to the temporal line
essentially just locks in that side plane. Everything
in front of that is already moving towards the
front plane, everything behind it is moving towards the plane of the back.
In this case we actually see a bit more of the occipital.
So I'm glad that we went over it because from this angle
you can really see that underlying, the
plane that creates the base of the head.
Once again, contributing to
our structures. And so
then you can begin to get a
little more specific, you can move up the, as I'm doing here, you
can move up the frontal process of the
maxilla. You can get a little more
intricate and more precise with the orbits of the eyes
but remember that as soon as you make one mark on one side of the head, you have
to take it across the central line and find that same
change of plane or same point on the other side of the face.
(drawing)
And so, see
we kinda have, to some degree,
we have sort of a structural
placement for all the things that we have. And then
at this point I'm gonna begin to get in there with a little
bit of tonality to kind of add
a bit of
a more organic structure to
to this skull. At the same time we've established a lot of our
changes in plane, a lot of our major points, and so
it won't be like all
the shadows that we put in, the half tones, they won't be just
randomly observed or observed by accident, they're going to be in accordance
with the structure. So see here, just once you have that side plane
of the head, you know that you can place that into a darker tone.
So
honestly I'd rather do a few more
than spend more time on this one.
In this case, it's quantity over quality.
You gotta do a lot of them and they'll keep improving.
There's no point in getting hung up on these.
What's very important is that you practice all this from imagination though
at some point.
Or, you can even continue on it after -
without an image after a while. See
how far you can take it without observing it. After spending some time with it.
But alright. So, here we not have a very
different angle, it's also quite complex in
terms of the perspective
on the head. We're looking at it from above.
But as you see, after getting the overall, just very basic outline
I'm quickly moving to establish
those super orbital margins. Because they're going to give me
that line that I can take across the head. And then
I find the mid point and I can move it up
and around. So I immediately have all my - I essentially
have my latitude and my longitude. And then
from that point you can start building the bones.
And for the most part the reason to
really spend time with
each of the bones as in the way that
we did is because from one angle
or another you're gonna see more of one bone than you do of the others.
And if you really know what that bone is then you can spend time on it and you can begin structuring things
using that particular bone. in this case it's
the frontal bone. And then right away
move out
from those important points
on the frontal bone and take
your facial angle, take the facial angle.
And we've already practiced
how to take an angle. Here you just do it strictly from observation.
You move it over
all the way to prosthion. And then, just for practice
establish those two orbitales and in this case,
I'll establish two porions and create a
Frankfurt plane. Right so right away,
it didn't take very long but I already have the
tilt and I already have the character.
So this is a
more structural approach over. But I think this is a good one to practice and
in essence that is what the academy in Saint Petersburg
is known for, a structural approach to these things. At the same time I don't want
everyone to get confused and think that it's exclusively structural.
There's a very important structural element but ideally, in the
long run, you practice it to the extent that you can keep all the
structure in your head and you don't actually need to put it on paper. That's the goal.
But I wouldn't worry about it yet. And so
you can then begin
to work around some of
the parts that are the most obvious based on what you know. So here
clearly I want to see the entirety of the zygomatic
arch because from this angle we really see the arch
of the zygomatic arch. And keep in mind
keep taking things across. And in some cases
when something really feels interesting, you might
as well just, you know, go into it and copy
a line. And then - and even just
establish a tonal area. Maybe just not even thinking
about a plane. Allow just an observed tonal
area to tell you what the plane is.
Always find a new way to approach a thing.
Be intuitive, be kind of
improvisational as well.
And so yeah. See just -
you keep kind of going off of just a few
observed areas and finding a structure underneath and other cases
you know there's a structure in one place and so that will influence how
you find the values in that area.
(drawing)
And yeah and just - but here though the important
thing is since you don't want to spend too much time on these
the areas
that call for a larger amount
of completion by adding
more gradations, more tonality, they
still they need to be structured because here you are practicing a structure.
(drawing)
So do keep that in mind but always observe.
So I don't mean to be confusing
but I think if I keep repeating it I think it'll
somehow just make the concept more clear. Alright so now
let's try a very unusual angle, let's try the skull from the back. And of course keep in mind that
a skull from the back is, of course, helpful but
is not something that you really can imagine
in a head.
When you're looking at a human head. There's just a lot in the way and so
this almost means that you need to practice the skulls
from these weird angles even more. So you could try to imagine that skull
when it's not as obvious. And so here
you don't even have - you basically have the cranium.
But what you do have of the zygomatic arch, what you do have
of a - and especially what you do have of the mandible
would really give you that orientation.
(drawing)
And keep in mind that the
advantage of having an actual skull in front of you or any object in front of you is that you can take it, you can move it,
you can walk around it, you can really understand what that form is. But -
so don't think that once you found that angle on the screen
you keep it. You do wanna keep it because that's the angle
you're working from but at the same time keep moving that skull so you can see it from as many angles as possible.
You see what's happening.
And here, our terminator
just passes quite cleanly, simply along the -
just up from the mastoid process on the temporal, all the way
up and around the occipital. So it's very clean
and gives you a form.
And it gives you a plane. And see and here you
really need to establish those angles of the mandible
so that you can show that we're seeing the mandible from this
unusual angle, slightly from behind.
And this is particularly helpful because in a head, if you were looking at a head at this angle you
wouldn't be able to see the other angle of the mandible, the one on the other side of the head but
you would still need to imagine it. You still need to see things as though
they're transparent.
(drawing)
And so, the idea here is to spend, on some
cases a large amount of time in some cases a small amount of time,
it'll depend on you, it'll depend on maybe the particular sort of assignment
and the goal that you have for the skull that you're working on at the
moment. And so see,
just with finding some of these important points
knowing what the bones are, knowing what their orientation is, you can immediately
have
the proper tilt of the skull on the page.
Allowing you to then make some adjustments and corrections
and so on. And a lot of the tone I'm using
here is sort of primarily
tone that is structural. I'm not working too much on half tones, I'm
finding where the terminators are and I'm just establishing the half tones only when
there's a major change in plane.
(drawing)
And so, I do want to talk a little bit
about just a generalized skull construction. We started with one
but I just want to be as simple as possible. Right, so you establish
the base of the skull and then you move out of that
up to nasion.
And then move around
following the center line and immediately establish sort of that center
line all across as if it were transparent and then work around
from the base up to the widest point. Up to euryon, up to the
parietal eminences. And then from - just indent a little bit
up and then bring down the
rami of the mandible
and then continue past the angle into the
point on the chin, gnathion,
and then up and then you move it back up to nasion.
And there you have a pretty simple skull construction. I'm not
saying the proportions are that accurate, but I often, as you know I don't care that much
about proportions. That's something you can begin to work out
once you have a full understanding of how things look in space.
I think that's more important than having all the proportions right.
But see, and also this particular
constructive approach I think is very helpful because it can let you,
as you see, work on a skull from
almost any angle. It's easy to imagine these
planes and curves
from any angle. Or at least, if you practice it,
I think it'll come fairly quickly.
And so why don't we
get back to our viewer here
a little bit, move things around.
Oops looks like the battery's dying. Gotta change that
and so I think
this is a good
exercise. So what I want
to do a bit more of is now to
try to structure the skull that I'm looking at
in this way that I just showed you. So
it's as basic as possible, we are not working
the way that we started with.
And it's just as simple
as possible. And you see
in here, you're just making sure to separate the cranium
and the face.
You're finding those important points, the
angle of the jaw, nasion,
gnathion.
All the ones that we covered. And
allowing yourself to just simplify that skull in front of you,
to its upmost structure.
So, at the same time I'm not entirely sure
I don't always think it's necessary to start from the
simplest thing honestly. Oh man, okay.
So why don't we sketch out
a skull right now.
to find an angle that we
can use for the simplification, the ultimate simplification of the forms of
the skull. And I think
why not actually go back to one we already did.
We started and we made it a little more complex
at first going through all the points that we covered
but now I've chosen an angle in which
is moderately complex. And
mainly because we're looking at the skull from underneath. So our axis are going to be
very, very important here. And so
I just wanna start with
a simple structural approach
in which the axis are very important.
And so you need to establish base of the skull, that lower plane of the
occipital and move that immediately upwards
towards nasion and then
out,
after a little bit of an indentation, out from that upward plane
underneath the cranium, you can bring down
the angle of the rami to the angle of the mandible
out towards gnathion, that point
right at the chin and bring that back up to nasion.
So that's basically
the idea and it's
kind of exactly what we
need to do.
And so I don't think you need to
take it to any more completion than that. Let's rotate it again and
see what we can do from a different angle. So here
I - now let's try it again from
above. It's not looking in the same direction as it used to
but that's
perhaps is a good thing.
We know it, up to a point, but there are some things in the way
that are gonna make us think a little harder. But see
even the order in which I approach this is kinda always the same
you get the base, find all those changes in plane,
in the base of the cranium, and then you take it around from the back
to the front. See? Like I can't even - I'm
not even always aware, but now after doing a few of these
I'm noticing that even I am following a kind
of procedural schematic order.
And on the one hand I kinda hate that
I have sort of a way
that I approach a thing. I like to improvise a bit more than that.
But on the other hand you can't escape your own education
and all the practice you've had and the times
you find that you do things a certain way.
But alright. How about we just sort of
polish up our contours a little bit and let's
move the skull again and try, speaking of which,
and try a totally different thing. And what we need to do here
is work entirely from observation. So here
you're working with the tonal areas,
you're keeping them flat, you're just copying lines, you're copying shape, taking angles
you're not thinking of the skull anymore. I wouldn't recommend you start
these exercises with this
quick skulls in the way that I'm talking about now but I do think
after doing some of these constructions that this is a nice way to step away from that
and just work from observation. And so -
so I'm just working off of
the shapes of the shadows around the zygomatic
but see that's the thing. You know where they are now. You know where those
shadows are, you know what they're describing. Even if you're not thinking about them
as the structural form
you're still aware of it. And so
see and then I started that way
but then I changed it up a little bit and I
kind of added a little bit of a structural
aspect to it, I found the base of the skull, I found
on the occipital, but now I'd like to move back in
to just figuring out where the shadows are. So
it's mostly observational but you still, you keep a little bit of that
kind of a structural aspect. And you keep it as simple as possible.
See so it already looks a little more organic,
that's because it was. There's more observation.
Okay so, but also there's some angles and in some cases you just can't
see a structure as clearly. And that's when
you do have to simply observe, trust your eye
and then see what the lines that you've put on paper
can tell you about the structure of the form.
Here, the approach is also sort of a
combined observational and structural approach.
In some cases I'm just working with a line that I'm observing.
But in the back of my mind and sometimes in the front of it, I am
trying to just figure out what that
line is. Not just as a line on paper
but as a form. But at the same time, in other cases like
as I move around the head, and in some cases
you simply want to use a more structural approach because the structure's
very obvious, like with the mandible here. You can see the
entire - that entire arch of the mandible.
But we don't really see the
other orbit and so that makes
this kind of a challenge.
I just want to put in place
with an outline and right away find where the shadows are.
Because they're going to help me figure out
where that zygomatic is and how it's casting
that shadow onto the mandible and the maxilla,
allowing me to the use it
to figure out the form of the maxilla. And then
there are other parts, like the underside of the mandible, can easily
place into a darker tone, either from observation or from understanding,
it'll work both ways.
The base of the skull is something you can observe
but usually there's a lot of stuff going on there so you do want to keep it a little bit simplified
and that's easy to do because that's one of the things that you start
a basic structure of a head with so
a skull at least so that's
a simple process and then immediately move it
back up to
euryon, to the parietal eminences, at the same time just trying to find that shape
of the shadow along the back of the head. And then here I'm just following
that line as I see it, not really thinking of it. But then
I still would like to show some form. So
that temporal line signifies that change in plane
so I can make it clear. So
see I'm speeding things up now, I'm showing you a more improvisational
approach where I'm using larger amounts,
like a larger amount of
different techniques and approaches to achieve
a certain result at a greater speed.
There's certain things that come easier from certain angles
and certain - from certain angles and
certain lighting situations and so on.
And so
why don't we try another one.
And honestly this is really enjoyable. I could keep
doing this all day.
And it's something that I did do a lot of
and a lot of this practice and a lot of the ability to
draw the skull came from just working
a lot from imagination. And you'll see that
these exercises will allow you and almost push you to work from
imagination.
And so here, once again, a kinda
half structural, but yet with more observation
in the contours. A cleaner
kind of just outline, I see it, I copy it,
I put it in. And yet, it's the order that matters. So you see
I still stick to the order of finding that superorbital
margin as soon as possible. I find the zygomatic process, I find
the temporal line. How I find it isn't always important.
See that's the thing. At times
you wanna just imagine where that structure is, kind of
analyze it and show it, or you just observe it, but the key is
that you observe the main points, the landmarks, the
important structural elements, in the order of
importance. And so
after figuring out where the cranium is, I'm just going
to take that point
from nasion to prosthion to get that facial angle,
(drawing)
move it back to the angle of the mandible, and bring it up.
So see, a little bit
here I've decided to be a little bit more
structural than I intended at the beginning.
And so it's -
so even if you're just observing, if you're
observing a bone on one side of the head, then look at the bone on the other side of the
head. Even if you're not aligning them, even if you're not thinking of the form,
always
establish the proper order for observing those
important parts. And now, why don't we
really make it abstract, at the beginning at least.
Why don't we not structure at all, right. Just
especially from this sort of angle where, honestly if you didn't know you might
not even know it's a skull. But just find those shapes.
I'm just
trying to find the shape, the terminator, the outline
of the shape, maybe even immediately think in edges. Maybe there's a softer edge
on a terminator that's falling on a more
rounded curvature of the form. Maybe it's a sharper edge,
a sharper change of plane. You know
get those half tones in.
And then, structure a little bit on top.
Just establish where your center line is, find maybe the top
and side planes, make sure to go back and change those values,
adjust those values because here if you're working in values then you need to keep those shadows separate from your lights
so that's the technique. But now
why don't I do a little bit
from imagination. And so
here I'm just gonna begin
from one part, I'm starting from the orbit. Starting from the zygomatic
and I immediately wanna take it across.
(drawing)
It's basically putting all of what we've been doing up to this point
into a drawing of a skull,
If you spend enough time on this you'll be able to
draw a skull convincingly, at least structurally, from
almost any angle. And you'll be able to modify it and change it based on
on those points that we covered.
And so you can find these alignments, you find where they are,
find these angles because you know them, you know what they are
(drawing)
And even here, when you're working from imagination
don't think it's all a structural approach. At times you
just wanna follow a line that you
believe is there. Like you remember that there's a line,
there of a certain kind, there's certain curves because
you've working on it a certain amount of times.
And so you want to,
you know, you kind of
don't think that it all has to be a structural approach when you're working from imagination.
A part of it has to be from
what you remember a skull to look like. So it's imagination and
memory. So that's the exercise
I think it's really enjoyable and really
helpful and what it can do is
help kind of pull all these individual parts, all this anatomy
make it something that you can use
and you can explore it from all these different angles
and you can go back over it as you're working
on these skulls from different angles.
you're going to write down everything that we covered about the skull
in your notebooks. That includes the names of all the individual
bones and points. Following this,
using the 3D viewer or the provided photographs, draw
basic skull constructions from at least six different angles.
If using the 3D viewer, move the light around to give yourself an added
challenge. After completing them, take two of those basic constructions
and develop them into a more completed drawing on
a separate sheet of paper. After this, draw
six basic skull constructions from imagination.
Free to try
-
1. Introduction
1m 38sNow playing...
Watch the whole lesson with a subscription
-
2. Skull Drawing Project Overview
1m 52s -
3. Skull Drawing Project Instructor Demonstration Part 1
35m 34s -
4. Instructor Demonstration Part 2: Putting in Shadows
35m 10s -
5. Instructor Demonstration Part 3: Adding Half Tones
30m 15s -
6. Instructor Demonstration Part 4
20m 10s -
7. Instructor Demonstration Part 5: Completion
42m 15s -
8. Skull Drawing Project Assignment Instructions
44s -
9. Anatomical Terminology Overview
23s -
10. Anatomical Terminology Lecture
4m 55s -
11. Anatomical Terminology Assignment Instructions
14s -
12. The Anatomy of the Skull Overview
45s -
13. The Bones of the Cranium Lecture
48m 42s -
14. Facial Bones of the Skull Lecture
28m 31s -
15. The Cephalometric Points Lecture
25m 5s -
16. Tumbling Skulls Project Instructor Demonstration Part 1
23m 35s -