- Lesson Details
- Transcript
- References
- Instructor
- Iliya Mirochnik
- Subjects
- Drawing
- Topics
- Human Figure, Light & Color
- Mediums
- Charcoal
- Duration
- 1h 11m 50s
- Series
- Russian Drawing Course 4: The Human Figure
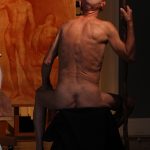
The next step in preparation for the long-pose figure drawing project is to draw a medium long-pose. Iliya considers this to be any pose that’s worked on for 2-4 hours– enough time to introduce some anatomical elements and to bring the drawing to relative completion. This slow build toward your long pose figure project is vital to the success of your drawing.
Join Ukrainian-born artist Iliya Mirochnik as he passes on a 250-year-old academic method preserved at the Repin Academy in Saint Petersburg, Russia and seldom taught outside of the Academy and never before on camera.
The Russian Academic drawing and painting approaches were uninterrupted by the modern art movements that transformed representational art in the West, and as a result, they provide a unique and clear lineage to the greater art traditions of the past. As a powerful approach that is both constructive and depictive, it combines the two methods that prevail in contemporary representational art.
In this course, we have set out to condense the entire program, spanning over eight years into a logical, step-by-step procedure. We have made improvements and added resources and exercises to explicitly drive home the concepts that are required to work in this approach.
We have also structured the course so that it is not only useful for professional and experienced artists but also artists with no drawing experience whatsoever.
The New Masters Academy Coaching Program directly supports this Course. If you enroll in the coaching program, you can request an artist trained in the Russian Academic Method including Iliya Mirochnik himself. Click here to enroll in the Coaching Program.
Materials
- Graphite pencils
- Kneaded and Hard Erasers
- Sanding Block
- Utility Knife
- Roll of Paper, Smooth Sketchbook paper
- Easel
- Light source
* Reference material is only available for premium subscriptions. If you don’t have premium access to the reference, you can pause the video when the reference is shown.
Discuss this video in the forums!
Discusslet's try a medium-long pose. I consider a medium-long pose
a pose that lasts anywhere between two and four hours. It's enough
time to build up the drawing to relative completion
and to begin to integrate anatomical knowledge.
time working on the figure
from observation and doing quick poses
in order to
understand certain key principles,
practice certain exercises, why don't we spend a little bit longer? So
we're working on something a little more completed but in a shorter period of time.
So here
let's just begin
with just a general placement on the page.
And what you wanna do is
kind of combine some of these approaches that we've
talked about. And what you want to try to see
is how you can use some of this anatomical information
that we've covered to get a
basic placement of everything. So as you see, I'm trying
to get the placement of the neck and head, a little bit
of the scapulas, the medial
border of the scapula. Don't worry too much about the arms
at the moment, just figure out where the torso is, and at times just
figure out where the contour is just by observing. So you
are combining. You are combining approaches. And you're
combining the approaches that we actually were just talking about and were covering
but on their own. So there are -
there is a structural understanding that is kind of the
underpining of it all, but also
we've practiced just observing kind of an organic contour and
that's what we need here as well. Because keep in mind when you have
a longer amount of time, you have the opportunity to combine approaches. If you have a short amount of time
and you're focused on one particular exercise
then of course you're practicing one thing at a time.
But now you can kind of work into it and practice it
all of it at once.
And so after getting some of these contours you can see
I am trying to figure out where the box of the pelvis
is with the box of the ribcage is, where the spine
is, all of this is half
observed and half essentially imagined.
Follow the spine down, find where the coccyx is
at the end of the spine, at the end of the tailbone,
the end of the sacrum and
and just make sure the proportions
are in the right place, but also
even at this point
begin to find some anatomy, especially if it's something that you can
easily see. So here we have the scapula,
the spine of the scapula, the medial border,
the inferior angle, and
that certain amount, even show with line the
amount that it's protruding up from the back.
And it's particularly important to figure out where the scapuli are.
The scapulas if you will. Because
in this scapula, the arm is pulled back so the
scapula is going to be moving closer to the spine. While
the other scapula
that's connected to the left arm is pulled further
away from the spine because the arm has moved forward. So that angle
and that rotation and that curvature that you'll be able to see
a bit more because of that is very important to get.
So especially when working in the back - and with the
back it's much harder to establish some of these anatomical landmarks
because they're sort of complex and very organic muscular structures.
But you still have to find where the ribcage is and where the
opening in the ribcage is in the back as well even though you might not be able to see it that well
So here we have the opening
at the eleventh
rib, we have the posterior superior
iliac spine of the pelvis, which
you can see and that can allow you to structure the pelvis.
Just by using those two points and seeing where they are
on either side of the sacrum. So
there is - we're trying to work
anatomically here. We're trying to think of
the internal structures.
And then right away maybe begin to put in
some of the muscular aspects, some of these overlaps along the contour
and then take them back in and find
for example, like I'm doing here, find the seventh cervical vertebrae.
Use all of the understood anatomy
as well as all of the observed anatomy. I can't say that enough.
So - but you're also, I think you can see that there are some of these
alignments that are helping us get that mild twist
between the pelvis and the ribcage. So make sure
you do have that before you start with
anything else. And then, using the
seventh cervical, you can kind of create that ellipse, which
will create the base of the neck. And the thing is you can't always -
you can kind of image a little more easily from the front, but here
it's all in your head. You have to use
a point to establish that ellipse and then take it up and find that curvature in
his neck. So there's not just a twist between the pelvis and the ribcage but it also
moves up and there's a tiny twist with the -
tiny twist with the head as well. And so all of
that's gonna contribute to a large amount of sort of movement and action in the pose
itself. Which is especially important in
a seated pose like the one we have here, where the twists aren't
that obvious and yet they definitely need to be
in place, maybe even a little bit exaggerated.
(drawing)
And then since we practiced the skull as much as we have,
try to imagine the full structure of the head from the back.
(drawing)
And so I think that gets all - and now
we can begin with some
internal contours as well as external ones that are
describing some of the anatomy that we've covered in the back. So here
you can see that slight
protrusion of the teres major.
So - and then you take it down to the
latissimus dorsi.
And then out of that you find the obliques.
See so all along the contour,
follow that contour observe, but also in your head
explain what that is. Just - like as
you're making a line, just
like even go ahead and say it out line. Say what the line is and what
anatomical form that line represents.
And remember, once you find that on one side,
take it across the center line, in this case across the spine, and find that line
along - across that symmetrical line,
axis. And the same here. Because of
of the position of the arms, though, you might actually be getting a little
bit more - like the ribcage might be a little bit
closer there. You might be able to see it a little bit more. And if you can see the ribcage
then definitely exaggerate that.
And usually when the
scapula is pushed away, away from the spine,
because of the position of the arm
latissimus is stretched out a bit more and so you can see
the ribcage underneath it a little bit more obviously than if the scapula
were closer to the spine and the muscle is
more bunched up in that area. And then
let's get into some of the more specific
anatomical aspects of the scapula. You can move up and find the
infraspinatis underneath the spine
of the scapula and then work from the spine of the scapula to find
the posterior head of the deltoid. See so you just
and then you might even be able to see - I think I can see it -
the accromial head. And then remember
that we have the long head of the
triceps coming out from in between
the teres major and the
infraspinatus.
And take the long head of the tricep
all the way down
to the
end of the humerus where you can see the
olecranon a little bit.
and see so I just worked the other edge almost entirely from
observation. But I know that that is
the lateral head of the triceps.
And so what's important right now is to try to establish - and this
one's a little bit harder - try to see where you have the
trapezius. And we know that there's a little bit -
there's a little part right at the origin of the spine of the scapula
that's uncovered and the muscle
is more obvious in that area. And then
there's the aponeurosis, there's a more tendonous part
that connects to the spine. So you wanna try to divide the trapezius up
into these parts that you see, but at the same time keep in mind
it's one thing.
Remember that the bottom, the inferior edge
of the scapula is slightly underneath
the latissimus.
You can see that slight -
that slight elevation after that, the serratus interior.
And
so we're getting into the complexities of this.
And keep in mind I'm still working primarily in line
but I'm finding the contours of all of these muscular structures
that we've covered. And here you do want to
show just a little - a little
bit as much as you can - you want to show
that edge of the
latissimus. You can really see it and you can
really see hints of the ribs underneath the
lat as well. Now let's move
to the other scapula and see what we can get there.
And here we have a much larger amount,
the trapezius in that area that we can see because
the scapulas movement away from the spine has opened up that
area. So we can see a much larger
amount there. And it's these -
these differences between
what's happening on the left side of spine and the right side of the spine that's really going to make
this convincing and make it interesting as well.
And then you wanna try to find that teres
major, wanna find the infraspinatus as well as the
spine of the scapula as well. Here it's not as clear, we don't
have as much
information there and neither do we need it. You don't want to accent both arms equally.
(drawing)
And then we can follow the
erector spinae
to the area where we can really see them in the
lower back.
And the erector spinae of course consists
of a number of different groups so be particularly
attentive to where they are and where you
really see elevation and where they become a little bit flatter closer to the pelvis.
See we're still
working in line but we're just continuing to map everything out.
And you see it's observed but it's based off of
an understanding of what's going on inside.
Complete the oblique there, you actually get a little bit of the
internal oblique as well exposed. Let's not
worry too much about it, the external oblique matters a bit more there.
And bring down the erector spinae
into the sacrum. And then
continue, continue with the muscles
of the pelvis and
just get them in place. The gluteus maximus and all that.
Now, I think it's time to begin
like we did in some of the exercises, on top of our
sort of outlines of all this anatomy. Just follow
the terminator. But now that you know what the forms are
you've outlined them, you can make sure that this
is - that the terminator
continues along the forms as opposed to simply being
just an observed line. You're doing a little bit of
the combination of the two, but at the same time that's the advantage
of having much more precise anatomical outline underneath.
And then the advantage of working in
charcoal is that you can just find that, use your hands, and get that all in place.
And charcoal is a little bit closer to what we're going to be working with
when we spend much longer amount of time on the drawing.
On a much more developed
piece. I do think this is a good
primer though for how we're going to be working on something that does
take longer, is a little more involved, and is also much larger. But I think the technique will
remain the same. So at the moment I am
just focused on where the shadows are.
Just following that terminator but also
in the cases where I can see it, figuring out where the full
area of that core shadow is and seeing if I can even spot
just the tiniest of cast shadows
right under
the teres major there and the armpit.
(drawing)
See this is quite easy to do when you have your outlines.
This is a little bit harder to do when you don't and that's also something to practice
and we're going to be talking about this.
I do want to accent that arm, I do want to accent
the triceps and the olecranon, the elbow
in that area because that arm -
I feel like it's an important accent, we might as well - especially because we're
kind of moving the other arm, you can't see it as much,
you can sort of push it into a haze while
the arm that's extended outwards,
I think that's the one that we're gonna accent. Here
you can see I just follow the terminator on the head and then
immediately took it into that outline of the cast shadow
from the head onto the neck. And here too, once that's in place
all you need to do is essentially just color it in.
Right. Stay within the lines, more or less just get
a flat shape for that core shadow.
And use your hands to get it a little bit smoother, a little bit softer.
See so as soon as you put a little bit of tone down
and you find where those shadows or you're just a lot
more completion that it adds
to a piece, even at that moment, even without the half tones.
So I've switched to the charcoal pencil
because this allows me to work in gradations of tone that are
a little more nuanced. And you can see I'm already thinking
about some of the half tones. Some of the
half tones that are particularly descriptive of the
structures. So figuring out
what the values are on either side
of the spine and the area of the scapulas.
See so
these are the darker
half tones. And I'm putting them in right away to try to get -
to try to get some softer movement
out from these shadows that we started with.
(drawing)
It also allows me to work that
terminator. To begin to pull those
half tones out from the terminator.
Which in most cases is a great place to begin with your
shading.
(drawing)
And then
keep in mind the eraser is a friend of yours,
use it to define those
shapes of shadows even more. Right. Carve
into them when you see that there's a bit of light. And at the same time ask yourself
what is that light?
So see so I'm focusing at the moment
for the most part on the area of the upper back. So
I'm trying to get like with these small half tones, working off of
small changes on the sort of just the very outside of the form I'm
still trying to get a larger area of half tone that will show
the full roundness of the ribcage.
(drawing)
And so you can - at a certain point - after getting
into it just a little bit, you just need to kind of
group the values a little bit more. Right. Don't think so
much about specifics after they're in place and just see if you can get a general
half tone to describe a larger mess.
Now the idea behind this is that as you're putting that
larger half tone on top of a little bit of tonal -
a little bit of tonal work that's describing the
general topography, all that work you did is still there. So it's
kind of like you're putting a transparent coat
onto - a transparent coat of tone onto those areas
that you've already slightly modeled. So you're just getting them into a general
area. You're - like it's a way to quickly move
very specific modeling into
a larger and more generalized area
that describes a larger form, a larger
underlying structure.
So the part of the lower back that I'm working on right now - it's a little bit harder to describe
because it's relatively flat
but there's still a lot going on in this area. So
you just want to make sure it reads as flat
but still keep a lot of the information there.
And we do have some important things. We do have - you can see
that tiny bit of, you can even call it a shadow, along the
erector spinae that falls onto the area of the spine.
And the real thing to worry about now
is the form of the upper back.
It's catching the largest amount of light but there's also some major
and pretty radical changes in plane. So
right in between the scapula
and the spine is a plane that moves in towards
the spine. And then
that's kind of - that's the shape that we need to keep all of
across that upper back. And that shape we spoke about is kind of like an accordion.
So if there's a plane moving in, the one right next to it's gonna be moving out
and then the one right after that's gonna be moving in again. So you wanna try to see that
as much as possible, even though it might not be that obvious and even if it's not that obvious
you still wanna put it on paper.
So after
getting some of the larger form modeling, then
take some time away from that and just indulge yourself with
some of this smaller form modeling based on specific
anatomical parts.
(drawing)
I'm just gonna push that tone a bit
more, working the trapezius,
push that tone of that plane from the medial border
of the scapula to the spine, the actual spine
of the back but using some of the smaller changes.
And always go back -
always go back and take a look at those, at your overall contours,
correct them, find more overlaps, see what's happening along that
contour with maybe a specific tonal change
that's really showing that form coming in off of that contour.
And at the same time remember that you do want to accent
very specific parts. You do want to accent
as much as possible the anatomical landmarks. Even if you can't
really see them as a dark half tone or a shadow. Sometimes you wanna
take a half tone and make it just a little bit darker than it really is. Or take a dark half tone and
almost push it into shadow. Remember to keep the
principles, make sure that those shadows are separate
in value from anything in your lights, including the
darkest of half tones, but you have to use as much as you can
to pull out as much anatomical information, especially the skeletal
landmarks, as you can.
(drawing)
So now I'm
continuing to work along the spine and I'm just taking that
shadow and really making it -
making it count. The thing is you don't wanna count all of the
ribs. You don't want to have each
rib individually modeled, you want to hint at them
while preserving the overall form of the ribcage.
And then once you do a little bit of work
to figure out what the general form is and use that eraser,
the eraser is a tool that's as important and I kind of even believe it's
more important than your pencil or charcoal. It allows you to
carve out a shape, model a form. Also the amount
that you erase is going to affect
the - how light or dark that half tone is. So
it gives you a lot to work with and you can really push
and pull the values if you use more your pencils, charcoal, and the eraser.
So
just to work into, once again, some smaller form modeling,
keep in mind, after you've spent a lot of time on
smaller sort of the
topography of the surface anatomy,
you will need to keep stepping back because often when you get too involved
in an area, your general value -
your general value structure gets a little bit
confused. So
you are gonna have to go back and readjust these things as you
go. But keep in mind that's part of the process.
So I do
see that in order to get that turn, that slight turn
of the teres major, keep in mind that the scapula though for the most
part is relatively flat, there is that
little bit of a curvature. But all the muscles on top of it are going to amplify that curvature. So
you're gonna want to make it
feel as round as possible.
(drawing)
And keep in mind that your
hands are really important.
They can get a nice, smooth
change of value and then you can hatch
on top, erase into it, and so on. And see even as is, I can already see
that there's some problems with the
overall value of the scapula, as opposed to value of all the parts
underneath it. But that's okay. As long as you keep that in mind, you
can always then go back and bring the whole thing
up in value. It's a natural -
it's something that happens naturally as you just continue to model
and you're going to lose
some of those values. It's the importance of stepping back though.
Step back, analyze, make large connections, and then get back into
the small things.
So we're not working on anything too involved, this isn't something
that we're going to spend 20 hours on but we're going to try
to still to get as much information as possible.
(drawing)
And the -
(drawing)
a way to kind of achieve it and what is most likely
going to happen is that the whole
drawing is going to get a little bit heavy. There's going to be a lot
of tone on the thing. And keep in mind that
it's not about the amount of tone, it's not about how dark or light it is, even though
that is of course a stylistic reference you might have, but
it's just about the relationships. So I just wanna go back
and make sure my half tones read like half tones but not by changing
them but by making my shadow even darker.
And the advantage of working in charcoal is that you have a very
wide range of values. And so you want to,
at least begin, if you haven't worked in charcoal a lot
before to use those values, to use as much of that range as possible.
And so
as we know from our practice that it's all about
controlling those relationships of values. See even toning
down the shadow achieves a larger
effect of modeling. Stops things from being flat.
Because keep in mind, no amount of small form modeling will ever -
will ever contribute to a full roundness of the form. It's only
large form modeling that can do this. So
I'm not working to define the
contours that specifically yet but I do want to get
a little bit of variation along them. And keep in mind that within the shadow you just wanna
concentrate on just a large area of reflected light.
And that's all you can concentrate on.
So here
we can now, I think, safely move
down to the pelvis and kind of model, on the one hand the more organic
structures of the gluteus maximus, but also
try to see as many planes there as possible.
There are
some major changes in plane there.
(drawing)
And then at this point I'm just moving around the whole thing because
I feel like I do want to keep
focusing on the upper back. And so that's kind of the idea
you want to establish that hierarchy
of important elements and do spend more time
on those parts that are important. Don't spend all your time
there, do move around, complete the whole thing, add more
in other areas, but most of your attention should be spent
on those parts that you deem important. And I am -
I'm particularly focused on the upper back here, I think it's the largest amount of interesting
information that we have here. So I'm just gonna
tone back that other scapula,
(drawing)
define a little bit of the arm but not -
the key is not to get too involved in it though.
Not to get
too involved in the arm. But also make sure
you don't have too many super sharp edges. Right, especially coming off of the
terminator. Just an important element can be
accented with a sharper terminator. But the keyword there is that it's not sharp, it's only
sharper than some of the other areas that you just need to
get a little bit softer.
(drawing)
So the amount of information we need in the head - and keep
in mind, the whole point here is to get as much
in here as you can in the time that we have.
So if you don't
complete something in this time, then
that's it. All you have to do is move on and do a new one.
And I assure you with practice you'll be able to get more and more in
in a set amount of time as you practice.
But we're still gonna try to do as much as possible.
As I said this is a good primer for working on something
for a lot longer.
I just got some of the major plane changes in the head, on the occipital,
on the parietals, moving off of that temporal line
to establish that side plane of the head and now I wanna
come back to that most important area
to the upper back. Okay.
and we're back.
And now let's see what we can do here. Always take a
break even if you're not working from a live model.
Take out your phone and put a timer on the phone so that you're able to
sort of clock in the amount of time you have worked and then make sure to take a break
because you need to step away because the more you're looking at a thing - and especially
here you're looking at it rather intently,
takes a lot of energy and you get kind of caught up in things
and you stop being able to see how to
proceed. So you need that break to
clear your mind a little bit.
So just gonna continue
working on some of this
smaller form anatomy on the trapezius on to
kind of hinting at the arm a little bit.
And also keep in mind it's nice to take a break
especially after you've spent some time on the -
on the
beginnings of a drawing. Mainly because
the mindset that you have at the beginning
is not really the same one that you need when you're working on
completion and then you're focusing on smaller areas. So it's nice to take that break in order to
just allow you mind to switch gears a little bit. So
after you come back you can -
you can be just a little bit
calmer and be able to
concentrate on smaller areas of the drawing.
And in this case, this isn't very large but
when you're working on something much
larger in order to complete it you do have to
essentially complete it piece by piece. And so
that is something to think about.
So
just gonna use the eraser to add that bit
of light right under
the spine of the scapula and the origin of the -
origin of the deltoid. There's that light
on the infraspinatus.
And I am working on this area mainly because I think
this - not just the upper back as a whole but
this part of the upper back is even more important
than the upper back as a whole. So you start with
large hierarchies and you move to smaller ones and smaller ones and smaller ones so that can
really get maybe even just one tiny sort of
square half inch. That's the real accent.
And then everything else is not as important.
And you kind of - and that's what we'll
dictate the amount of completion in every area.
(drawing)
So that's the part
I'm going to focus on.
Just making sure there's
clarity there, they're very soft changes in tone in the
very soft changes in tone in all the muscles of the
scapula. And then take it down a bit and see
how
we can model that area right underneath
as well as above and around.
So see, I'm still staying with the area but now I'm working around the area, I'm sort of
pulling away from it because I wanna see how the information and tone
around that most important area is going to influence and
affect how we perceive that one area that I've isolated as most important.
(drawing)
So
(drawing)
that -
that's just the process. It's hard to talk about it
this entire time because now I'm not working on anything specific.
I'm just kind of taking a look at the whole thing, adding information where I see it.
A lot of this at this point in the process has moved to
just observing and seeing what
I need to put on paper.
And if I can
get more information, as I'm doing right now, then I could
push that information, I could see a little bit more on the
erector spinae and the lats.
The latissimus dorsi. See I'm going to go for it.
(drawing)
I'm going to go for it but I'm gonna try and not
to forget that it's in a general tonal area
of its own. Small
tone and large tone, that's what you need to be thinking about.
So
now is a good time to
work some of those contours. And the thing is, you work those
contours by seeing where a mass is
creating that contour. And this applies for internal contours as well.
Now in some areas you actually just want a
line. Because there's a plane there that's
perfectly sort of turned away, perfectly in line
with your eyesight, it's parallel to it. But then as the plane reaches
in more, that angle moves from parallel to
just slightly more perpendicular - it's not of course, it's at a different angle, but it's
not a line anymore, then you can begin
to pull out a tone along that edge, really wrapping that edge. And I have to tell you
that in terms of the techniques and approaches that
will really complete a thing, it's working those edges.
And I don't just mean soft or hard, I mean analyzing what that edge is and
what the tone on that edge is.
So -
and you see how just a little bit of this sort of small form modeling
is really beginning to complete this area
of the ribcage and the lower back.
Now you do wanna hint at the spine. The spine is not an easy
thing because it's long and on the one hand you wanna have it in place
you wanna show it but you don't want necessarily to count each
of the vertebrae.
You want to kind of get a general idea, hint at
some of them, and step back. Because you don't want the spine
to overtake the whole drawing. And if you were to really spend time on it,
then that amount of small form modeling might just take a lot of attention.
So I've accented
that curving in that is sort of the end
of where we can perceive the ribcage. Maybe a little bit more
than I see in life but I feel like we just need to lock that point in, it's an important anatomical
landmark and one that's harder to find in the back,
which only means that I need to spend more time on it.
And of course
at the same time, the more tone you have in your
areas of light, the more
you're gonna need to reevaluate the overall tonal structure of the drawing. And so
you're gonna have to go back and figure out what's going on with those shadows.
(drawing)
And here too I just wanna
make sure that there are distinctions within that shadow. And especially along the terminator.
You gotta have those anatomical, skeletal
landmarks accented along that terminator and within larger
tonal areas.
(drawing)
So
I think we're getting a good feeling. See
without really doing too much to the scapula to make sure
it's catching a lot of light, by toning down everything around it,
the scapula has now become much lighter. So
always, always, always keep your eye on those
things that you're not working on as you're working on other parts.
Because you see how the relationships change the way you perceive them.
And you've heard me speak about this a lot
in a lot of our assignments here
but I feel like if there's anything that's important
it's gotta be that so I'm just gonna keep repeating it.
(drawing)
So
now I'm working on a little bit of -
finding a little bit more of a connection between the upper
torso, the upper back and the lower back. Trying to get
a little bit of a smoother movement
from top to bottom. Up to this point it's just been,
just a little bit divided and so I feel
it's gotta - it's still a back
and you need simply to feel the back in its entirety. As much as
you're working on finding individual areas
within the back, you gotta keep the whole in the end. And you gotta
evaluate it and see how you can
make things come together. While - see I still
feel like I did need to model a little bit more
on the obliques especially.
(drawing)
Do a little bit of accents on the
spine
and the thorax.
And there is a
strong bit of light here
on that much
wider part, the more exposed part of the trapezius.
So it's a more pronounced
highlight. So in such instances
you might even wanna just kind of think of the highlight
and work around it. Just work around that highlight and extend out of it.
And that will
give you some of those lighter half tones. Some of the
lightest half tones actually. So I think
I'd like to go back and just use the
eraser to kind of get a general area of light up top.
It does feel like I'm erasing but as you see I'm just getting light
most of the information that was there is still there but it just - on the whole
a bit lighter. Because the upper back is catching
a large amount of light. So kind of like
you put, as I said, kind of a glaze
of a darker value on top of an area
after you're working on some small form modeling to get it into that area. To get it into that,
to reinforce that overall structure.
You can do the same thing with the eraser, by just lightly erasing a part
in way that keeps most of the information there but
just brings the whole thing up.
There's actually quite a lot that you're capable of modifying and
adjusting as you go. You can erase pretty much everything and
often if you can't because
there's just a large amount of medium
on the page, most of the time you don't need to erase at all,
you just need to bring it up a notch or tone it down a little bit, it's not
about erasing something that's
wrong, it's about making tiny adjustments
all over the page and seeing how it affects
the general relationships.
So as you can see, if you have
a relatively small piece of paper
you can get quite a lot accomplished in not a lot of time.
Of course if I only had an hour or
so to work on an enormous
drawing then there's no way that I can get as far as I've gotten here.
But so keep in mind the scale
is going to be important because it will allow you to complete
a drawing to a higher degree
based on how large or small it is. So
when practicing, make sure
to cautiously think about the size of your paper
and the size of the drawing. So
now that some of these major things have been adjusted
now the time to really get back in and figure out where I want those
accents. So along the other - the shadows on the
on that scapula, on the left scapula,
I feel like I need them a little bit darker
right so that I can lock it in, so that I can see
both scapulas at the same time. Because you don't wanna have
one completely developed and the other one kind of
vanishing into obscurity. You still want both of them accented.
One more than the other but both accented.
(drawing)
I need to see it as it was. On top of that
it's nice to always see it move because that gives you more information
about the anatomy.
And that's what you want, you wanna take
advantage of every time the model moves mainly because
that just exposes more information.
You might not
want all that information but that's already on you. I think the important
thing here is to not work out of ignorance but to get as much as you can
and then you pick and choose what you really need in the drawing.
(drawing)
So some structural aspects. I do wanna accent
the spine where I can with that shadow
(drawing)
and a lot
of the times when you get something a little bit softer after
you smudge a bit, you're gonna need to go back over it with a hatch
or some kind of a tone right to get these a little bit more -
a little more
controlled. You could of course smudge
a bit more carefully but it's a smudge anyway and always
look like one and it has an interesting positive
effect but you're gonna have to go back and add
to it, work into it, and so on.
Right now I'm going back over
a lot of the things that we've spoken about,
a lot of the important anatomical
landmarks by just giving it a once over again.
And that's kind of the approach too. It might
seem like it takes a while
because you don't ever really complete anything, you just kind of do a
little bit of work and then you move on and then you come back to it eventually and then
you do work elsewhere and come back to it again and this is kind of a definite. And that's
an interesting approach that might seem
a bit long at the beginning but it's what keeps you
thinking of the whole. It's what keeps the -
what keeps things interesting I think also.
So just to get a little bit more information on this arm, we're
primarily focusing on the back but, as I said, that arm
is important in terms of its
(drawing)
its action and the movement that it brings to the pose.
And so there is some information there, there's a lot of information there
and it's be nice to get a bit of it, of the other arm as well,
to get as much there
as possible with
without making it the most important actor in this piece.
And here's where I add that bit of a background, right, it's
not really a background, it's not really a tone, but it's just enough to minimize that contrast
because keep in mind you're thinking in contrasts. So
what I see in front of me is a certain way because
there's a value in the background. But I advocate for
not thinking about - for not putting down a value for the background
until you need it. And you are
doing everything in relation to the white
of the page. So when you do need a little bit of a tone there, right to just minimize
that contrast, then you're really analyzing and you're not just
copying a value but you're transposing
multiple values at the same time onto
the page. We're not copying, we're analyzing
and essentially inventing.
But in the way that
ideally is still quite convincing. So I haven't done too
much on the pelvis so I do feel like at least I need a bit of a value
there because now it's pretty much as light as the page and that's not great.
So not as much information there perhaps
but we can get darker values
on the gluteus maximus and one side
and the other. At least, for nothing else, then to show
just a little bit more of the sacrum. Get a little bit more -
get a little bit more pronounced because that is
an anatomical landmark we can't really ignore.
As well as, of course, we need the shadows on the pelvis
and we especially need at least a line, right, it's possible an
occlusion shadow but you can
think of it pretty much as like a cast shadow. It's -
we're gonna need to find it in order to make sure that
he's got some weight to him.
And yeah so just a little bit more information, figuring out where the sacrum is,
what those particular terms on
the contour are and how we're going to show
the legs. And we're not gonna spend too much time on
them. Gotta lock that in place a little better.
So
just wanna hint at the leg and
here, see , I'm kinda giving a little more attention
to the leg that's at a diagonal from
the accented arm. And that's
intentional right. So that you don't have too
areas actually that equally
one right above the other. And so instead
you wanna accent them essentially at a diagonal on the page.
So just
gonna go back with my eraser and
my blending stump, right, just to get
some things a little more intricate, a little more precise. I
don't usually start things off with them, I kind of begin
to work with them later on when I'm really modeling
small forms. Small areas, tiny changes
along, just at the outermost part of the form.
The one - the part that's closest to the surface.
So
at the same time I do wanna go back and make sure that we read
the spine of the scapula. The spine of the scapula is of primary importance and we need it
there. I'm gonna tone
back - just feel the need to tone back
that trapezius a little bit.
And you can see - you can place these tiny little accents
right at the major change between one form and
another form. Right at the crease. Really
pulling one form apart from the other. Not along the
whole contour of the form but just in one or two areas. And that
little bit of light was also I think helpful. I'm happy with
what happened there. It gives us that inferior angle
of the scapula.
And really
pushes that edge,
the medial border, out.
I think that one tiny part.
So, of course, it's advantageous that
our model Mark does not have a lot of body fat. It's really
good for us to really see what's going on there.
But that's kinda precisely
what needed to happen here right, so that we can see as much of this
anatomy that we covered, exclusively
up to this point using
casts from cadavers we wanna try to get as
close to that as possible so that we can observe that in a human
form. However of course, people come in all different
shapes and sizes and so in some you might not be able to see it as much but I think
these points that I keep accenting, you know, the
scapula, all the parts of the scapula, the end of
the ribcage, the posterior superior iliac spine,
the coccyx, all of that,
the spine of the scapula, all of these things,
you probably will be able to
observe on any model. And those are the ones
you need to concentrate on. Everything in between is not that important, as
long as you remember what the major masses are. So
I'm just going back over our main accents.
Just going over scapula again. I keep coming back
to it, keep coming back, keep adding as much information as I can
and the idea is basically you can't observe it all in one go
so as you add a little bit, it hints
to what you still need. And so that's why you keep coming
back to it because it's not - because you
begin to observe more keenly as you analyze
the drawing itself
as it's in the process.
So I'm just trying to get a little more specific
on the changing in planes along
the deltoid, especially the posterior portion, the one that we can see more clearly.
And right now I honestly can't remember if
that was what I saw at the beginning but you see how the posterior portion
of the deltoid is almost casting a shadow onto the muscles of the scapula.
And it's just, it's too good to
pass up. I'm gonna have to use it. So
just adding that as a shadow. And remember
if you just keep going over those principles of shadows, terminator line,
core shadow, reflected light, cast shadow, at times
occlusion shadows. If you know where they are, you keep them in their
proper - in the proper relationships - then you really
can almost invent a shadow if you happen to need it.
If you know what the form is.
And it's nice to have that bit of cast shadow
from that deltoid because it gives us that sharp edge,
focusing our attention even more on the scapula.
Just feel the need to get a bit more
of that roundness underneath it, tone it down a bit,
make sure it's a plane that's going inwards.
So with all the information there it still can't catch as much light as anything
above it. So it's -
at this point in the game, you're just making
changes everywhere and doing your best to add information.
But at times, you realize that you might actually have
overmodeled the part. You don't actually need that much there. So at that point you just kind of erase it.
It's totally fine, you've learned
the form, spent time with it, you've analyzed it, you've put it on paper, but it's the
overall texture after, not individual details. Keep that in mind.
Even though, while working on the thing,
you are focused a lot on individual details. If for nothing else then for the purpose
of really learning them and understanding them. So
a little bit more work on the head. I don't wanna overemphasize
the head here. We've spent a fair amount of time on it.
And keep in mind that the portrait in a nude
if you're working on a nude model, the portrait is far from primary.
You're focused on the anatomy, you're focused on these larger structures, the general movement.
The head - it needs to be there, it needs to be in the right proportion
but you don't need it to be a portrait.
Because otherwise it becomes a portrait of a -
it becomes a nude portrait as opposed
to a nude. It's sort of
a shift of emphasis, if you know what I'm saying. So
just kind of remove that shadow on the head a little bit, make it a little bit
lighter to keep the relationships correct right now. I know I might go back in and
change it though because I do plan on adding
some more of those half tones on the head.
So as to not leave it totally schematic. I'm okay with it being
simpler but not that much. And so just gonna use the
blending stump to get general values and
clearly right away you can see that I have made
the half tones darker than the shadow.
And as much as I don't want that shadow to really take away from the shadows on the back,
we still have to have our shadows consistently a darker
value than any of our lights, no matter how dark those half tones might be.
So at the moment I just wanna step back, take a look,
and I gotta go back in to some of those main
terminators that go all along the torso
and just make sure that they're emphasized. Right, once again -
we're kind of wrapping this up a little bit and I just wanna
make sure that those contrasts, those hierarchies of contrasts
are in place and have them in there
and they're doing what I want them to do. And also that goes
in reverse like that deltoid
just needed to go down a little bit, just needed to tone back,
it's catching a little bit too much light. There was a conflict that
I needed to resolve. And so
I still feel like maybe it's not
enough tone on the pelvis areas,
just not enough of it.
I'm just gonna add a little bit more of the leg,
just enough to make
things just a little bit more interesting, kind of establish that there's a box.
It doesn't have to be a chair. Even if you have a chair, doesn't have to
be a chair, it just needs to be something for us to understand that
he's not just floating in space but that he's on a structure.
So we're thinking a little more architecturally. You could also begin with
the box, you can build everything up from
the -
essentially in an architectural way. From the ground up
but I chose not to here. And
as I said, completion does depend an immense amount
on accents and contours. So
in some cases, just to get that accent, it's okay to simply have a line.
Don't keep it too long, find variation
in those contours, but nonetheless, a line can be
quite an interesting effect. It can attract the eye
in a good way. And then also keep in mind right -
practically at the end, you feel like you're wrapping up but you still have a little bit more time
you notice something that's just off, you just go ahead and change it and do it as fast as possible.
See what you can do.
(drawing)
So, yeah I think that
it's the same process over and over again.
On just maybe a smaller scale, adding more and more information
as you go.
Tiny accents, tiny highlights, that's
the part we're on right now.
(drawing)
And then maybe you see an opportunity, like I'm doing
now to once again get those important
skeletal landmarks
into a drawing. maybe you had them but now you've noticed
that there's a way you can make them even more obvious, even more clear,
more prominent, so you go for it.
(drawing)
And then of course, as you do get towards completing things, you
end up really
thinking of highlights. The shape of highlights, the
edges of highlights, what are the half tones around them, really making them
as dynamic as possible.
Because that highlight, which will really give you that element
of completion at the very highest point of the form.
And right now it might be one
of the hardest parts of the approach to explain because
you're just
sort of observing, you're trying to add
information about the same time, at this point, really trying to
preserve all of our relationships. And at this point you're
just trying to find a way
for the drawing to really complete
itself. Of course you're responsible for that completion but
you kind of - like the way that I think about it is it's something sort of apart
from what I am in control of.
And at this point in the process, I'm more
just responding not even to the model but I'm responding to
the drawing itself and constantly asking questions, you know,
what more, what more, what more does this need?
And so, you know, and there's always of course those parts that
you just didn't think about and didn't have time to do that you can
maybe because they weren't actually that important but at the same time
I think I don't want that hand to be
just nonexistent so we
can hint at it enough for it to be there without make it too prominent.
And so as you see, I kind of, I add
a tone and I wipe it away and then I add a tone again and I wipe it away again, it's
a way to sort of just really
not allow me to overwork it.
And so even if you are modeling
something that's relatively unimportant
you just have to make sure to control those values
in relation to the main values
and accent the base of the skull, that change in plane
inwards from the front plane to the
plane underneath or the occipital.
(drawing)
Just make sure to have
some clarity in those contrasts in those
terminators and especially, really following how that
cast shadow from the head is defining the forms of the neck
and the shoulders.
(drawing)
And I do wanna
hint a little bit at the mandible if I can. Can see it a little bit
and just
see, almost randomly. Just move from the head
down to the pelvis. It's just something that caught my eye.
Something that needed to happen. In general try to keep your eye moving
all across the page, along the page, across the page, every part, try to see it
all at once, especially at the end of
an assignment or the end of just a drawing.
You know, even if you're working
on small things, the whole is
what you're really trying to capture at the very end, trying to keep a unity.
And then, you know, you just kind of - this is the time
especially since I get everything
covered in charcoal or whatever media
I'm working in, then you wanna maybe go around
and clean up a little bit, you know,
kind of work those edges from the outside with an eraser a little bit
you know remove some of the smudges you made. And I think that's it.
This exercise was a great primer for what we're going to do next and I hope
you've enjoyed it as much as I have.
the images provided, draw Mark from the back,
taking the drawing to a relatively high level of completion
and paying particular attention to the musculature and the skeletal
structures of the back.
Reference Files (1)
Free to try
-
1. Introduction to Medium Long Pose Demonstrations
25sNow playing...
Watch the whole lesson with a subscription
-
2. Medium Long Pose - Seated Back (Part 1)
33m 12s -
3. Medium Long Pose - Seated Back (Part 2)
37m 50s -
4. Medium Long Pose Assignment Instructions
23s
CONNECT
New Masters Academy
16182 Gothard St
Huntington Beach, CA 92647
Contact US