- Lesson Details
- Transcript
- References
- Instructor
- Charles Hu
- Subjects
- Drawing
- Topics
- Drawing Exercises, Sketching
- Mediums
- Marker, Pastel Pencil, Pen
- Duration
- 2h 40m 17s
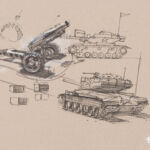
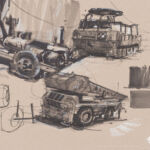
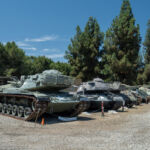
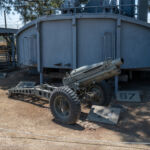
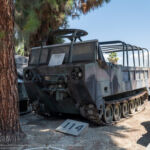
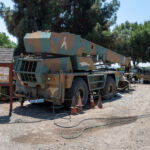
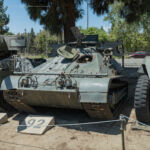
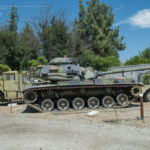
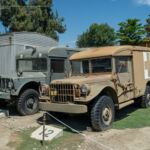
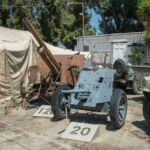
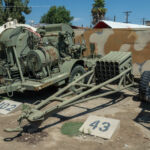
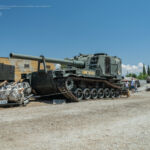
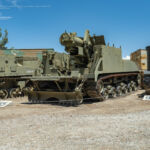
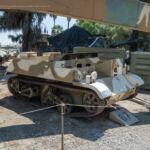
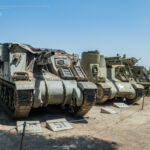
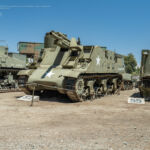
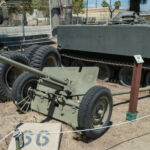
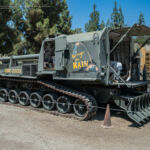
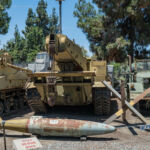
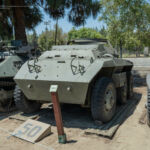
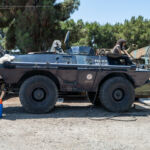
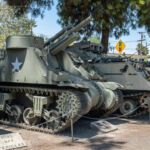
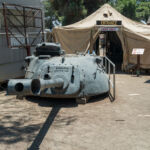
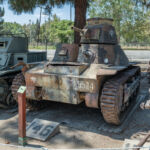
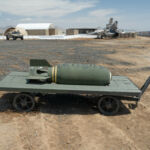
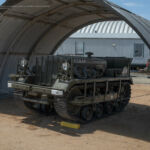
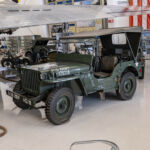
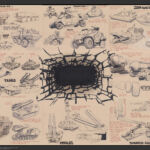
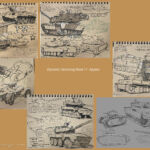
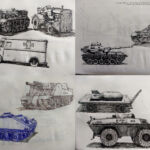
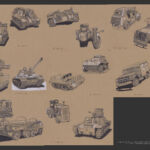
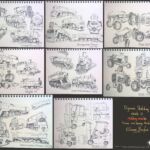
In this lesson, instructor Charles Hu will teach you how to draw military vehicles starting from the tanks. Charles will examine the different types of tanks and break down the structures of the tanks’ wheels. You will practice sketching these vehicles in perspectives.
This lesson belongs to the course Visual Development: Dynamic Sketching. In this 12-week course, Charles Hu will teach you the core fundamentals of dynamic sketching. You will learn to focus on gesture, shape, and structure while drawing various subjects. Charles will first introduce you to the materials needed for the course and give you basic drawing exercises that will help strengthen your hands’ muscle memory. From there, you will learn to manipulate organic, geometric shapes and add surface details. Charles will demonstrate drawing animal skeletons, marine animals, insects, landscapes, cars, and many more. In addition, you will explore sketching in colors using gouache. After this course, you will develop an ability to break down any 3D subject into a 2D structure, and from there, draw with confidence.
Throughout this course, you’ll have access to the NMA community for feedback and critiques to improve your work as you progress.
Transcription not available.
So we went through the cars, like pretty much
when I did a pretty thorough demo on how the perspective
that's to benefit how you block,
kind of finding all those...
Well, first of all, you have to understand
where the boxes of,
where the perspective boxes.
Making sure all the body of a car,
the corners, all the corners
that's happening on the vehicle.
That's the conversion vanishing point.
So once you get that pretty comfortable,
and military is something I love to draw.
Luckily we have these military museums
that got all this amazing vehicles.
And so we took a bunch pictures here.
As a military vehicle just like,
just designing a,
and I refer it like steampunk characters.
And I love it, 'cause I like to add stuff
to make the silhouettes
looks very, very interesting,
and it kind of grabs the viewers' attentions
by adding accessories.
And so military vehicles, it's kind of just like that.
They all looks, just by looking at them,
they just like,
I almost can hear the voice
of how this, if they could talk,
how the voice there sounds like.
I will start with the, usually for this lesson,
I start with the tank,
'cause that kind of the main combat vehicle for on land.
So I had this reference right here.
All right, so everything we should start with a profile,
just understand its proportion and its character.
So if we look at a tank on the profile,
again you have the body and also the wheel.
This is the track, all right?
And then you got to always have this.
It's called a turret on the top,
and then you got a barrel in the front.
The relationship of the wheel and turret,
they can be different shape-wise.
They can go very more slick
design
like that.
Or they can also look very kind of a little bit bulky,
like that, all right.
But they all have a track and also the row wheels,
and they have a lot.
And sometimes they can seven,
and sometimes they can have nine.
But we're gonna talk about that.
The turrets, which is this thing on the top,
but obviously, you guys probably all seen it.
You can just basically kind of rotating
all the way 360 degrees.
And you got a couple hub on the top,
and allow the commanders and the loaders
and shooters to be in there.
So there's actually three people in the turrets.
Actually the driver sits, usually sitting in the front.
And it actually sits, it's kind of reclining
seats in the front.
So let's look at this at this pictures.
Well, still it's a box.
Actually, maybe in this case, maybe two boxes
stacked on top of each other.
But usually, I'm not so worried about the turrets so much,
'cause I wanna make sure I get the wheel right.
Again, track your center line.
So this is this side of the wheel,
and this side is closer, so it's much bigger.
And normally, they have a mud guard.
Well, I guess this considered mud guard.
Usually, they have another piece
kind of hanging below like this.
And one plate you're probably all gonna see for all tanks
is the skid plate at the bottom
that sits out diagonally like this.
And that's for preventing explosion from below.
Sometime what these tank would do is they would go over,
they find bombs underneath the ground.
They will basically hover over.
So when a bombs explodes,
see all the blast can basically skip up from the bottom.
And that's why, if you look at all these plates,
they all kind of, it sits up in a angle.
Rarely this sits flat.
The only plate that sits flat usually is the wheel,
which it has to.
And that's probably the reason why the wheel
is the most fragile part of this tank.
Everywhere else is just solid.
So a lot of time you will see
they actually carry spare wheels,
the chains on the side of the tank.
And even you see some luggage
from those guy that's riding in it.
Because inside of the tank, there's not much space to it.
And imagine they have to spend,
these guys has to spend month
in this very confined space.
They pretty much sleep in it, do everything in it.
And then I'll respect them,
'cause for sure I can't do it.
So when I get to a turret,
I usually just draw an oval,
and then I'll just kind of chisel it out.
And they can see here,
this here's still the center.
You got this triangular shapes
that kind of hooks over.
Here's the base of the barrel, comes over.
Again, see how this sits on an angle,
and you got the back piece sits behind,
and it looks like this box thing
coming from, sitting on the back like this.
Okay, fill that surface, bring it over.
That's where the hub, one of them, right here.
There are actually usually two on the top.
And here's the barrel, just draw it.
Usually, I'll do, I just draw a gesture line.
I figure out same thing as the wheel, figure out the axis.
Usually this part is quite dark
because this is actually that down plane
and don't get much light.
But they'll seal, they'll seal pretty tight.
So there's no preventing
some of the poisoned gas
that leaks into it.
So these actually seal pretty tight.
It's actually it's what happened with turret is a bucket.
Again, here's the wheel.
Here's the turret, looks on the top.
It actually is a bucket, go all the way down like this.
So that's why it allow you to spin.
And then there's obviously
soldiers standing in there.
I also tend to darken that edge
because that bottom plane
is always gonna be in shadow most of the time.
And that's often where
the core shadows sits.
And sometime, you can't see really on this.
I'm just gonna make this out to make it more interesting.
And sometimes you see this cable coming out,
antenna coming out.
Sometimes you see there's like a flag.
And then I somehow often, I should,
often now I might do, I'm gonna add couple more
just for the fun of it, just for the look of it
when I get to those wheels.
So first of all, let's look at this track.
They are little plates, right?
You can see they're not just kind of round off
like toward the ground.
So usually what I'll do is at least the first track,
I keep it quite straight.
And then I roll it off and roll off toward the ground.
So don't just go, like I said,
don't just go sweep like this.
Right, so keep the first one a little more flat.
And I already can look at the side,
see how all this plane changes?
And also what happened, they're gonna reduce,
also reduce sizes.
So the way how I draw this in perspective,
which is the track going back,
and then 'cause you look at the side view,
this almost looks like a 45 degree,
the front end and toward where you touch the ground,
the front of the track which touch the ground
just almost looks like about 45 degree.
So usually what I'll do is,
let's say here's the ground.
Instead, just kind of roll it off
sometimes can never trying to get that right.
I just not quite.
And I'm not quite sure where exactly
when it goes to the back,
how's it gonna attach onto the ground.
So usually what I'll do is
I basically, I look at where they begins.
And here's the ground.
And then what I'll do, I just basically,
and instead connecting it, I'll jump right to the ground.
Finding where the back end, the lower part is gonna be.
And then I just connect it.
Again, with the floor.
I'm finding where it attach on the ground,
and then I'll just connect it like that.
All right, so we got one, two, three, four, five, six.
And then two
on the front and one on the back.
So the one with the spike, can see on the back,
that's a main wheel.
Actually, that's a wheel that's pushing every wheel.
You got all these.
This is the only one that's actually
connected to the engine, the motor.
Probably the engine's somewhere in the back here.
So actually, this is the one actually push
all the other wheels.
All right, so this is usually what I'll do.
I usually, first of all, I just draw lines.
Go figure out how many, make sure the space right, right?
And then, well, in this case, also where they hide.
And then I would just kind of draw, kind of eyeball it,
and I will just draw them.
And then because they all looks like a disc,
so I'm gonna also bring a line back.
And because they also had a inner thickness,
so I'm also gonna draw a little inner rim right here.
And when it goes away, it gets thinner
and start fading it out, all right?
I'll get to it.
I'll zoom this in and show you guys how I drew it.
And when I say just freehand it,
but obviously, I have done a lot of just,
I study this wheel by itself
so I can able to do it more just freehand.
All right, so let's just do that.
So let's zoom out these wheels.
Well, first of all, like I said,
there are actually two wheels sits side-by-side.
You can see it on full reference.
There's one actually behind it.
So it's like this.
So how do you draw like multiple ellipse?
'Cause I can see there's one,
two, three, four, looks like four.
But the best way when you draw multiple ellipse
is just keep your motion, your arm motions
kind of steady.
And then just keep that motion going,
keep the motions sturdy, and just move over.
Just basically don't stop move your arm,
don't stop the circular motion.
Just only you do just move your arm forward, all right?
And then connect it like that.
Actually, I'm do it again, come over.
Let's go to a different one further out.
Even if you're gonna go draw an inner one,
or let's make this thicker.
If you're just gonna draw an inner rim,
keep the same motions
to reduce sizes.
All right, so again, let's do it one more time.
Let's go the other way.
Don't stop, come over,
drawing it through, connect.
And usually sometime
the part that rolls over to the top and bottom
might feel a little bit flat.
And that's the only part that you
have to kind of chisel a little bit,
to clean up a little bit, to make it a little bit rounder
so it feels more wheel-like.
See the roll flat, right here, just round it off.
Round it off.
Make sure this long height
be thicker than that line right there.
And the next,
well, like I said, I don't do this.
This is back to that Perspective 101,
but I go over it, 'cause sometime might be helpful.
And kind of repeating boxes,
'cause these basically, it's all little boxes
that kind of, basically,
repeat itself, goes into distance.
So how's that work?
All right.
So let me draw one box first.
This should go to the center line.
This should go to your vanishing point.
And maybe's it's not quite center.
Let me cross this over.
So that's based on this one.
Don't base it on the top one, base it on this one.
Let me use a blue. (pen clicking)
All right, so
it's quite simple. (pen clicking)
What you do, you basically take
from this corner right here. (pen clicking)
You only use the half of this box, the top half.
You take this corner and then basically connect
through this corner right here,
and just continue, extend that.
Where it hits on the baseline,
that is gonna be (pen clicking)
your next boxes, your next box behind.
And then we just
keep doing this (pen clicking)
on this corner,
drawing through the whole,
pretty much your center line
that intersect the side of your box and just connect this.
(pen clicking)
And if I do it right, not rushing about it,
the box should be
gradually get smaller. (pen clicking)
We talk about how to draw circle in a box.
So let's do that one more time.
So here, let's draw the English flag first,
so that's where the English flag.
Here's my clock and the 1/3.
So that's how we repeat boxes.
And let's see,
let's look at another angles of a tank.
So here's a profile, as you can see.
So I just count one, two, three, four, five, six,
and then go one, two, three,
four, five, six.
Roughly this sits below, right, below in these two wheel.
But before I get to wheel, let's get the body first.
So we can turret, join the oval,
or look at the native space.
Huh, I'm wondering that thing is from the car behind,
or this is part of this tank.
That looks like pretty thick considering the hub.
But anyway, I just put that in there.
Maybe I don't bring it up too high.
Let's do that.
And whatever this is, it looks like a huge,
it looks like those light
in that lighthouse, like big, giant light.
And see all these stuff in there?
Those are actually suspensions,
so they do have some cushion to them.
All right.
Transcription not available.
So, okay, that was...
So, that was fun
and notice all this little flare of a highlight,
all those are, kind of, painterly,
to get, painterly touches.
I like to do that.
I do that my,
you know my, traditional mediums too.
Just almost creates,
you know, again, give some sense of energy
and also a little bit,
that organic,
almost feel like a gesture of a,
sense of like either a light, you know, strike through
or wind blows.
For example, I can do this right here.
I know, it's a...
And also is something that I learned,
I learned from watercolor.
I had a friend,
he's a kind of well renowned watercolor artist
and they do that with their brushes,
to create this splash of transitions.
All right.
And that's fun to do.
Again, I say, I love textures,
and that might give us some,
sense of some textures there.
So, look at this beast,
it's just, it's so chiseled, like so,
you know even,
I don't even know where the passenger is at,
but it's just cool.
It's like,
this almost looks like, some type of robot.
Giant robot emerging out from,
I don't know, Avatar 2 or something.
(drawing pen scratching)
So, one of the first things I wanna get,
I wanna get that very dominant perspective.
Should get close to you?
A very massive in the front.
(drawing pen scratching)
Just quickly set out some of the perspective guidelines.
All right, I'm gonna jump to right,
jump to the obvious.
(drawing pen scratching)
Kind of, not small,
see how I made that way too short
and we're looking at it on this side, man,
so, if I'm gonna screw up,
it'd be better if I'd make this side shorter,
but this much longer.
So, that's not a good screw up,
so I need to fix it.
(drawing pen scratching)
Lot of geometric shapes.
(drawing pen scratching)
Look at it.
The internal perspective guideline,
look at the silhouettes.
Not a box right here,
or reduce that size,
make it much shorter.
(drawing pen scratching)
Here's to, check where that wheel is.
(drawing pen scratching)
Looks like little below, than this headlight,
maybe about right here.
Look at this space right here,
If I can screw up,
we gonna make this a little bit wider.
Squeeze this short.
All right.
So, I have to show you guys
the architecture of the wheel,
to draw the,
you know, the way that we are supposed to draw,
you know, draw your looks,
and there's also a shortcut.
And a shortcut,
just basically, you think of a wheel as a barrel.
Like this.
And then at the side,
way off to the side,
at the opening,
the rim.
And then we can,
we can even leave it like this for small sketches.
or we can also come back,
to get the side edges of the tire.
And, but it only works better with,
if it's deeper tire like this,
not with don't...
See, these all can work,
but if you see more of the wheel itself,
the side wheel itself,
it doesn't work that well.
So, I think this actually,
I could probably get by,
I go,
side like this.
Feel that wheel, the front wheel, the side,
and then add a wheel right behind,
like this.
So, also in this case,
see how I also think about,
feel that box?
Just fit that wheel in there.
Now often, you get a catch out over,
across the wheel like this,
and you actually,
you kind of, the catch over would sit,
shows diagonally like this
and then goes to the front,
the front end of the tire,
the front face of the tire like this.
(drawing pen scratching)
So, I always start one on number six,
'cause this is not super dark,
not really light.
Normally, probably if I,
you know, could just...
If I, you know, today, if I'm,
maybe if I'm super warm up,
I can probably just do it with,
I'll start with the black,
'cause right now I'm, you know.
But in that case, if that screw up,
that would take the more effort to fix.
So, just to be safe,
so I'm using number six.
(drawing pen scratching)
Let's see some, it's up,
I just added in what one I showed you pretty markers.
I saw that this coincide,
but you didn't see the pole,
so I can add that one in,
and add a thin one in the back,
So it feels,
again, feels goes,
you know, help us to feel that we're going towards the back.
(drawing pen scratching)
So, same trick shadow right here,
shadow right here.
I'm gonna use my number four, as my overall half tone.
And now I can come back with my super dark.
Do I still have to be careful?
Like I said, it is, um,
it helps.
What we doing, basically,
we still create, you know,
besides the light and shadow difference,
to give a sense of light,
we still,
also our main goal is always to create that harmony,
that gesture harmony.
So, every shape you see,
they all integrated to somewhere else.
So, it depends on the weight to balance,
there's a lot of,
it's a very heavy weight with the black,
so you have to be really carefully,
to see how you wanna spread it out,
but at the same time still feel harmonize,
doesn't feel scattered around,
but then,
the certain area you might want it to be heavier,
certain areas you might not want it be heavier,
so you still need to be careful.
And that's why I prefer to start with the six
and I kind work my way out.
Go back and watch one more,
number four.
I wanna get a little bit darker.
There much, not much light,
just, you only have some light on top of this,
like the back part almost looks like
a truck bed part,
obviously it's not a truck bed,
it's the top part,
here's catch,
only here catch is highlighted.
It's all little geometric shapes.
Further back, gets thinner,
more close to you gets more open.
Well, this is it for this one,
but definitely,
I could have made this thicker, wider.
I feel I haven't really,
didn't really capture that massive,
the front end,
that hulk like robotic beast.
So,
keep that to mind,
if I, you know,
come across something such like this again,
I'll make sure,
I'll make it a little bigger than I than I expect it.
I could however,
I could go in and then add this to it.
It's not a done deal,
again, it's a sketchbook,
so I can go back in and add more massive,
add more mass, I mean.
I'll take a risk to see.
And I can even add more of those,
I can even raise up those little lights on the top.
Maybe make then even a little taller.
Like that.
See now, you know, fixed it.
All right.
Let's just sketch this last one,
just for fun.
This is not a real vehicle,
but it's got a lot of interesting shape going on
and let's see if we can do it.
Now it's all about compositions.
Let's make this bigger.
See what I'm looking at?
Just the silhouette,
just the relationship of this shape
versus these guys on the side.
I wanna make that missile even taller,
'cause I don't wanna line out with this.
Let's make it taller,
maybe what happens if we even cropped it?
Transcription not available.
Reference Images (51)


Free to try
-
1. Learning Recommendation
24sNow playing... -
1. Intro to the Different Types of Tank and Drawing the Tank’s Wheels in Perspective
30m 53sNow playing...
Watch the whole lesson with a subscription
-
2. Drawing the Tank and Fighting Vehicle
31m 31s -
3. Drawing the Fighting Vehicle Continued
36m 36s -
4. Drawing Other Military Vehicles
31m 58s -
5. Drawing Other Military Vehicles Continued
28m 31s -
6. Assignment
24s
CONNECT
New Masters Academy
16182 Gothard St
Huntington Beach, CA 92647
Contact US